
Last Modified on November 1, 2024
Are you looking into more advanced tracking techniques?
Deploying tags on all pages is fundamental for learning Google Tag Manager. It is necessary for tools like Google Analytics 4 and remarketing with Meta Ads or Google Ads.
However, what if you wanted to fire a tag on a specific page or after a specified user interaction? The answer is the Google Tag Manager button click tracking.
This technique is well suited for cases where you have a thank you page in your online shop or if somebody submits a form and you want to track that.
Here is an overview of what we’ll cover:
- Creating a GTM Custom Trigger
- Meta Pixel Event Tag Configuration
- Testing the Custom Tag and Trigger
- Google Tag Manager Button Click Tracking
- Event Tracking with Google Tag Manager
- Google Analytics 4 Event Tracking
Let’s dive in!
Creating a GTM Custom Trigger
We’ll first discuss how to create custom triggers in Google Tag Manager.
Inside our demo shop, we have a Contact Us form.
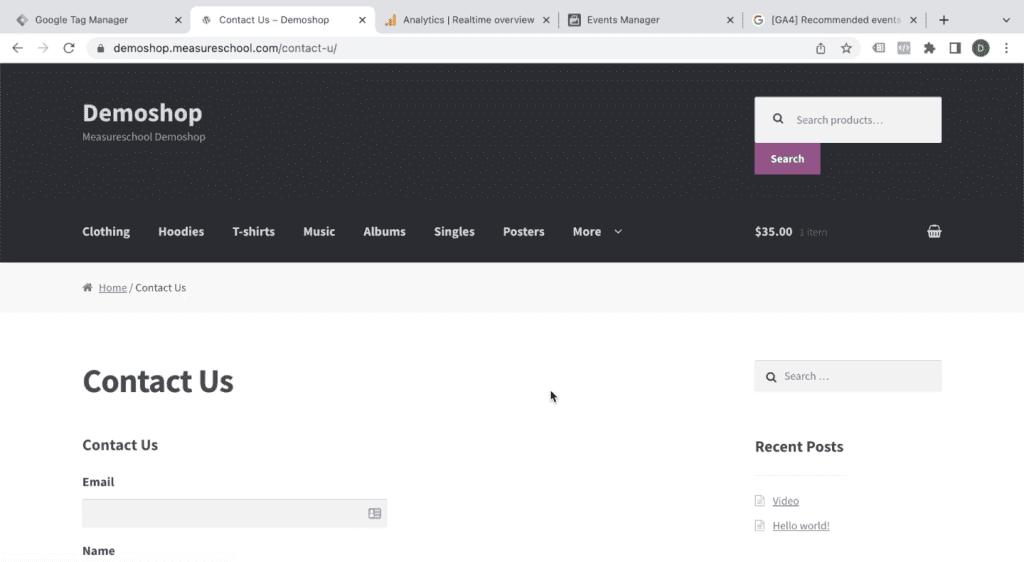
We’ll fill out the form and click the Submit button.
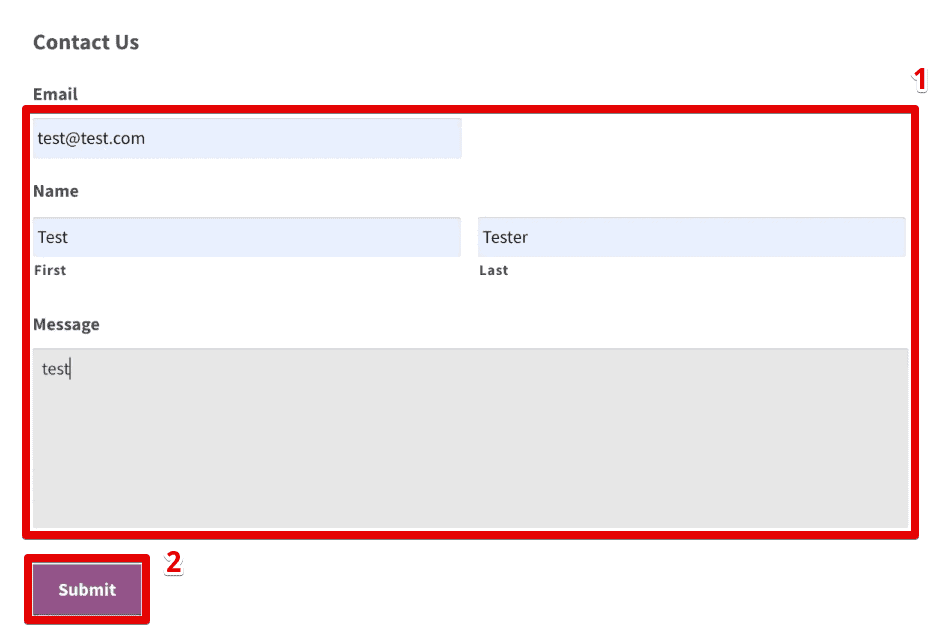
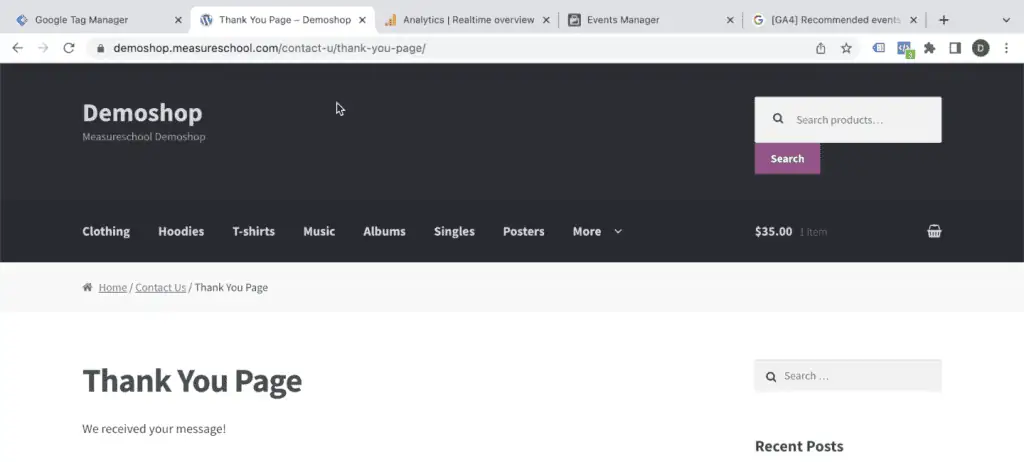
After a form submission, users arrive at a Thank You page. This behavior is typical for most forms out there.
So, we have this specific page that we want our tag to fire on. Another example of this scenario is when we want to track a lead event to our Meta ad system so that we can optimize based on the leads we have submitted. How would we do that?
First, we must define a trigger in GTM to fire on this page.
In your Google Tag Manager account, click Triggers → New.

Next, click Trigger Configuration. Here, we get many different events for which we can fire and evaluate our triggers, like checkpoints.
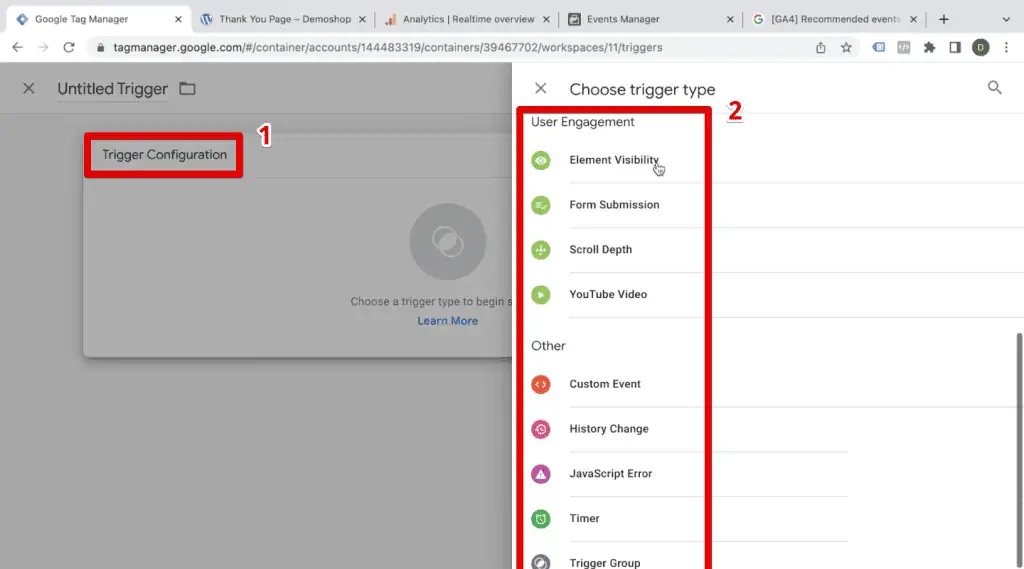
For example, when the page loads, we have Page View. When someone clicks a button, we have All Elements.
There are also trigger types for certain user engagement events and custom events that you can utilize to check whether your trigger is true or false.
That is what a trigger is. It is a set of rules that GTM evaluates at a given point, and these points are the trigger types you see here.
Now, we still want to evaluate our trigger on the loading of this website, but it should only fire at the thank you page.
🚨 Note: We will discuss creating a trigger configuration based on a unique URL upon form submission. If your form behaves differently, check out our guide on the 3 Form Tracking Techniques with GTM, where we discuss two other trigger types.
Select the Page View trigger type. Next, fire it on Some Page Views only, which opens the filter section.
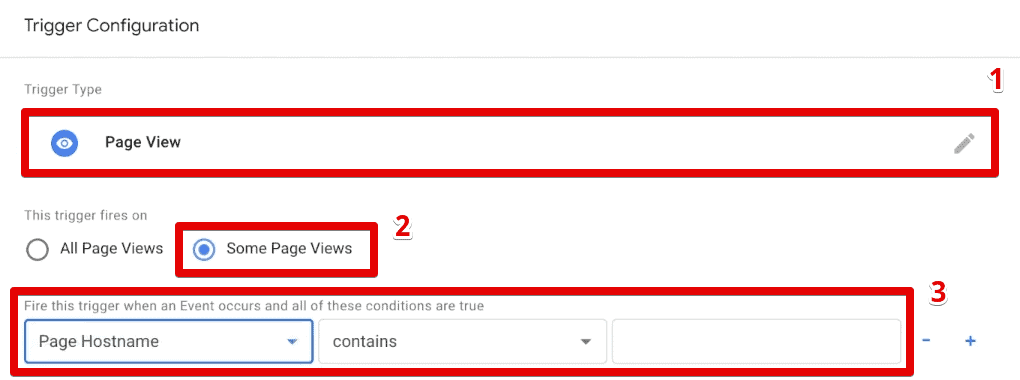
In the filter section, we can choose certain available conditions. For example, we have the Page Hostname, Page Path, Page URL, Referrer, and the option to select a built-in variable.
To demonstrate the differences between the Page Hostname, Page Path, and Page URL, let’s look at an example – our thank you page URL.

Here are the values of the page-based variables based on the thank you page:
- Page Hostname: demoshop.measureschool.com
- Page Path: /contact-u/thank-you-page/
- Page URL: https://demoshop.measureschool.com/contact-u/thank-you-page/
The page hostname is the domain name assigned to a host computer, the page path is everything after the hostname and before any query stings (if present), and the page URL is the full URL. Let’s utilize the page path variable.
Next, we have different matching conditions. Most are self-explanatory, and we have guides for the other more sophisticated options if you want to try them out.
💡 Top Tip: Check out our guides on How to Use RegEx for GTM and the Matches CSS Selector Option in GTM.
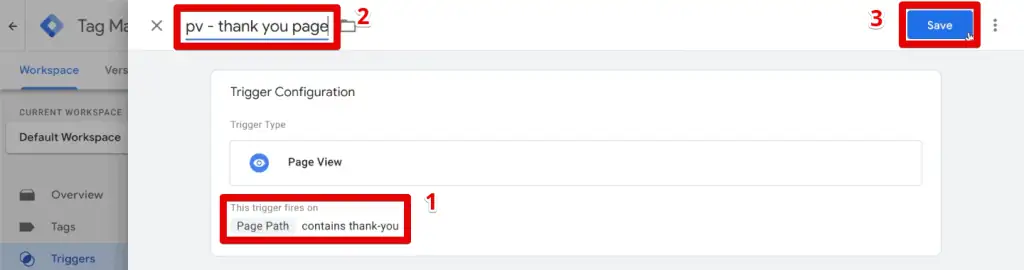
We want to fire our tag when the page path contains thank you. Set the firing condition to Page Path contains thank-you. Next, give the trigger a descriptive name. We usually go with the trigger type first, then the condition after. Finally, click Save.
The next step of our Google Tag Manager button click tracking implementation is to connect this trigger to a tag. For this example, we want to set up a Meta Pixel and send our event to Meta.
Meta Pixel Event Tag Configuration
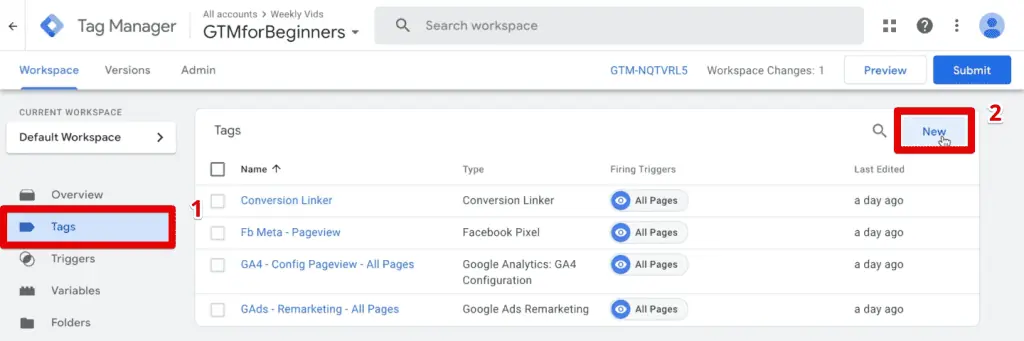
To start, let’s go to Tags → New.
If you want to send an event to Meta, select Tag Configuration → Facebook Pixel.
If you do not see this tag template from the list, import it from the Community Template Gallery. It contains listings of all community-created tags and variable templates.
💡 Top Tip: Check out our Google Tag Manager Custom Templates guides to learn which templates are available, where to get custom templates, and how to import them to your GTM container.
To set up a Meta Pixel, we need the pixel ID. Go to the Events Manager in the Meta Business Suite. In the Overview tab, copy the Pixel ID.
Paste this in our tag configuration. Next, we will stick with a standard event name and choose one from the list. Select Lead since it seems fitting for our example.
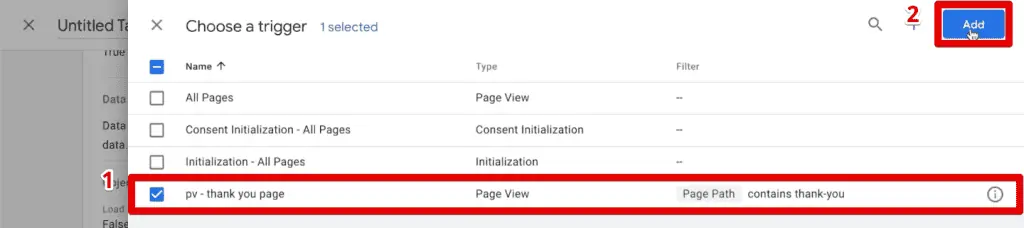
Next, we will set our trigger. Click Triggering and select our newly created thank you page trigger. Finally, click Save.
Give the tag a name and click Save.
Alright! We need to preview our Google Tag Manager button click tracking implementation. Then, test if our tag and trigger work properly.
Testing the Custom Tag and Trigger
First, click Preview to enter the GTM preview mode, which will connect the Tag Assistant to your website,

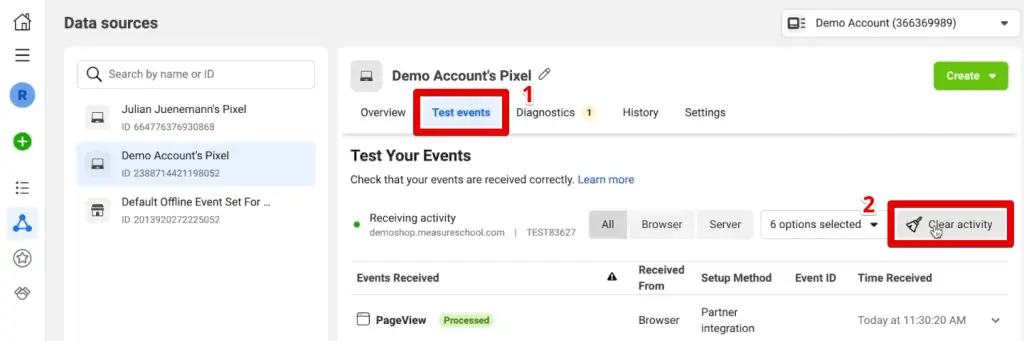
Next, in the Events Manager, go to the Test Events tab. Click Clear Activity.
Fill out and submit the form until you reach the thank you page.

Looking at the Tag Assistant, our Meta Pixel lead event tag has fired successfully.
When we click on the tag, we can see the Firing Triggers associated with this tag and which specific event the tag fired. In our case, it is the Container Loaded event.
Click the Container Loaded event, then select our lead event tag. We can see that all firing trigger conditions have the check mark, which is why we were able to fire our tag.
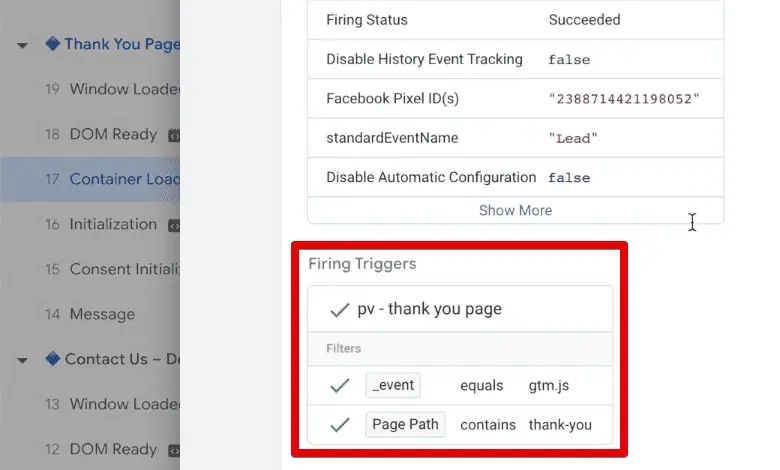
We have the correct event, and the page path contains a thank-you.
If we check the conditions on a different page, like the Contact Us page, our Meta Pixel lead event tag will not fire because we did not meet the page path condition.
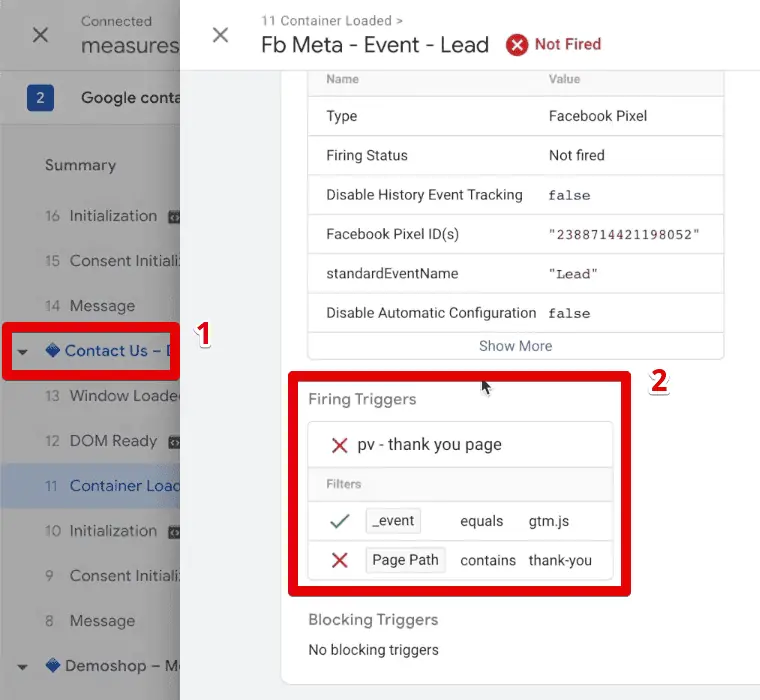
On a similar Container Loaded event, the tag did not fire because the page path of the Contact Us page did not contain a thank-you.
Great! It seems to be working fine on the Google Tag Manager side. Next, let’s check if the event reached Meta properly.
The Meta Pixel Helper is a great tool that helps when testing your Meta Pixel implementation. We recommend installing it if you work with Meta Pixels often.
💡 Top Tip: If you’re looking for more essential tools each digital marketer should have, check out our Top 10 Chrome Extensions for Digital Marketers list.
Back on our demo shop, click on the Meta Pixel Helper extension. Here, we can see it detected our Lead event.
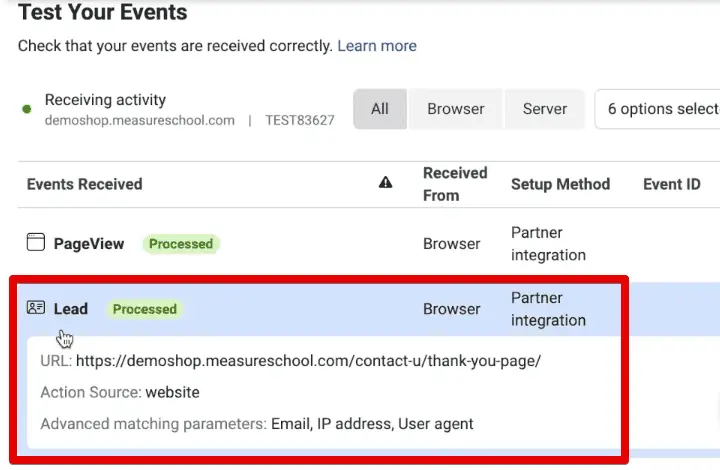
For a final check, let’s check the Events Manager. In the test events tab, we have processed the Lead event successfully.
Great! Our custom tag is working fine, and we have successfully created a custom trigger that captures a specific page path on our website.
Google Tag Manager Button Click Tracking
When we created our custom trigger earlier, you may have noticed other trigger types like the click trigger events or user engagement events you may want to utilize. So, let’s check it out.
Let’s go through a quick example of setting that one up.
Our website is an eCommerce store where we sell different products. With that, we have these Add to Cart buttons on our product pages.
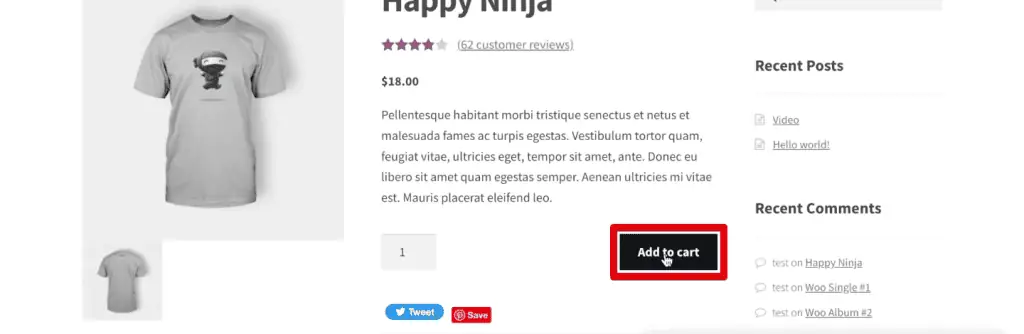
Meta also allows us to utilize an event called Add to Cart. Let’s show how to configure a tag when a user clicks the Add to Cart button.
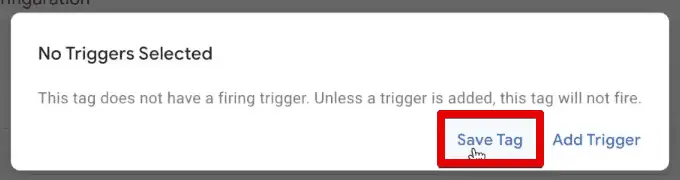
Let’s create another tag similar to our lead event tag. This time, select the Add to Cart event name. Name the tag appropriately, then click Save.
We’ll save this for now without adding a trigger. Click Save Tag to confirm.
How should we set up the Google Tag Manager button click tracking for when users click on the Add to Cart button?
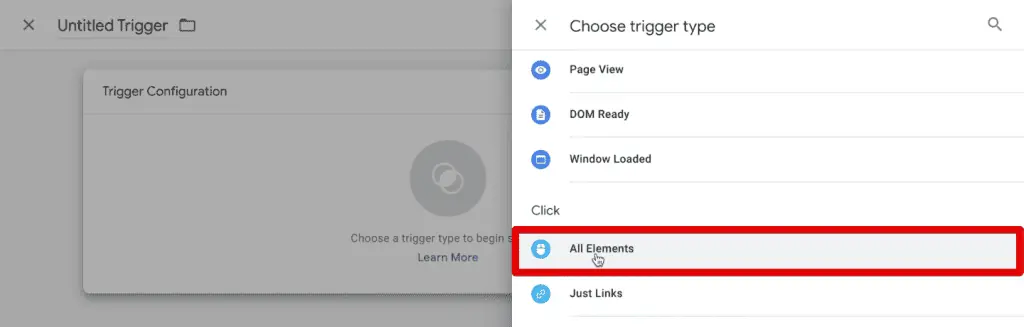
Let’s start with a generic click trigger. Select the All Elements trigger type.
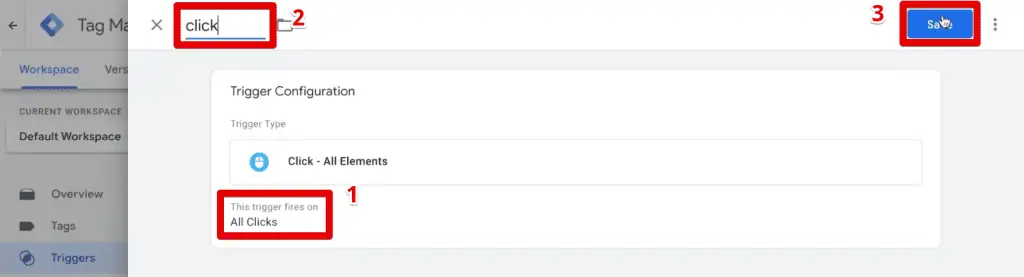
We will start with an All Elements trigger. Let’s leave it at All Clicks for now. Name the trigger click, and click Save.
We will not connect to a specific tag just yet. We want to check out how the generic click trigger works first. The next thing we need to do is to enable the click variables. Variables are like placeholders that we can utilize for our triggers.
Go to Variables → Configure.
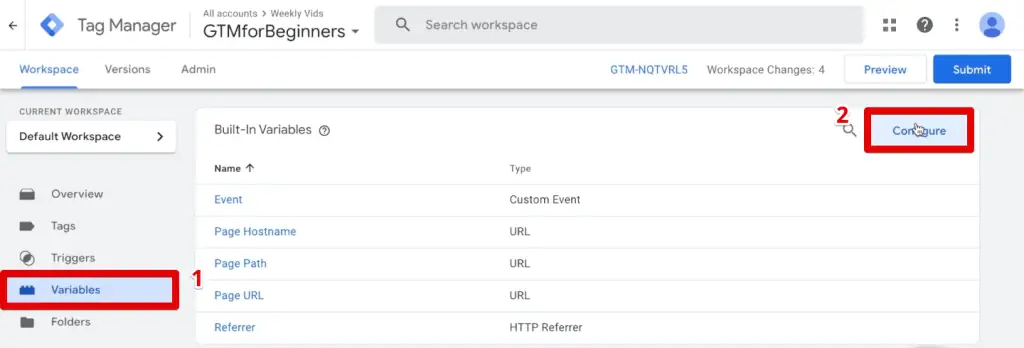
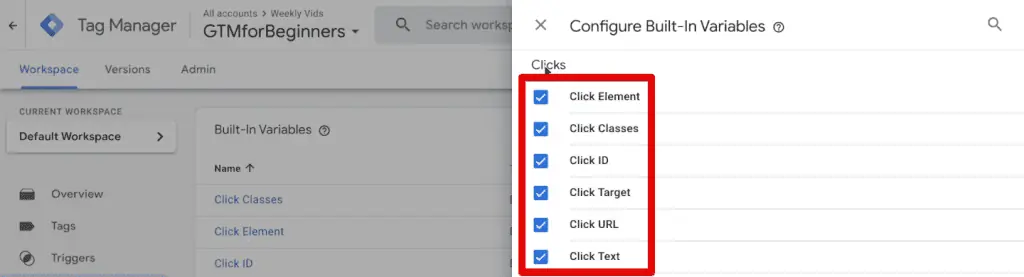
Next, tick all click variables to enable them.
Enter the preview mode again. Click the Add to Cart button on any of the products.
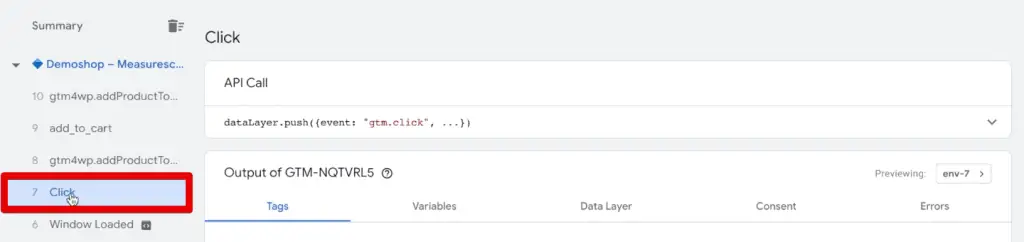
We should see in our Tag Assistant that there is a new Click event that GTM has recognized.
This event will trigger anytime we click on an element on our webpage. For example, we will click on the Demoshop home page, the Album tab, and the Search button.
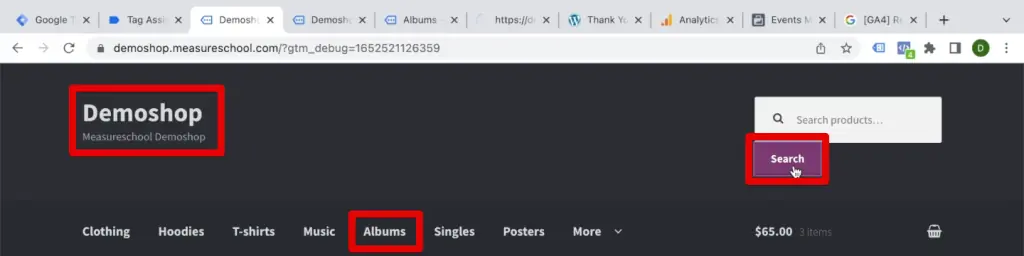
Back to Tag Assistant, we can see the clicks we triggered on the page.

How do we configure Google Tag Manager button click tracking, but only for the clicks you specify? Here is where variables come into play.
Go to any of the Click events and open the Variables tab. Here, you can see all the click variables, variable types, return types, and values.

We may have the same click variables for each click event, but their values will differ depending on which element we click on. There are different values for these variables. We need to find the one for the Add to Cart button.
Let’s go to the first click event we triggered and see how it differs from the other events.
Event Tracking with Google Tag Manager
Looking at the values in the click variables, we could go with two potential routes: the Click Classes or the Click Text variable.
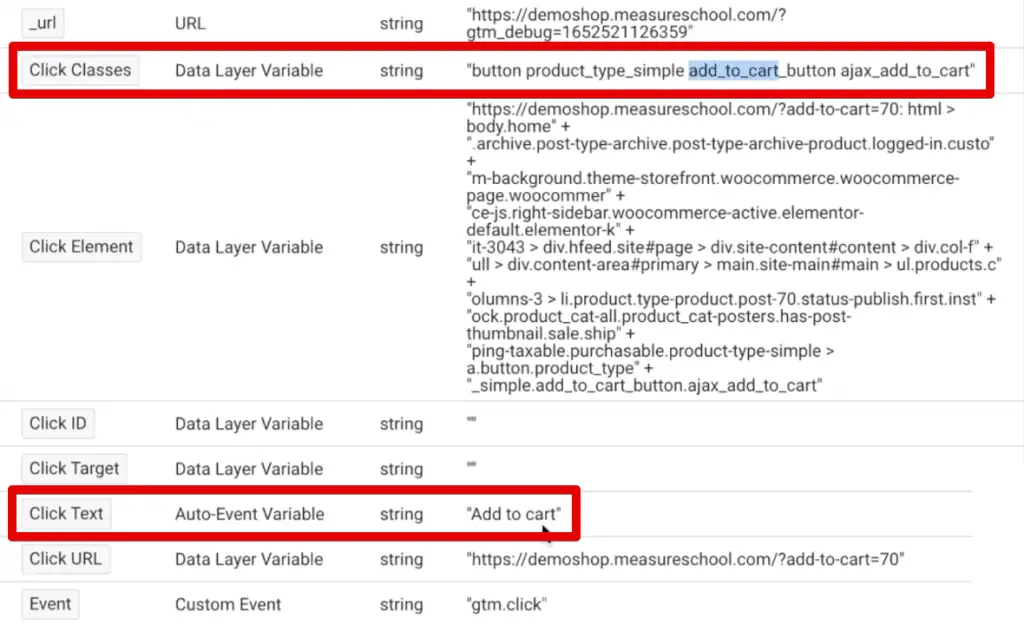
In the Click Classes variable, there is an add_to_cart text. We can utilize it in our trigger. A simpler and more flexible alternative is to use the Click Text variable.
If the button changes from the CSS perspective, we can fire our tag if it still has the Add to Cart text.
We will go with the Click Text variable. Now, let’s refine our generic click trigger to only fire upon clicking the Add to Cart button.
For the filter options, set the trigger to fire on some clicks, with the condition: Click text equals Add to cart. Change the trigger name to indicate an add-to-cart trigger, then click Save.

Ensure that you choose the exact text with the appropriate capitalization.
Now, we can connect this trigger to our Meta Pixel add-to-cart event tag.
Enter the preview mode again and click on an Add to Cart button. Next, go to the Tag Assistant.
Check if the Add to Cart event tag has fired in the Click event.
Next, go to our website and check if the Meta Pixel Helper detected the Add to Cart event.
Finally, check in the Events Manager if Meta has processed the Add to Cart event.
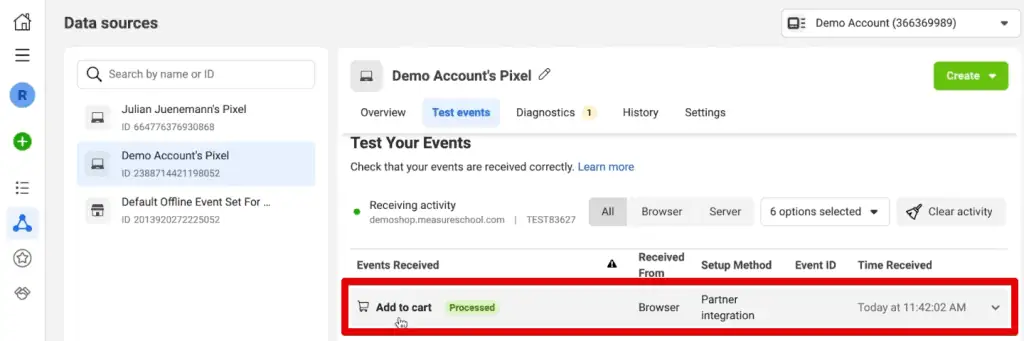
Great! Since we can now send over add-to-cart information, we can utilize our event to build custom conversions or retarget those who clicked on this button, for example.
We can also reutilize this trigger to send data to Google Analytics and implement Google Analytics 4 click tracking.
Google Analytics 4 Event Tracking
Since we have the add-to-cart trigger already, let’s reuse it for our GA4 event tag.
🚨 Note: Check out our guide on Installing Google Analytics 4 with Google Tag Manager if you haven’t installed GA4 on your website yet.
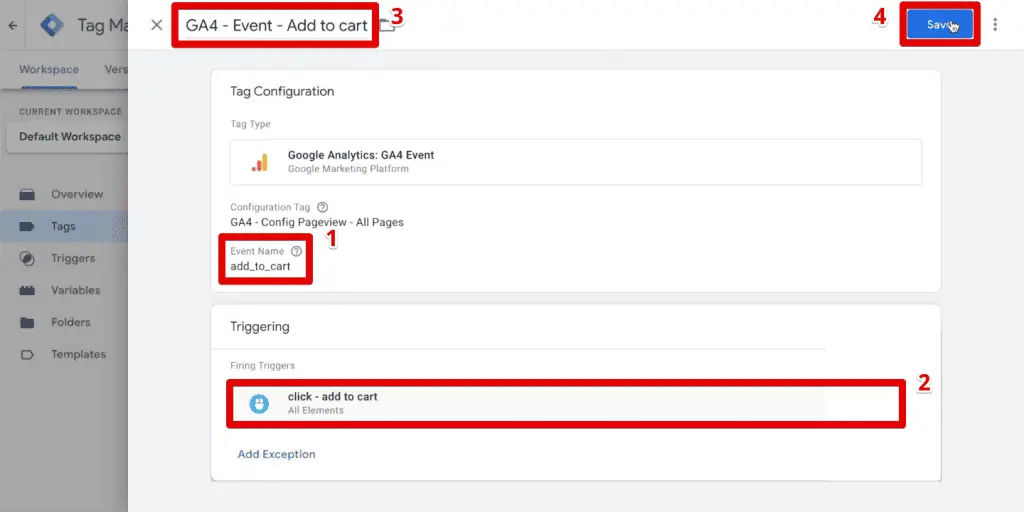
Select the GA4 event tag type, then our configuration tag.
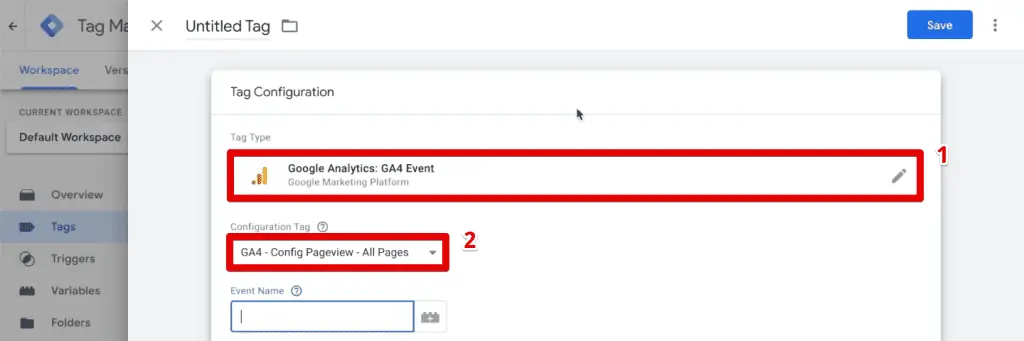
🚨 Note: If the configuration tag is missing from your GTM container, it is because Google has replaced it with the Google Tag. Check out our guide on the New Google Tag to learn how this change impacts how we set up GA4 events.
Next, we need to provide an event name. Before inputting any name, we should always check the list of GA4 recommended events. These events have predefined names and parameters that help unlock existing and future reporting capabilities.
In the GA4 recommended events documentation, we have the add_to_cart event under the online sales section.
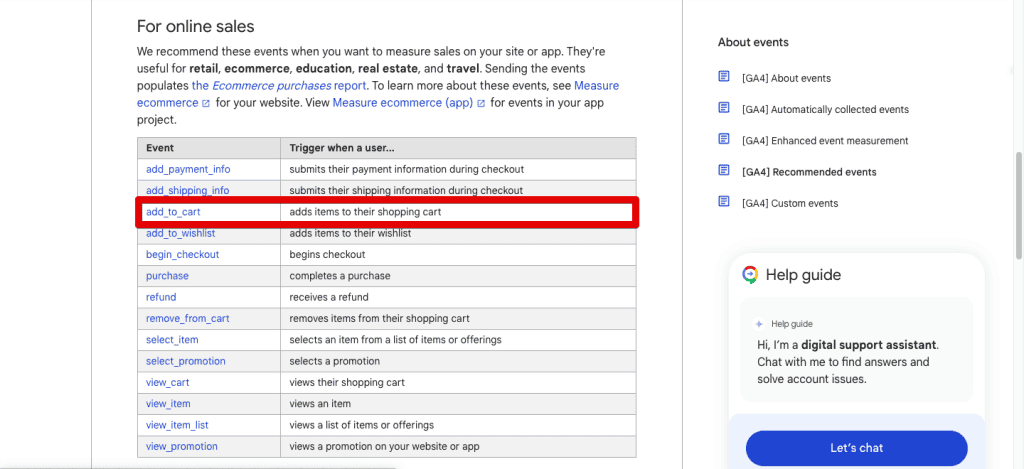
Copy this exact name and paste it into the GA4 event tag. Select our add-to-cart trigger, name the tag, and then click Save.
Enter the preview mode again. Click the Add to Cart button for any of the products again. For a quick check, open the Meta Pixel Helper and confirm we sent the Add to Cart event to Meta.
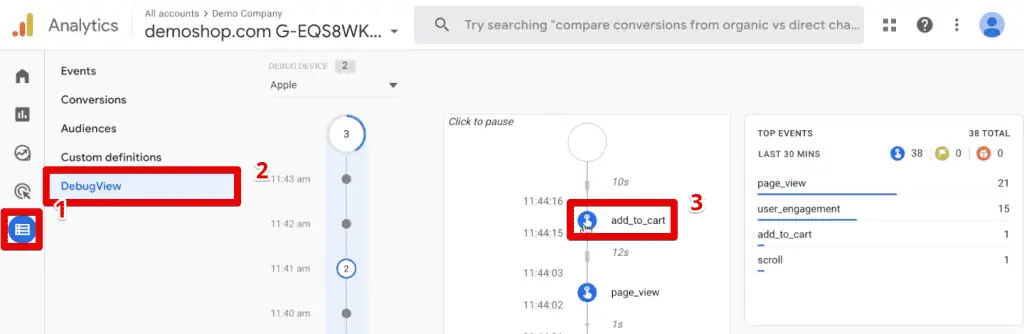
Next, check the GA4 DebugView to see if this information has reached Google Analytics.
In your Google Analytics account, go to Admin → DebugView. The add_to_cart event should show up in the timeline.
Great! We have now implemented Google Tag Manager button click tracking with Google Analytics 4 and Facebook Ads.
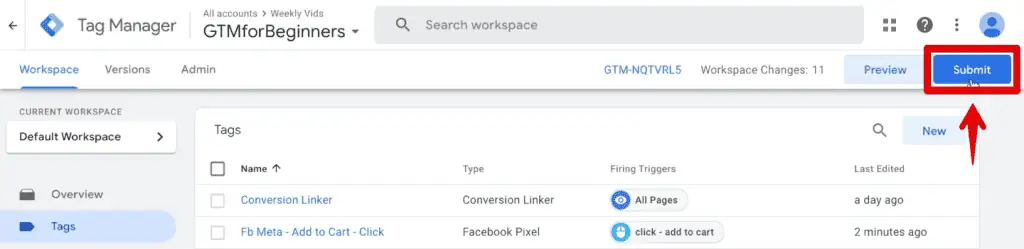
Don’t forget – if you want to take this implementation live for every user, you must submit a new version of your GTM container.
In your GTM account, click Submit.
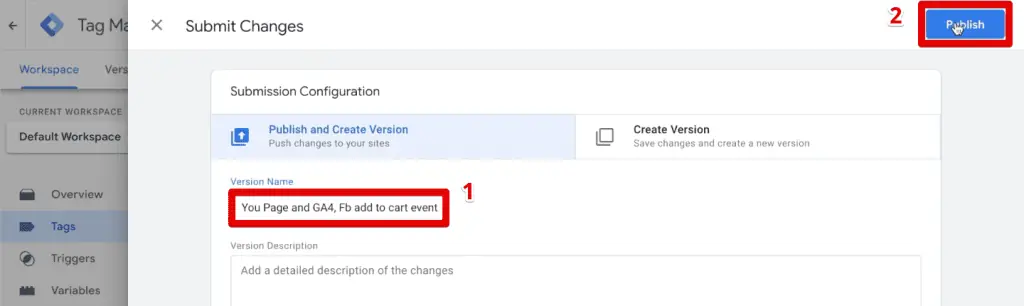
Provide a descriptive version name, then click Publish.
Summary
How to track button clicks in Google Analytics 4 (steps summarized)
Step #1: Create a Custom Trigger in Google Tag Manager:
- Go to your Google Tag Manager (GTM) account.
- Click on
Triggers→New. - Click on
Trigger Configurationand selectPage View. - Set it to fire on
Some Page Views. - In the filter section, choose
Page Pathcontainsthank-you. - Name the trigger appropriately and click
Save.
Step #2: Create a GA4 Event Tag:
- Go to
Tags→New. - Select
Tag Configuration→GA4 Event. - Provide the event name (e.g.,
add_to_cart). - Select the previously created trigger (e.g., the
add-to-carttrigger). - Name the tag and click
Save.
Step #3: Test the Setup:
- Enter
Previewmode in GTM. - Perform the action (e.g., clicking the
Add to Cartbutton). - Verify in GA4 DebugView that the event has been received.
Step #4: Publish the Changes:
- Click
Submitin your GTM account. - Provide a descriptive version name and click
Publish.
How to track button clicks in Facebook Ads (steps summarized)
Step #1: Create a Custom Trigger in Google Tag Manager:
- (Same steps as in Google Analytics 4) Create a trigger that fires on specific page views or button clicks.
Step #2: Create a Meta Pixel Event Tag:
- Go to
Tags→New. - Select
Tag Configuration→Facebook Pixel. - Paste the Pixel ID from the Meta Events Manager.
- Choose an event name from the list (e.g.,
Lead). - Select the previously created trigger.
- Name the tag and click
Save.
Step #3: Test the Setup:
- Enter
Previewmode in GTM. - Perform the action (e.g., form submission leading to a thank you page).
- Use the Meta Pixel Helper to verify that the event has been detected.
- Check the Events Manager in Meta Business Suite to ensure the event is processed.
Step #4: Publish the Changes:
- Click
Submitin your GTM account. - Provide a descriptive version name and click
Publish.
So, we have successfully implemented Google Tag Manager button click tracking. We covered how you can quickly set up certain triggers to fire on specific events on your website.
There are many other trigger types, and we recommend checking them out.
Check out our guides on How to Set Up GA4 eCommerce Tracking or Google Ads Conversion Tracking to determine how well your business generates sales or leads.
Which trigger types do you use most often? What other button/link clicks do you track on your website? Let us know in the comments below!


")
Hey Julian,
You forgot onething, Is it your triggers are working fine?? – Absolutely no. Because in your video you are not firing Facebook trigger from facebook website, Simply you are clicking, all events are happening. This is not right. Trigger should be fired based on source ok.
i use the third one (google adwords version), i didnt have any problem with debug mode, all tags fired correctly. but when i checked my google ads dashboard, the conversion number count didnt increase at all (zero conversion even after 3 days).
whats wrong with my case?
Hi, this is excellent. How to avoid duplicate’s in this case ?