
Last Modified on July 12, 2024
Do you want to receive more accurate conversion data and use it for targeted ads?
You can set up Google Ads enhanced conversions with Google Tag Manager using a conversion tag. This will help you to optimize the conversion tracking of your campaigns.
In this guide, we’ll learn how to implement Enhanced Conversion Tracking with the help of Google Tag Manager.
An overview of what we’ll cover:
- What are Enhanced Conversions
- How to identify the user
- Test purchase
- Data Layer variables
- Enhanced conversion check
- Google Ads configuration
Let’s dive in!
How to Set Up Google Ads Enhanced Conversions with Google Tag Manager
To set up Google Ads Enhanced Conversions with Google Tag Manager (GTM):
- Identify User Data: Use the purchase data from the data layer.
- Test Purchase: Make a test purchase to ensure data layer is populated correctly.
- Create Data Layer Variables: Capture and transfer user data to GTM by creating new variables.
- Modify Tags: Update the conversion tag to include user-provided data.
- Test Configuration: Test the setup in GTM Preview mode.
- Enable in Google Ads: Turn on Enhanced Conversions in Google Ads and wait for data to process.
What are Enhanced Conversions?
Enhanced conversions is a feature of Google Ads that provide more accurate conversion data to marketers by sending supplementary data from a corresponding website.
To implement this for your tracking, you need to ensure that you have the following:
- A Google Tag Manager Account
🚨 Note: If you’re still a beginner, a Google Tag Manager Tutorial can help get started!
- Conversions in the Google Tag Manager Account that you would like to enhance

- Your web page

- Google Ads Account

To understand Enhanced Conversions better, Google Ads has provided a brief introduction that we can refer to.
The first step is viewing the Ad.

Then the user goes to the website and purchases a product.
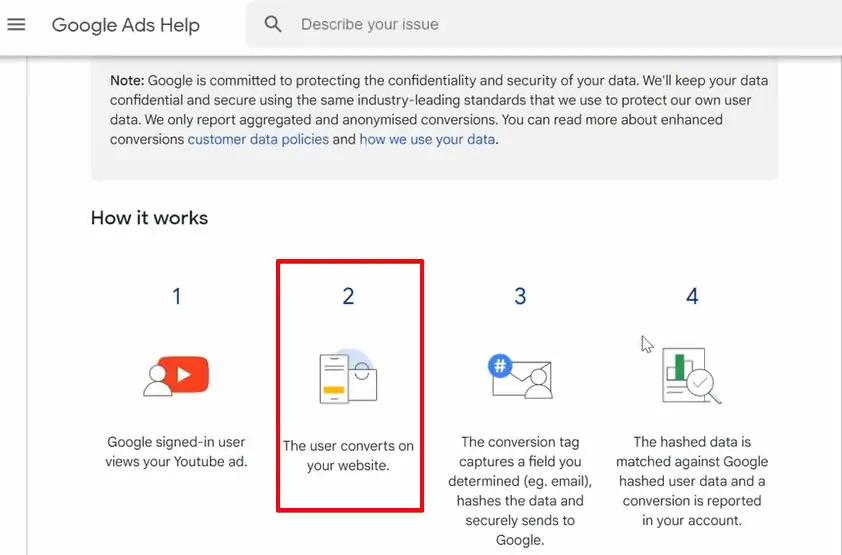
After the purchase is completed, the conversion tag captures the user’s data and hashes it, and then sends it to Google.
If you’re wondering what hashing means, then don’t worry! It doesn’t involve any secret cipher code. It is just a method to send Google the data in a secure manner.

Once hashing is accomplished successfully, Google uses the data acquired to match customers with their Google Accounts.

This helps in getting more accurate reports and more conversions. It is basically an ad stack with vital information about users such as their phone number, email, name, surname, etc.
Now that we are familiar with the functions, let’s get started with implementation.
How to Identify the User?
We cannot magically capture the user data, but we can use product conversions or some kind of tracking.
In this guide, we will be using Purchase data.

You can use a Google Tag Manager for WordPress plug-in to generate all the customer data. It sends the customer data to the web page as a usable data layer, securely, and reliably.
🚨 Note: Instead of using a WordPress plug-in, you can also ask your developer for the data or use CSS Selectors.

When it comes to EC implementation, Google gives a lot of flexibility. You can choose a solution that would be the most suitable for your tracking case.
In this guide, we will be focusing only on one of the many implementation options provided by Google, specifically on the GTM implementation with the data layer.
If you are using WordPress, there is a possibility to activate this feature so that a plugin will send additional data about your customers automatically.
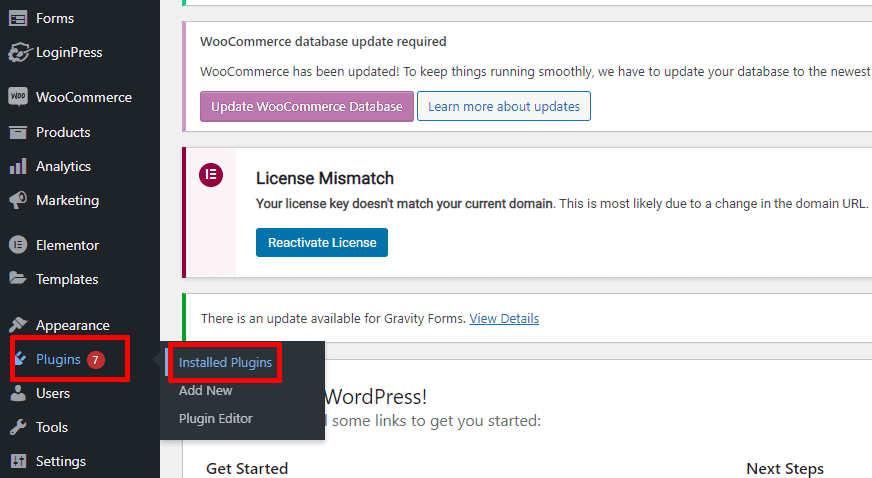
Login to your WordPress Admin dashboard and select Installed plugins (assuming that you have your GTM4WP installed already).
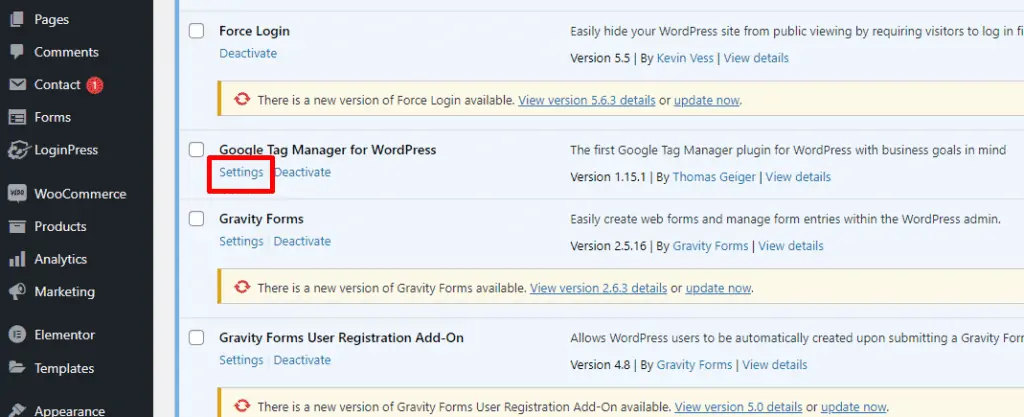
Find Google Tag Manager for WordPress in the list and click Settings.

Navigate to Integration → WooCommerce in the plugin settings and activate Customer data in the data layer.
Make sure that you are also tracking enhanced e-commerce if you want to use a purchase event sent automatically as your GTM trigger.
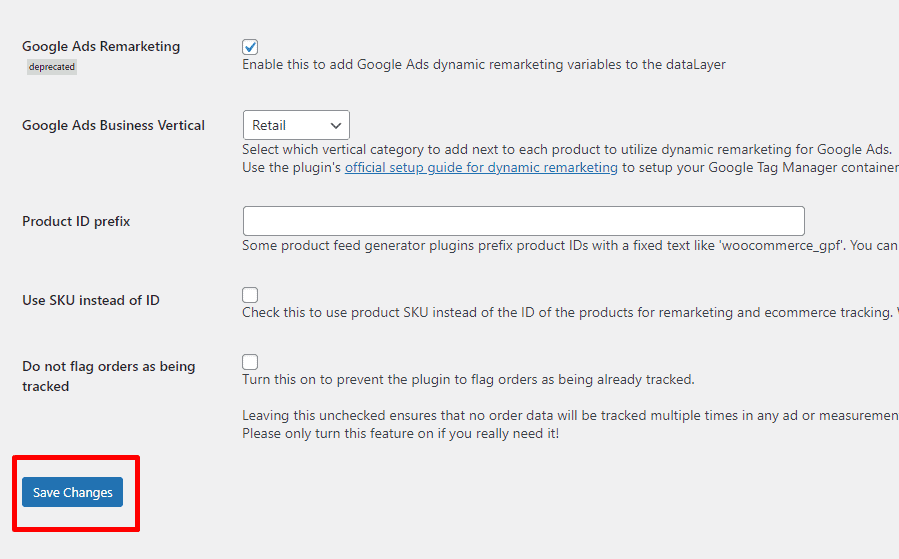
Do not forget to save your changes. You would need to scroll down a bit to do that.
Now we can move to the next step, which is making a test purchase to check if the data layer is populated correctly with the customer data. Sounds intriguing, doesn’t it?
Test Purchase
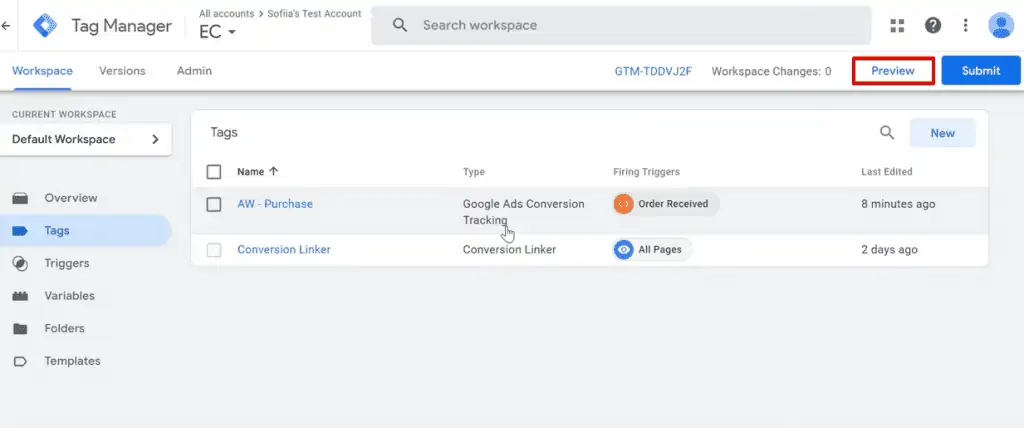
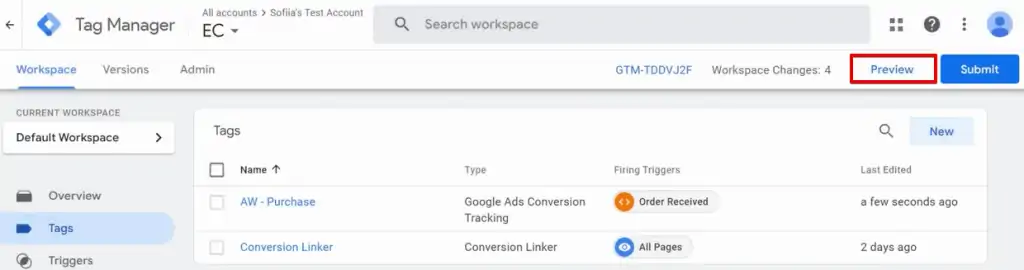
The second step is to make a test purchase on your website. To begin with the test purchase, we first need to go to Google Tag Manager and select the Preview option on the top right of the screen.
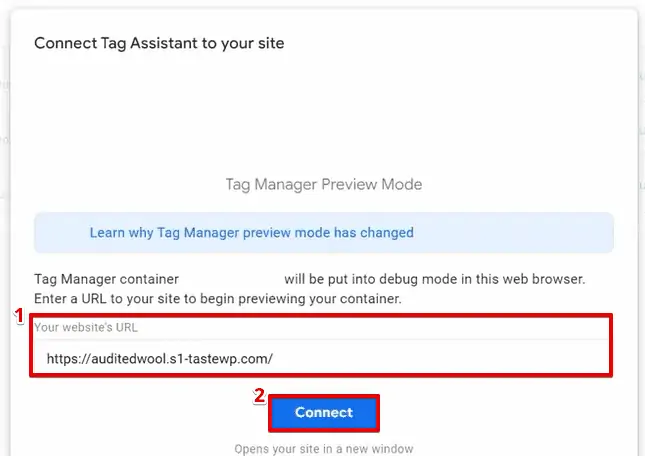
Once you have clicked on the Preview button, a box will appear which says Connect Tag Assistant to your site.
Before you move ahead by clicking the Connect button, ensure your website URL is functional.
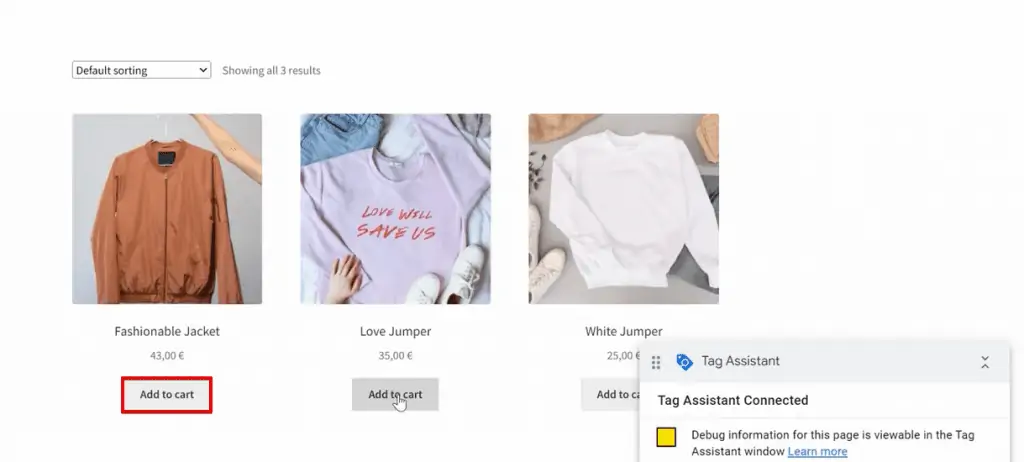
Now, to test the Tag Assistant, simply go to your website and click on Choose an item to purchase→ Place Order→ Get a confirmation message
🚨 Note: You will see the Tag Assistant on your screen throughout your purchase journey.

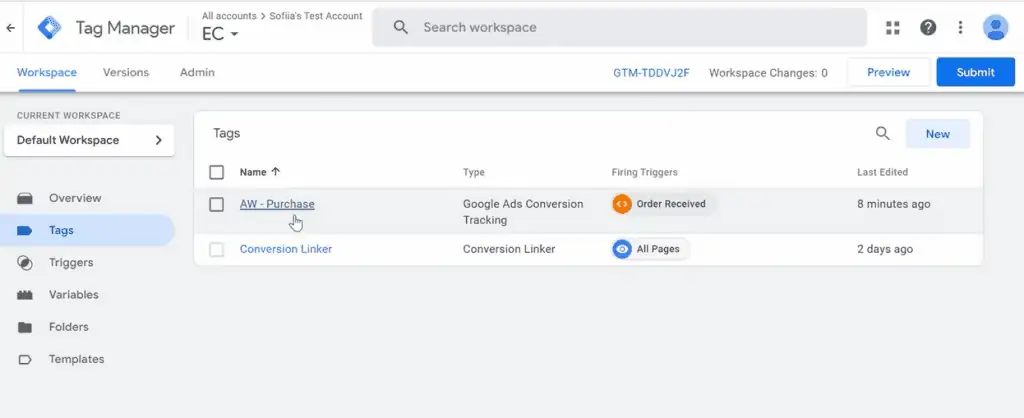
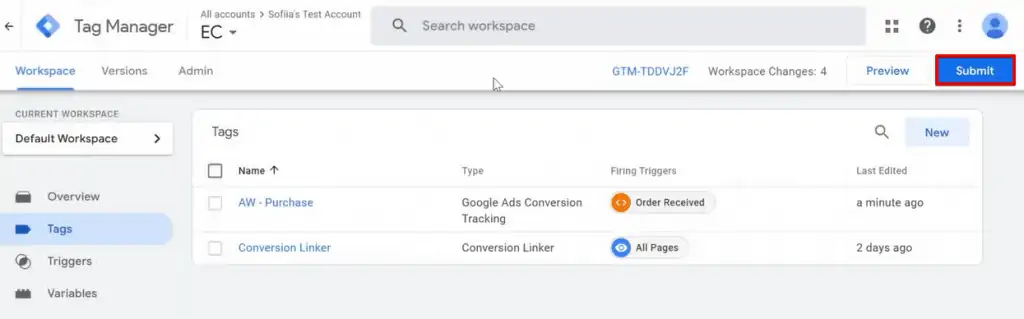
To view the event fired, we will go to Google Tag Manager where it will be visible under Tags.

To see the exact trigger, you can go to Variables.
You can access the exact tag from the left hand side column, and clicking it will show you more details about the Variables of the Tag.

Now, get the customer’s information by going to Data Layer, and you will find all the relevant information there.

With access to the Data Layer, our goal is to capture and transfer it to Google Tag Manager, but how? Let’s discuss that in the next section.
Data Layer Variables
Let’s say we want to capture and transfer the emails of the customers to Google Tag Manager. So, we will go to the Data Layer and copy the email prompt, i.e., customerBillingEmail.

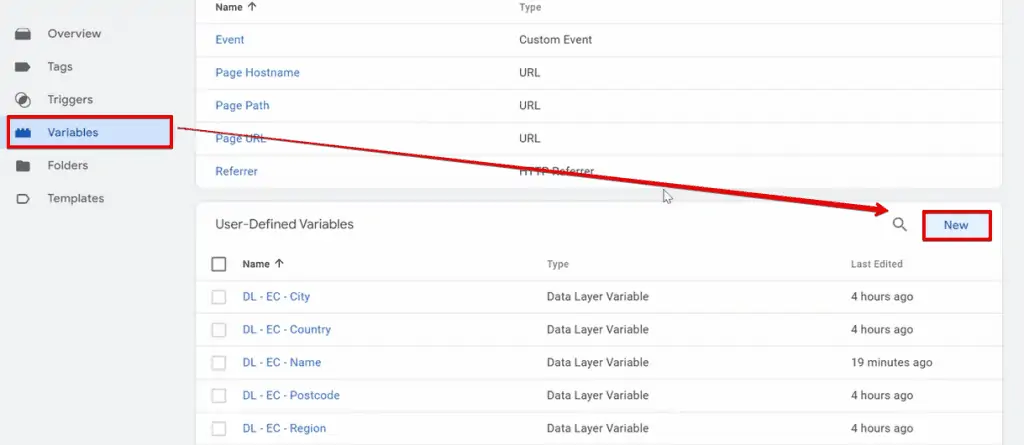
Now, we will go to Google Tag Manager and create a new Variable. So, the first step would be to go to Variables and then choose the New button on the top right hand corner.
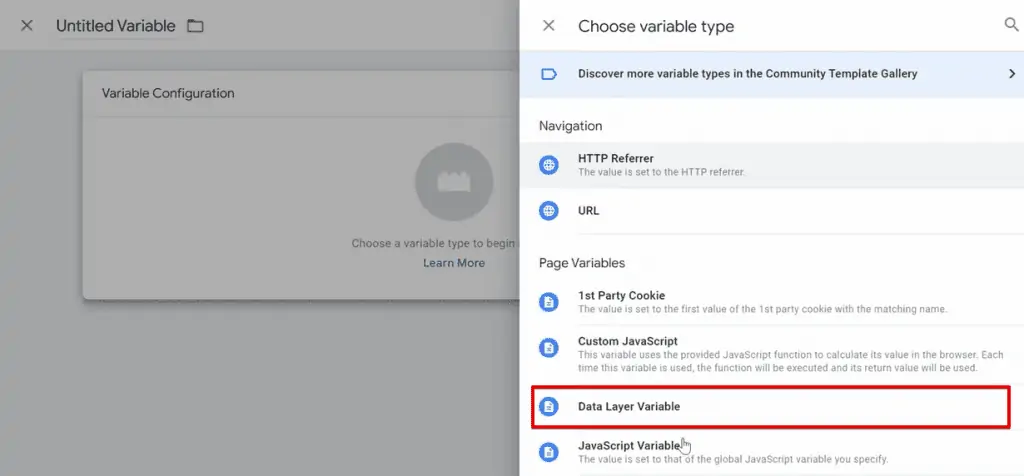
As you click New you will see a box appear that says Variable Configuration. In this box you need to Choose a variable type to begin set-up.

Now, we have to Choose a variable type, and we will be going with the Data Layer Variable.
You will see a new box pop-up on the Variable Configuration screen, where you will have to enter the Data Layer Variable Name.
Once done, you can also rename the Variable Configuration container name and finally hit on the Save button placed in the right hand corner.

Now, let’s move to the next step, which is modifying our tag. It is like an upgrade but for our conversions.
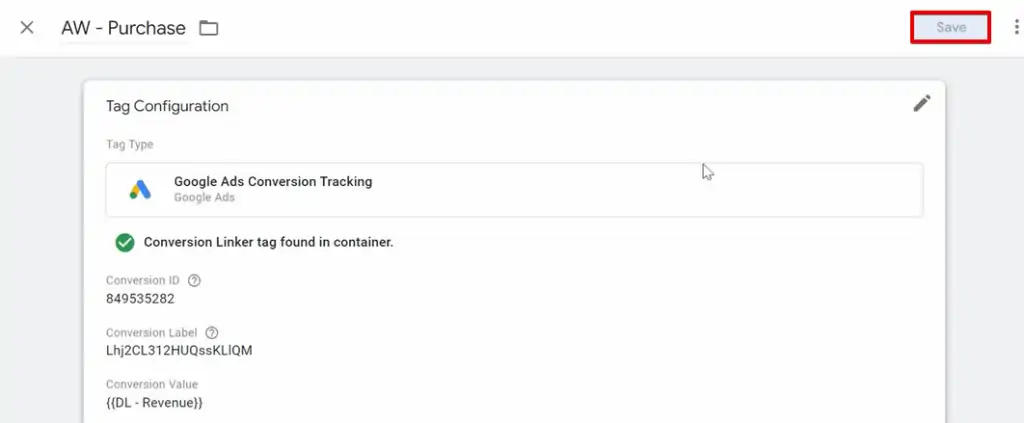
For this, we will go to the Tags tab and select the event,i.e., Purchase.
Once you have chosen the tracking event, you will see Tag Configuration, where you will be able to see a check-box that says Include user-provided data from your website.
Check that box, and you will then be asked to Select the user-provided data variable. Then select the drop-down box and choose the option New Variable.

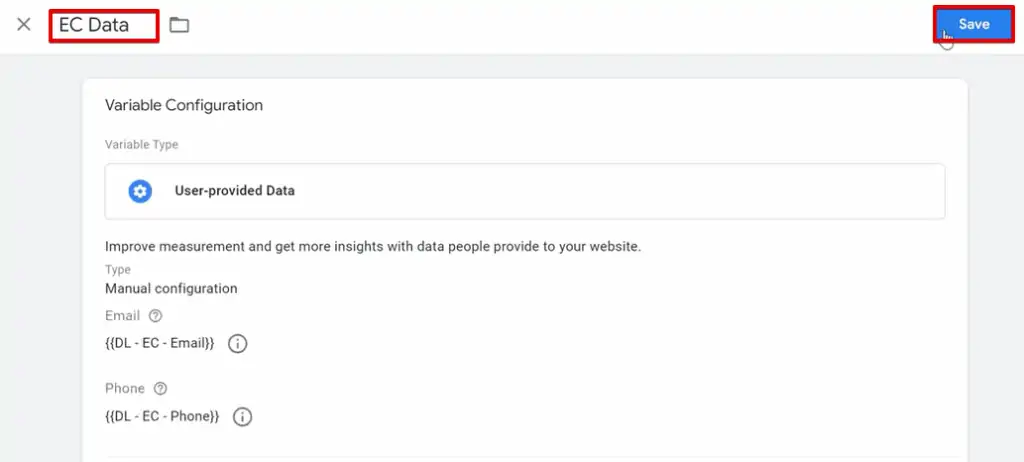
As soon as you choose New Variable, you will be redirected to a new page named Variable Configuration, where you have to choose variables for each field manually.
For example, for email you need to choose email, for the phone you need to choose phone, and so on.

Once done with choosing variables, you can rename the Variable Configuration Folder, and don’t forget to hit the Save button.
Once you have saved your Variable Configuration, go back to Tag Configuration, where we have our modified text.
Click on the Save button.
Now, let’s get to the most exciting part – testing. To begin with testing, click the Preview button.
Once you click Preview, you will see your website and Tag Assistant connecting, after it is connected, click on the Continue button.

You will be redirected to your eCommerce platform; so, once again buy a product from the catalog. In this case, we are buying the jumper again.
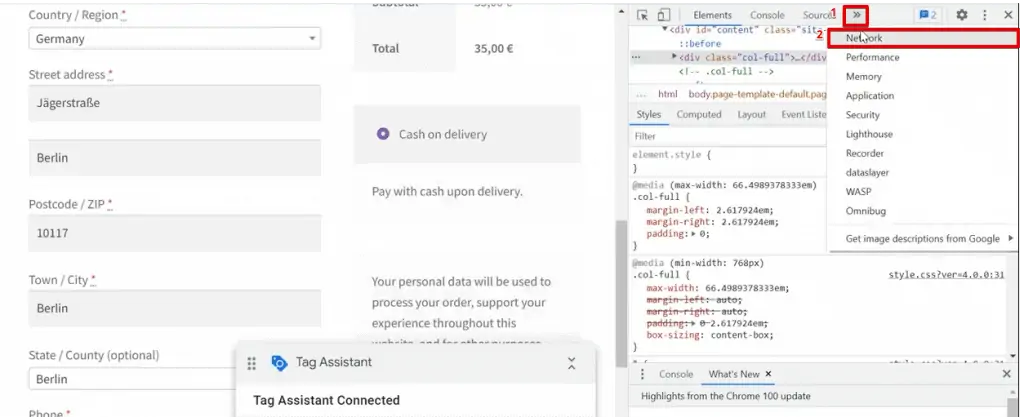
Before you place the order, right-click on the screen and choose the Inspect option.
Now, you will see your screen divided into two parts. On the right-hand side of the screen, you will see a top panel with options like Elements, Console, Sources, and an arrow indicating more options.
Click on the arrow and then choose Network.
Now, you can place your order on the website.

It’s time to move on to the Google Tag Manager and click on Summary. You will be able to see the event along with the tag fired.
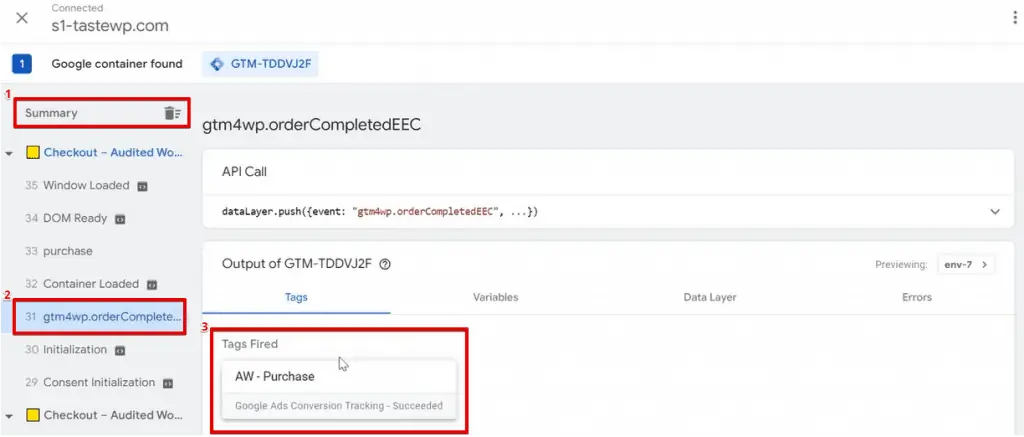
This will help us look at the Variables. If you see them become populated, then it means that they are working properly.

Now, let’s jump to the next section and focus on Enhanced Conversion Check.
Enhanced Conversion Check
We will be able to see Enhanced Conversion Data as we scroll down in the variables section.

Now, let’s go back to the Tag Manager and click on the purchases segment, where we need to copy the Conversion Label given in Tag Configuration.
🚨 Note: You can also copy the code from Google Tag Assistant.

Once you have copied the code, let’s go back to the website and paste the code into the Filter box given in the Network key.

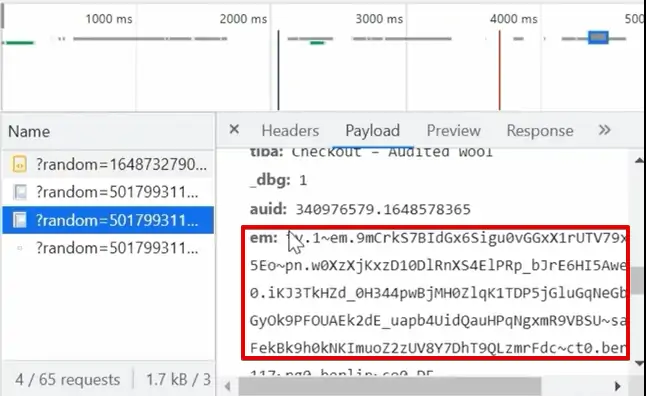
Now, choose the Google Lead Services request and you will have Query String Parameters.

Scrolling down further in the Query String Parameter, you will be able to locate the em parameter. If you can see this parameter, it means that the tag is picking up and hashing the object and it seems to be working.
Now, with everything working correctly it’s time to publish the container by going on to Google Tag Manager and clicking the Submit button.
Let’s now move to the last step of the process.
Google Ads Configuration
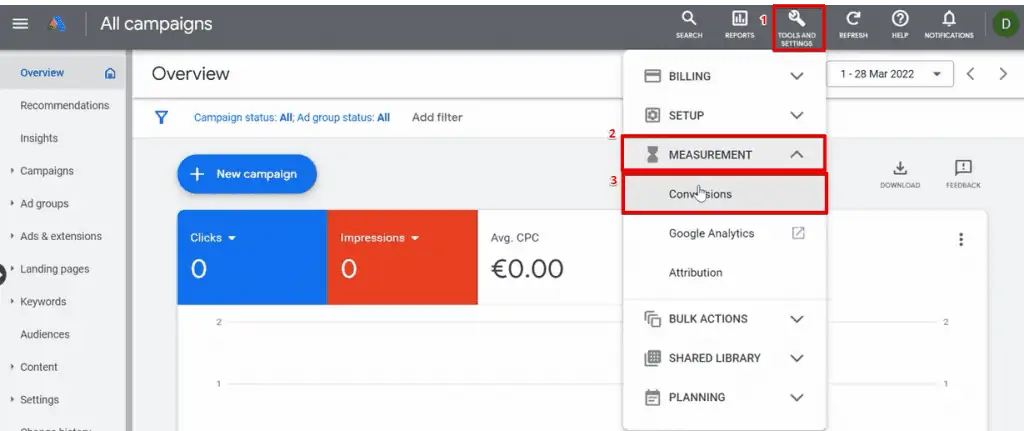
The last step involves a minor change in the Google Ads Account. Open your Google Ads Account page and then go to Tools and Settings → Measurements → Conversions
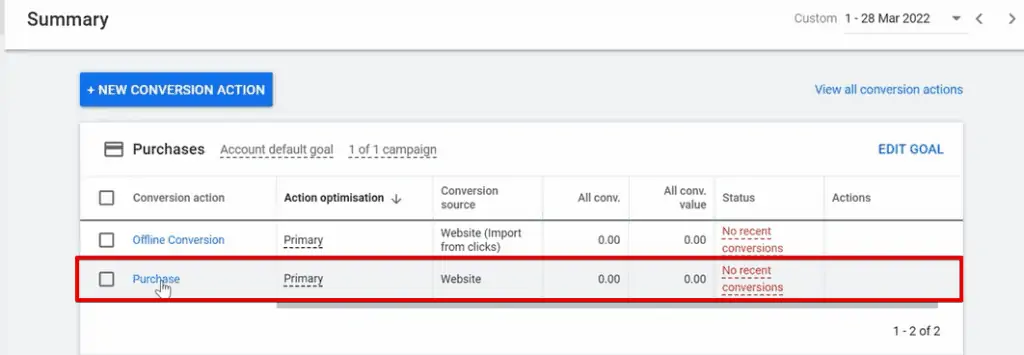
Once you click on Conversions, you will be redirected to a new page where you can find your conversion, which is Purchase.
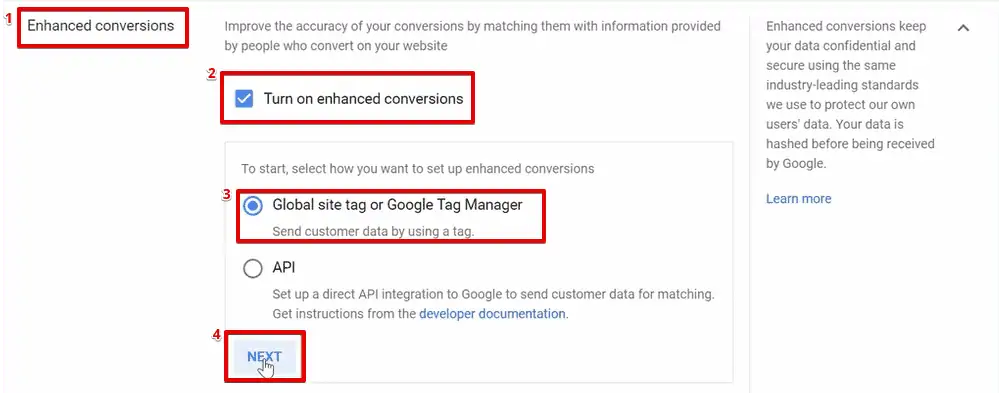
After clicking on Purchase, we will be moved to another page. Scroll down and then select Enhanced conversions → Turn on enhanced conversions → Global site tag or Google Tag Manager → Next
Once you have successfully clicked the Next button, you will have to add your website URL. Just visit your website, copy the link and paste it there.

Now, save the Enhanced Conversions and then click Back.

Click one more time on our Purchase conversion.

Now, click on Diagnostic, and you will be able to see a message that says Waiting to receive enhanced conversion data.
It could take up to 48 hours to be processed, but later on, you should see the report.

You have finally set up your Enhanced Conversions successfully.
FAQ
What do I need to set up Enhanced Conversions with Google Tag Manager (GTM)?
To set up Enhanced Conversions with GTM, you need the following:
1. A Google Tag Manager Account
2. Conversions in the Google Tag Manager Account that you want to enhance
3. Your web page or website shop in an online marketplace
4. Google Ads Account
How do I set up data layer variables in Google Tag Manager?
To set up data layer variables in GTM, follow these steps:
1. Go to Variables in GTM and click the New button.
2. Choose “Data Layer Variable” as the variable type.
3. Enter the Data Layer Variable Name and save the variable.
How do I know if my Enhanced Conversions are set up successfully?
After configuring Enhanced Conversions, you should see a message in the diagnostics section of Google Ads indicating that it’s waiting to receive enhanced conversion data. It may take up to 48 hours for the data to be processed.
Summary
So, that’s all you need to know about implementing Google Ads Enhanced Conversions using Google Tag Manager!
🚨 Note: If you want to track sales that don’t occur on your website, check out our handy guide on enhanced conversions for leads.
Linking your website’s data to the user conversion data in Google Tag Manager will give you more information about the converted user. This data can be very helpful for retargeting ads or segmentation of targeted audiences.
What’s more, the transferred data is sent privately using a hash for encryption.
But before enhancing your conversion data, it is important to set up Google Ads Conversion Tracking with Google Tag Manager. Alternatively, you can also import goals from Google Analytics for setting up conversion tracking.
Do you use the enhanced conversions feature of Google Ads? What are your use cases? Let us know in the comments below!


")
Very precise, complete and accurate. Thank you! :)) Only as a feed-back and not as a criticism, the enanched conversion Server Side part is missing 🙂
I couldn’t get this to work on Shopify. Data layer does not passing shipping info.
How is your data layer implemented?
Thank you for the very good documentation.
I am about to implement Google Enhanced Conversion and wondering if it has any effect on the data shown in the reports in Google Analytics. Is there any effect we can observe?
Thanks for the fantastic tutorial but…is this working just for logged-in users?
Thank you for your feedback, Matteo! Well, not necessarily. The most important thing here is to have user data available on the conversion page, and you should be able to grab it and pass it to the GTM (in case of GTM implementation). You could even go with CSS selectors, scraping your web page (although the data layer option is more reliable).
Thank Sofiia,
This is a great guide but it is no longer working as of September 2022 and I can’t seem to find a solution.
The reason is that the variables are not getting populated any longer by WPCF7 and even when I pull them from
Do you have any idea?
Hi Ben,
I have just tested it in my environment, and my variables are being populated. We have the latest WP version.
I would suggest checking the setup again. If this cannot be fixed, you could use the CSS Selectors method.
Thanks for the reply, Sofiia.
Do you have a guide on CSS selector method at Measure School?
I’m wondering about the legal aspect of enhanced conversions. Do we need to mention it in our Privacy Policy? Would consent be part of the “Marketing” / “ad_storage” consent or seperate?