
Last Modified on January 16, 2025
With more than 800,000 active installations, Ninja Forms is a widely used plugin, and there may come a day when you’ll need to set up its tracking.
There are 2 practical ways for Ninja Forms tracking with Google Analytics 4 (GA4).

Sign up to the FREE GTM for Beginners Course...
The first involves using GA4’s automatic form tracking feature, which isn’t always reliable. The second and most robust method is using Google Tag Manager (GTM) to deploy a custom tag that pushes data into the Data Layer.
Here’s what we’ll cover:
- What is a Ninja Form?
- How to Use Ninja Forms
- Ninja Forms Tracking with Google Tag Manager
- Creating a Custom HTML Tag & Trigger
- Sending a GA4 Ninja Form Submission Event
What is a Ninja Form?
Ninja Forms is a popular contact form builder. Its advantages include creating aesthetically appealing forms for WordPress websites without requiring developer skills.
Additionally, you can quickly create forms for different purposes, with advanced features that let you accept various types of payments, like subscriptions.
How to Use Ninja Forms
If you’re familiar with WordPress and installing plugins, you can skip this part and start from Create a Custom HTML Tag & Trigger. Otherwise, follow along as we add Ninja Forms to a WordPress page.
Install the Plugin on Your WordPress Site
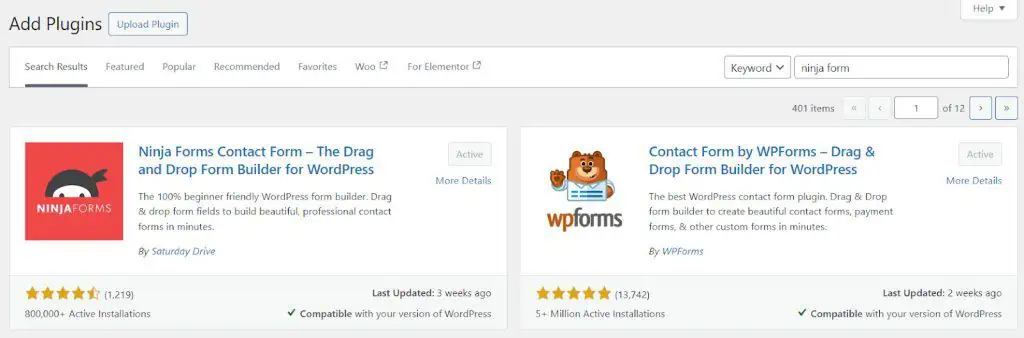
- Go to your WordPress site admin. In the menu, click Add New Plugin.

- In the search bar Type Ninja form.
- Click Install Now, then Activate.
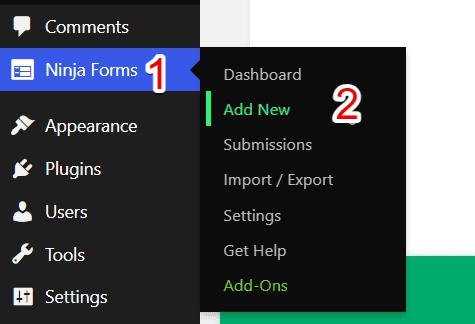
Next, click the Ninja Forms menu item, then select Add New.
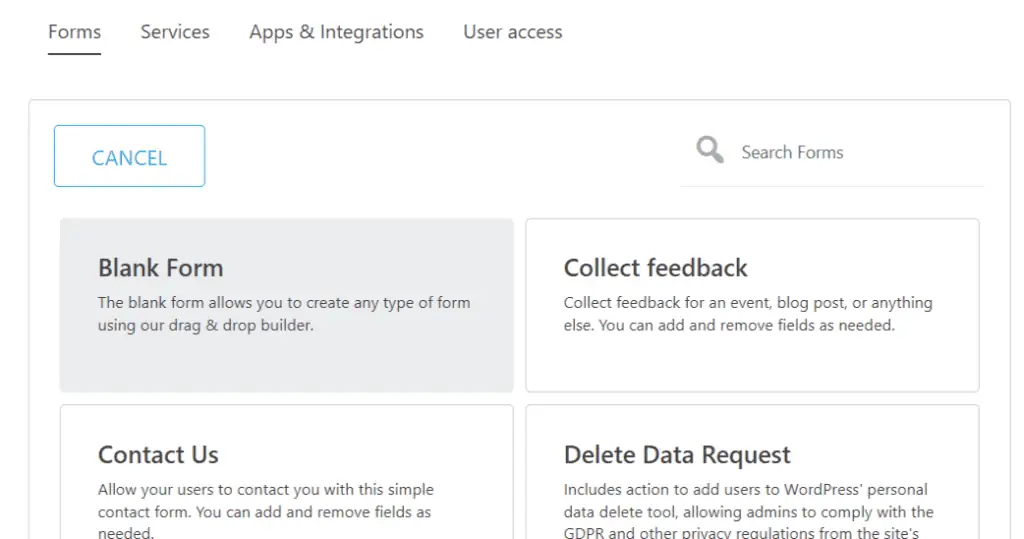
Choose from the many templates they offer, or select a blank form that you can customize.
After reviewing your form, click Publish.
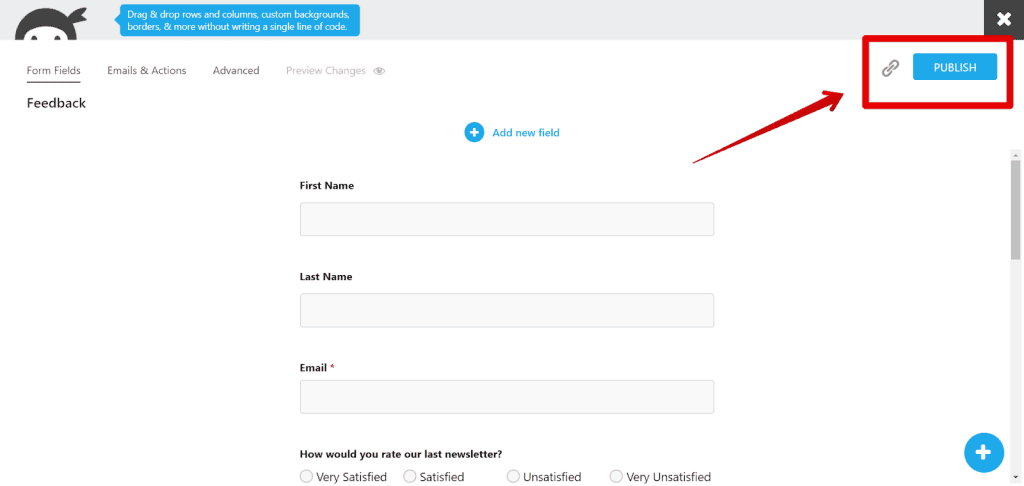
This action will redirect you to the main Ninja Form page.
Copy the shortcode of your desired Ninja Form. Embed the form in your web pages by pasting the code into the shortcode widget of your web page builder. You can create a new form to customize it how you prefer.
Copy the shortcode:
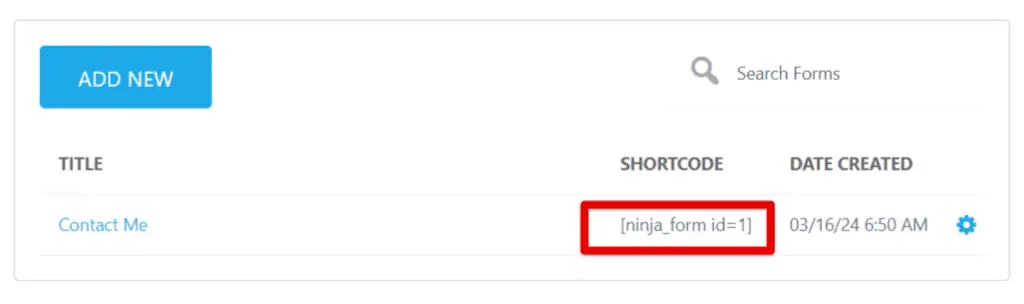
Paste the shortcode in Navigation in Ninja Forms.
Ninja Forms Tracking with Google Tag Manager
As mentioned in the introduction, Ninja Forms tracking with GTM is the most recommended way, and therefore the one we’ll cover.
The reason the Enhanced Measurement’s automatic solution isn’t the most reliable (for now) is that it poses several problems, including sending a form submission event that isn’t one.
This often happens when the user starts filling out the form fields or, conversely, when they click the submit button without filling out the form.
However, if this solution proves useful for your current or urgent needs, take a look at our post on Automatic Form Tracking in GA4.
Here’s the plan:
Here we’ll be using a custom tag for Ninja Forms submission tracking to see how the tag works.
After testing the Custom HTML tag, we will move on to create a new tag and trigger to send a form submission event to GA4.
Moving on to the second method, the one we recommend.
Before going into GTM, make sure you’ve turned off the form submission feature in GA4. This is to prevent sending duplicate events if you configure it separately in GA4 and GTM.
Create a Custom HTML Tag & Trigger
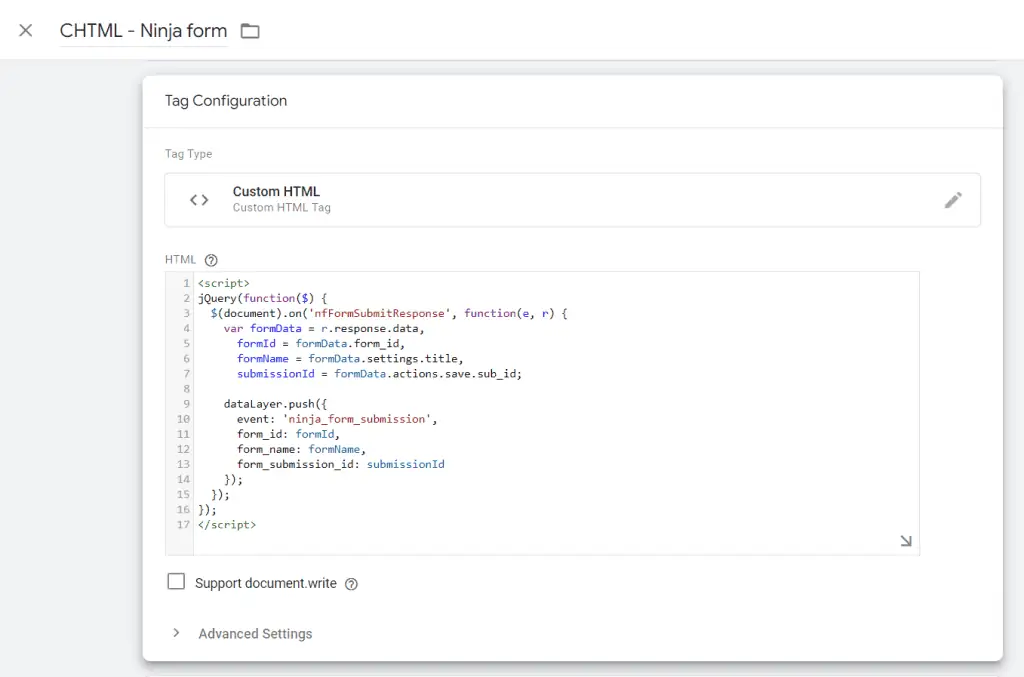
At this moment, if you were to use the Preview Mode of GTM and test the form, nothing would occur. This is the reason why our first step consists of using the following code enhanced by our colleague from MeasureSchool Praba.
<script>
jQuery(function($) {
  $(document).on('nfFormSubmitResponse', function(e, r) {
    var formData = r.response.data,
      formId = formData.form_id,
      formName = formData.settings.title,
      submissionId = formData.actions.save.sub_id;

    dataLayer.push({
      event: 'ninja_form_submission',
      form_id: formId,
      form_name: formName,
      form_submission_id: submissionId
    });
  });
});
</script>
This code snippet captures Ninja Forms submissions by using an event listener with jQuery. It listens for the ‘nfFormSubmitResponse’ event. When this event is triggered, the code is executed.
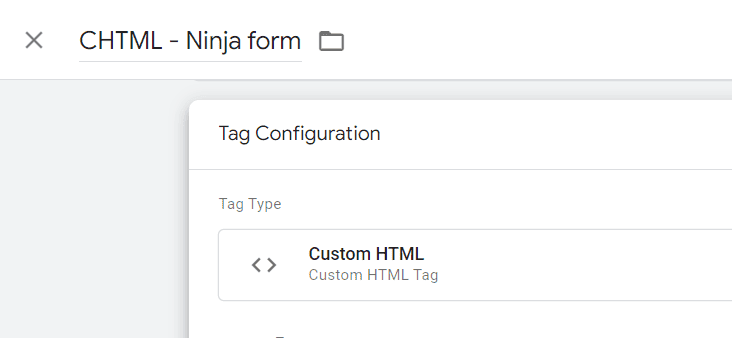
In GTM, go to Tags → New.
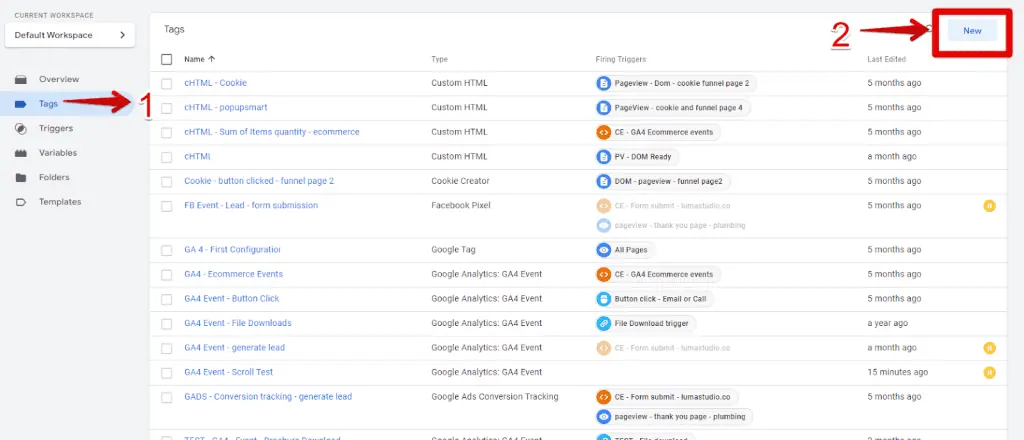
Click Tag Configuration.
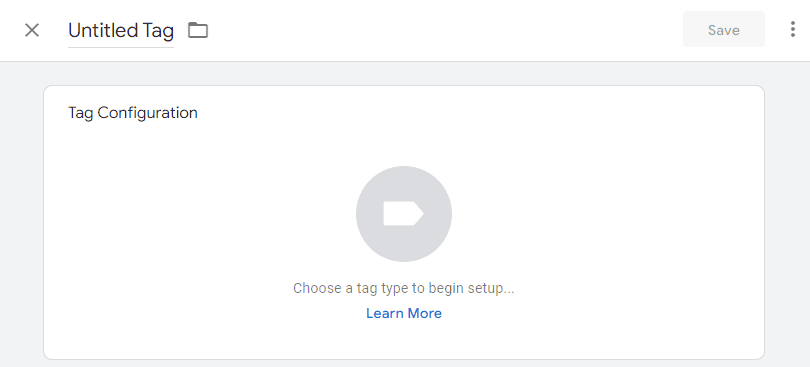
Under Choose tag type, click Custom HTML.

Paste the code.
Nothing will show up in GTM without a trigger for this tag. Since we’re still just testing things out, let’s create a generic trigger that will work on all pages.
Click the Triggering space.
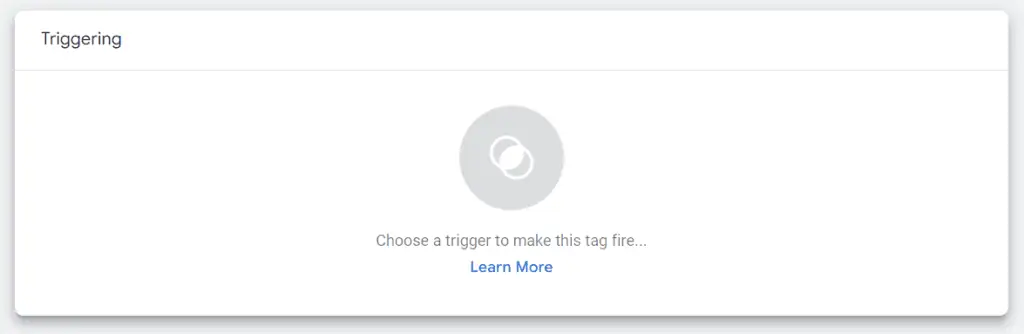
Select All Pages.
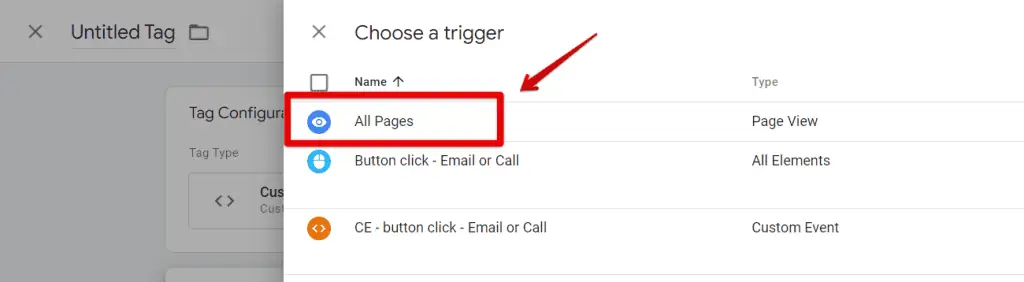
Give your tag a descriptive name.
Click Save.
Testing the Form
Let’s fill out and submit a Ninja Form, to see what happens on the Google Tag Manager side.
First, in your workspace, click Preview at the top right corner of your screen. Insert the URL of the page where your Ninja Form is.
Fill out your form and click submit.
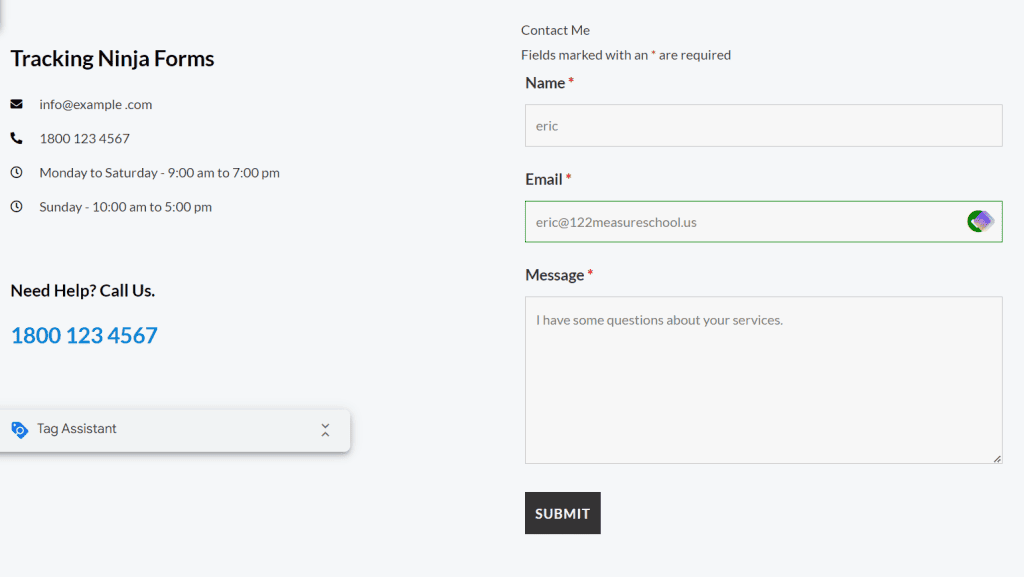
A success message will appear.

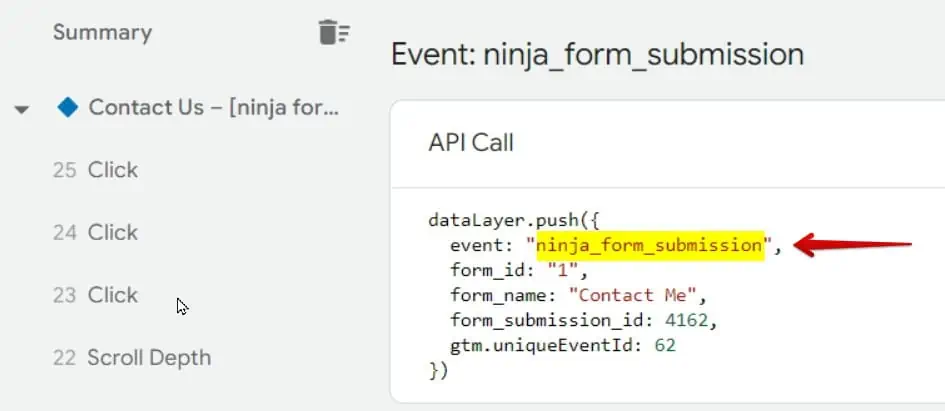
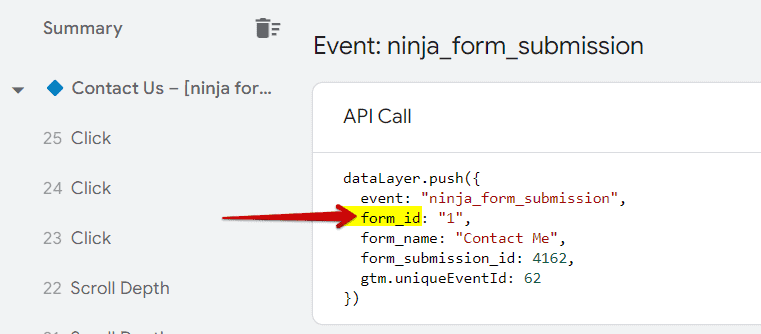
In Tag Assistant, you’ll see the result of the event listener from the code provided earlier. To get more information about the details pushed into the Data Layer form:
- Click the ninja_form_submission in the left navigation.
- Click the API Call dropdown arrow.
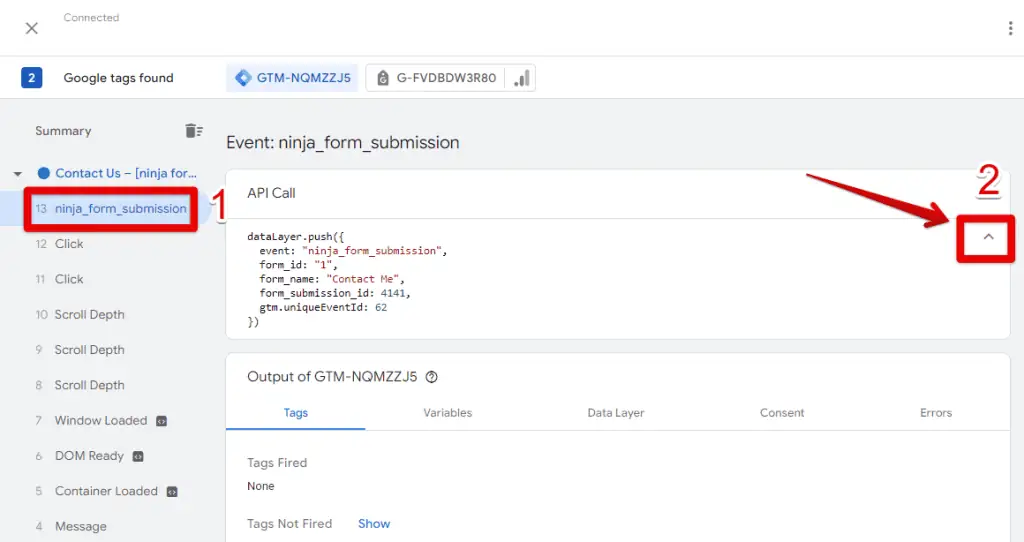
In the API Call section, the event for the dataLayer push is “ninja_form_submission.” This is why you see it in the navigation.
Sending a GA4 Ninja Form Submission Event
Creating the GA4 Tag
First, follow the same steps we did to create the Custom HTML tag, except choose Google Analytics: Tag → New → Tag Configuration → Google Analytics.

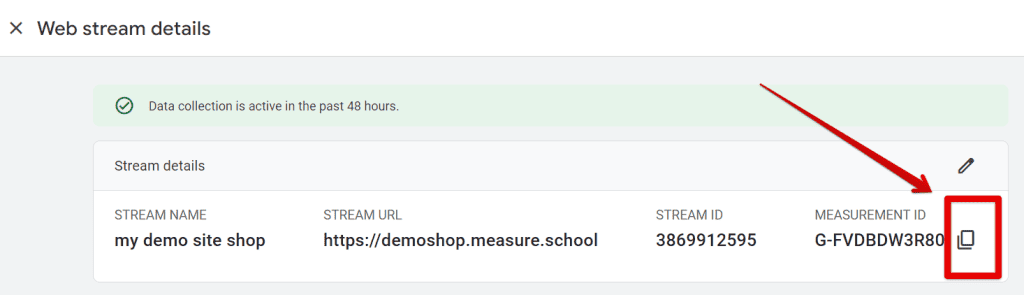
Insert or paste your GA4 measurement ID. In GA4, you can find your measurement ID by going to Admin → Data collection and modification → Data streams.
Then, click your data stream and copy your measurement ID.
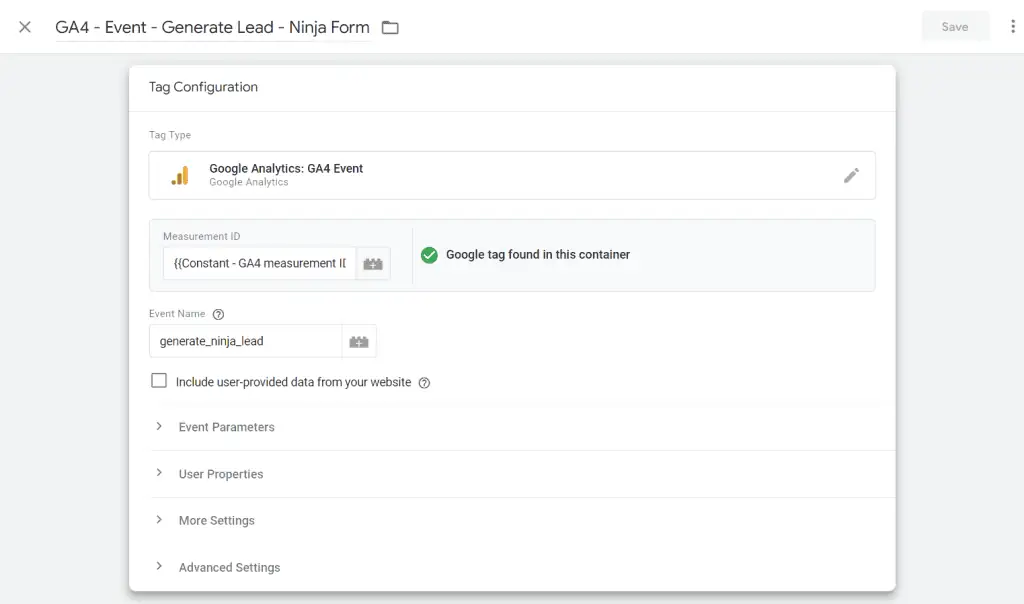
You can follow our naming convention for the Tag name and the GA4 event name.
🚨Note: Generally, the best practice for naming the event for leads form submission in GA4 is generate_lead. This is based on GA4 recommended events.
For this guide, we created the generate_ninja_lead event name just for clarity.
GTM Triggers for Ninja Forms
For our trigger, we’ll need to use a Custom Event trigger type. This is because the ninja_form_submission event appearing in the Tag Assistant’s left navigation is an event that doesn’t show up using standard methods.
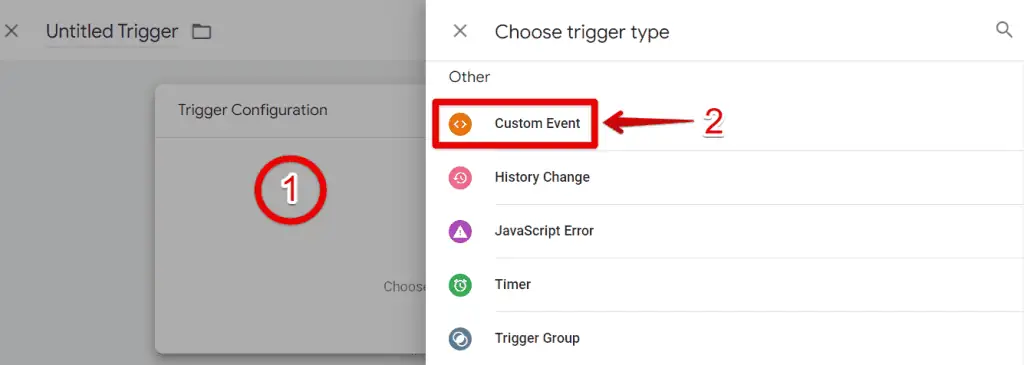
To create the Custom Event trigger, click the Triggering box.

In Choose a trigger, click the plus sign +.

Click the Trigger Configuration box. Under Choose trigger type, click Custom Event.
Here’s how your Custom Event trigger should look:
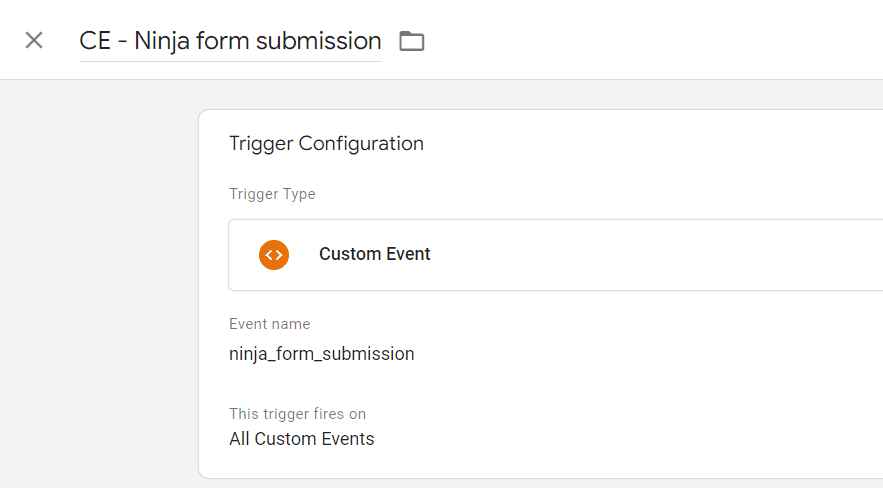
🚨Note: Unlike GA4 event names, here you’ll need to use the exact name pushed in the Data Layer.
You can copy and paste it from the API call we expanded when testing our form using the Custom HTML tag.
Now there are two considerations: the trigger configuration and a Custom Event.
If you only have one type of Ninja form, you can leave your trigger as it is, which says: This trigger fires on All Custom Events.
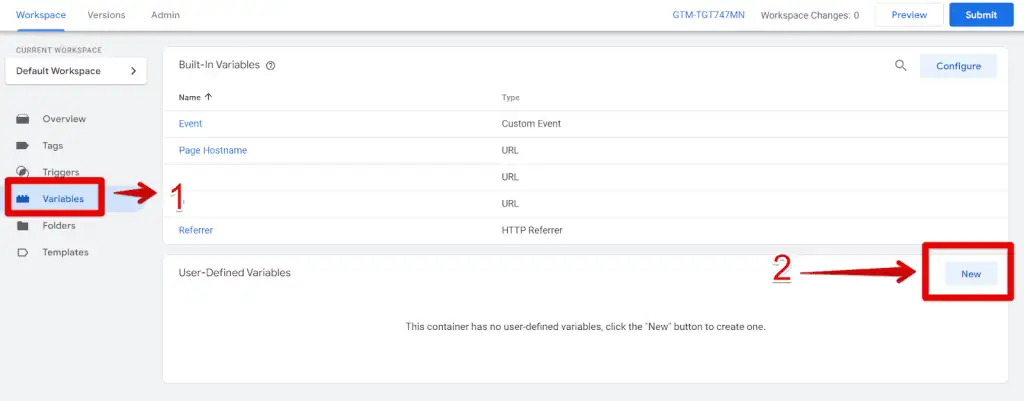
However, if you have multiple Ninja forms, you’ll need to refine your trigger, and for that, we’ll require the GTM Data Layer Variable.
Creating the Data Layer Variable (Optional)
If you need to distinguish between your various Ninja forms, you’ll need to use the Data Layer Variable. Fortunately, the code we use pushes the Ninja forms ID into the Data Layer.
This Data Layer variable will enable us to read that value, which we can then use as a condition for our trigger.
Go to Variables. In User-Defined Variables, click New.
Click the Variable Configuration box. Select Data Layer Variable.
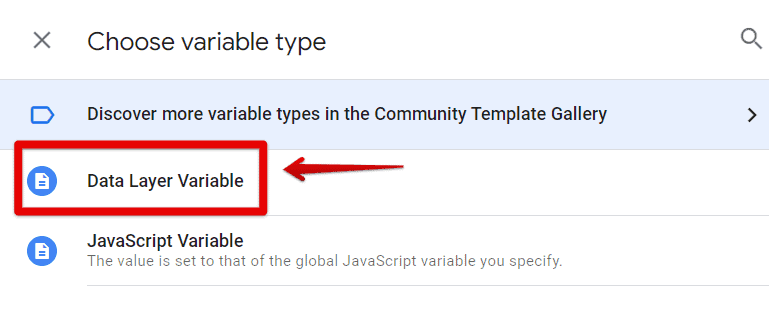
You can follow our configuration.
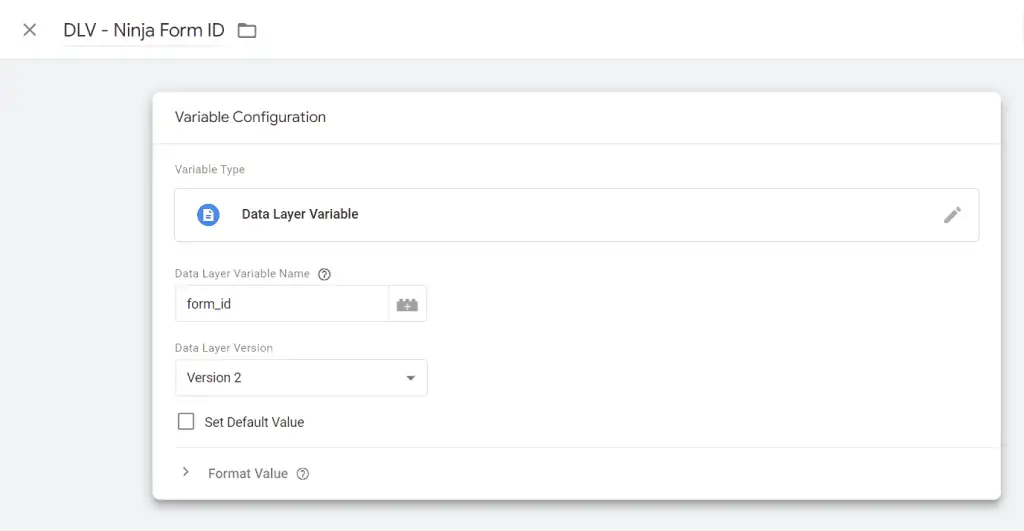
The form ID key is found in your code or the Data Layer.
Now we’ll have to adjust our Custom Event trigger. Make sure to enter the value of your form_ID, which in our case is “1.”
In your Custom Event trigger, click Some Custom Events. Here are the conditions: DLV – Form ID equals 1. As you can see here:
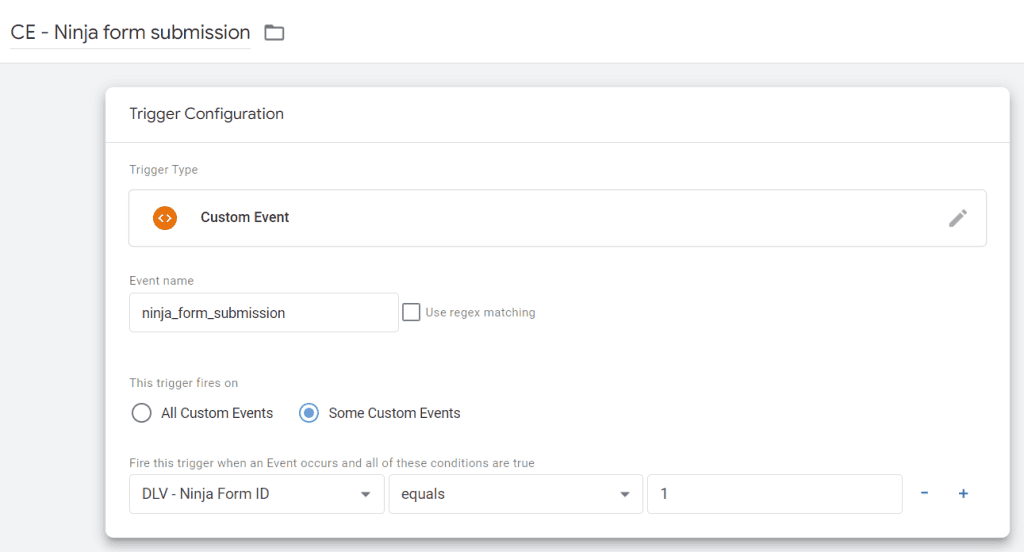
Click the Save button at the top right corner.
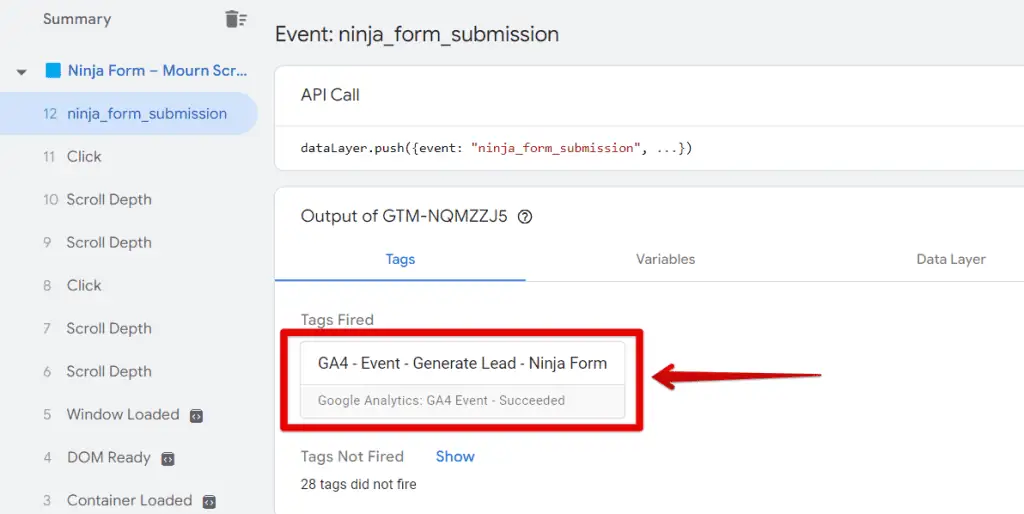
At this point, you can consider the setup almost complete. However, nothing is truly finished until we run some tests. Let’s enable Preview mode again in GTM, so we can fill out and submit the Ninja form.
In Tag Assistant, we can see that our tag fired.
Summary
Ninja Forms are another popular type of form you might need to track someday. In this post, we covered what they are and two ways for Ninja Forms tracking.
The first method is through GA4’s built-in features in Enhanced Measurement, and the second is by using GTM, which we recommend.
Tracking forms can often be trickier than expected, and different types often require different solutions since there’s no one-size-fits-all solution.
To assist you, we shared our approach to tracking Forms with Google Tag Manager and GA4. It is a good idea to check out the section on form tracking using an Element Visibility trigger if, for any reason, what we covered here didn’t work.
How have tracking forms worked for you? Let us know in the comments below.
Sign up to the FREE GTM for Beginners Course...


")
Thank you very much, very useful!
Thanks, glad you liked it !
Can you just set it so we can add our google ads conversion code to the thank you message please, it will save people hours but it doesn’t work for some reason
thanks, very useful really!
Thanks for reading and taking the time to comment.