
Last Modified on January 7, 2025
Are you running ads on TikTok?
As one of the most downloaded apps in the world in recent years, TikTok has become one of the largest social media platforms with audiences spanning over 150 countries.
Running ads here allows you to reach more customers and drive traffic to your business.
If you want to bring your marketing strategy to the next level, you should measure your advertising efforts to understand which ads are generating the most conversions.
This allows you to define your perfect audience and target your ads to them.
Be at the top of your measuring game and set up TikTok event tracking for deeper business insights.
We’ll show you how to configure it easily using Google Tag Manager so that you can stay ahead of the competition and drive more engagements and sales.
Here is an overview of the steps we need to take to set up TikTok event tracking:
- Setup Requirements
- Configuration in TikTok Ads Manager
- Create Your TikTok Pixel
- Create TikTok Events
- Creating a Tag Without Parameters
- TikTok Event Tracking with Dynamic Values
- The Data Layer
- Setting Up a Tag with Dynamic Values
- Verifying Your Implementation
Let’s dive in!
What are the Setup Requirements for TikTok Event Tracking
To set up TikTok event tracking, there are a few things you need to have first.
1. First, you need a TikTok Ads Manager account.

2. Next, you’ll need to determine what events you’d want to track. For this example, we’ll be looking at the contact page of our website.
Specifically, we want to track every time a user clicks on the phone number and email. We also want to count them as a single contact event.

3. Lastly, you’ll need a Google Tag Manager account and have GTM implemented on your website.

If you don’t know how to set up Google Tag Manager on your website, check out our Google Tag Manager Tutorial for Beginners, where we lay down the steps for you to follow along easily.
Configuration in TikTok Ads Manager
After you have all those setup requirements prepared, the first step to setting up TikTok event tracking on your website is to configure events in your TikTok ads manager.
How to set up TikTok event tracking:
1. Go to your ads manager and click on Assets → Events.

In the events manager, we can track events that happen on your app or website.
2. Since we’ll be tracking the contact page on our website, select Manage under Web Events.

3. Here, we’re prompted to install a TikTok pixel first.
Similar to building a house, we need to lay the foundation first before we can start construction. For TikTok event tracking, the TikTok pixel is our foundation.
We have to install our base, the main pixel, first and then create our events.
Create Your TikTok Pixel
So, step number one is to create our pixel.
1. Click on Create Pixel.
We are given two options for how to connect your website to TikTok: the TikTok pixel and Events API. With the TikTok pixel, the implementation is straightforward with step-by-step setup instructions.
Meanwhile, the TikTok events API allows you to send web events from your server directly to TikTok. You’ll have more control over what you share and when you share information, but you must have a server. Moreover, technical development resources are required.
In this lesson, we won’t deal with the events API and instead create a TikTok pixel.
🚨 Note: If you want to learn more about how server-side tagging works, check out our guides on GTM server-side tagging and Cloudflare Zaraz server-side tagging.
2. To provide a name for our pixel, select the TikTok Pixel, then click Next.
Next, we have the option of installing the pixel code manually or setting up web events with the TikTok pixel automatically. Either option will work perfectly fine since we are working with Google Tag Manager.
If you want to set up the pixel code automatically, select Automatically Set Up Web Events via Partner Platforms → Next.
Next, you’ll have to choose Google Tag Manager.
For this tutorial, however, we’ll show the steps to manually install the code, so click Back.

3. Let’s select Manually Install Pixel Code → Next.
Coming up are the event builder and the custom code options for the event setup method. Because we want to implement our events via Google Tag Manager and prefer having control over our tracking, we’ll be selecting the custom code option.
Now, don’t think that you need to know how to code here. You don’t have to be a developer because we’ll look at a great solution later.
4. Select Custom Code → Next.
Our TikTok pixel has now been created. Here, we’re given instructions on how to proceed, starting with installing the pixel code.
The steps we’ll show will differ slightly (particularly in step 2 – pasting the code to the header section of your website) because we’ll be using Google Tag Manager to install our code.
How to Install TikTok Pixel via Google Tag Manager
1. First, copy the pixel code either by clicking on the code itself or the Copy Pixel Code button.
2. Go to Google Tag Manager → Tags → New.
3. Next, we’ll select the Tag Configuration.

4. Choose the Custom HTML tag type.

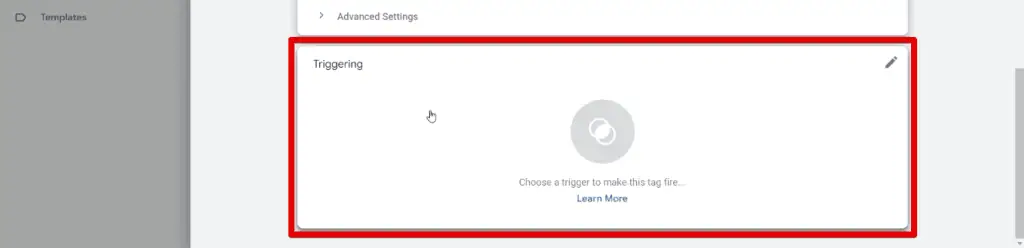
5. Paste the code in the HTML section, then click on Triggering.
The question is when should our tag fire?
6. Since the snippet must be installed on each page of the website, our tag should fire on All Pages.

7. Finally, provide a name for our tag, then click Save.
So, this was step one for setting up TikTok event tracking, our foundation, which is installing the TikTok pixel. Now, it’s time to create our events.
How to Create TikTok Events
1. To start, let’s go back to the events manager and click Next.
Here, we are prompted to follow code instructions to create events.
2. Click on the View Instructions button to be directed to the TikTok documentation page.

Here, we can see various pieces of information regarding the supported standard events and the parameters you can send along with them.
3. In our case, we want to track whenever a visitor wants to contact our business.
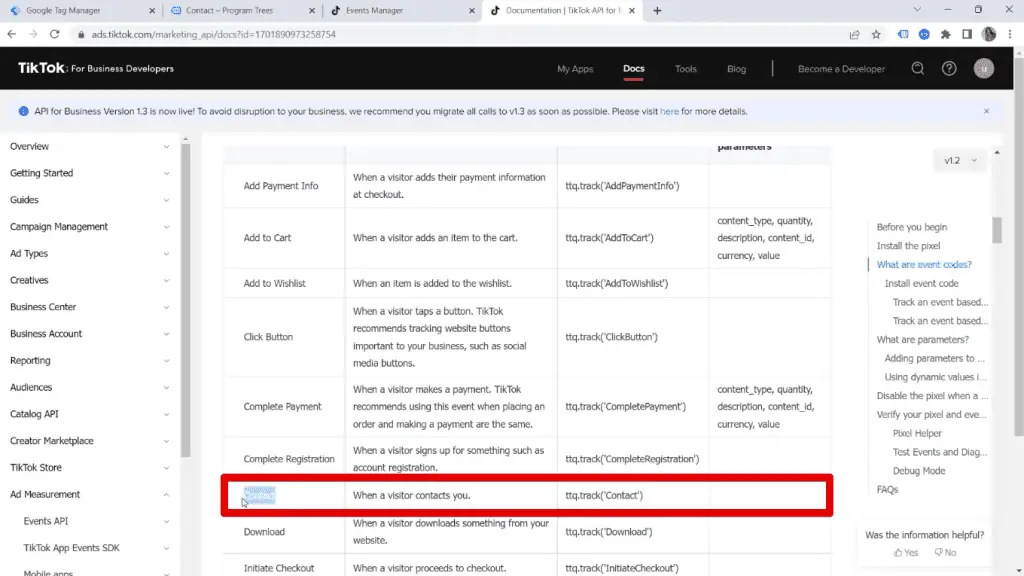
In our list of standard events, we can see the event type, its description, the event code to use, and recommended parameters.
What if you’re not experienced with coding and would rather not deal with it? Don’t worry because we have a workaround that makes this step much easier.
To do this, we have to go back to Google Tag Manager.
Configure GTM Variables
Before we do any implementation, we need to configure the built-in variables available to our GTM container.
Go to Variables → Configure.
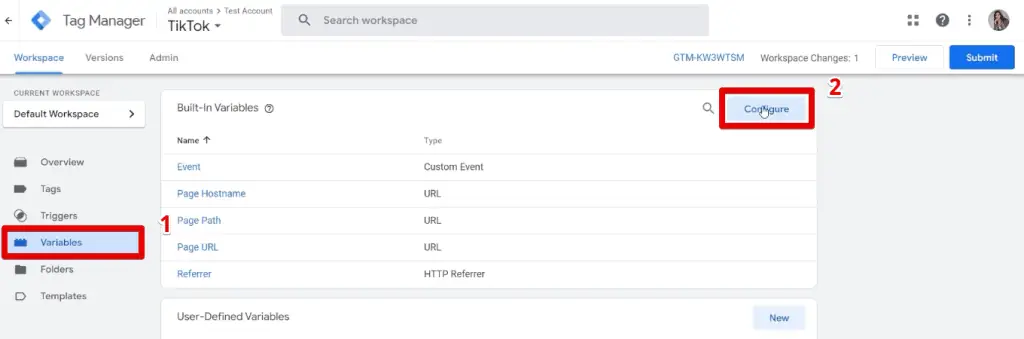
Now ensure that all the click-based variables are activated by selecting each one.

Next, let’s go on and create a trigger.
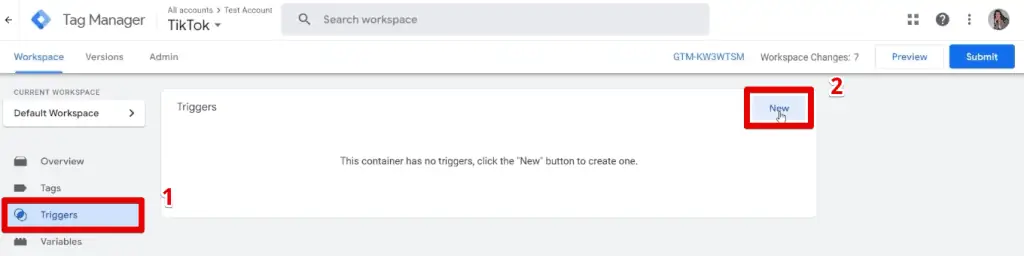
Create a Trigger
For this TikTok event tracking example, we want to track whenever a visitor clicks on either our phone number or email address links. Let’s first create a generic trigger for link clicks.
Go to Triggers → New.
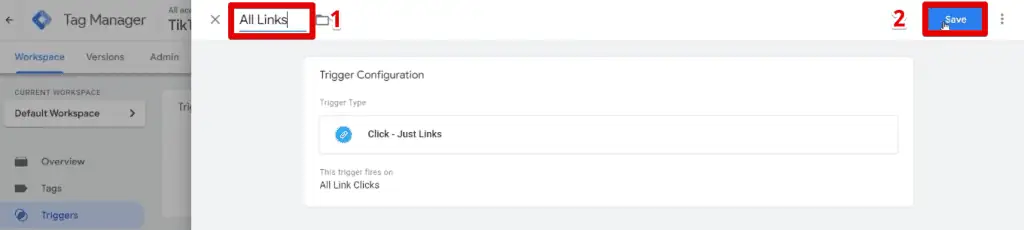
Select Trigger Configuration → Just Links under clicks.

For now, let’s write All Links for the trigger name. We’ll change this later when we make the trigger more specific to our use case. Next, click Save.
Let’s test if we are seeing our click variables when we click on the links on our contact page.
Click on Preview.

Next, click Connect to confirm connecting the Tag Assistant to your website.

Let’s go to the contact page and click on both the phone number and the email.

Let’s go to the Tag Assistant to check if our trigger works and if our variables get populated properly. We should have two subsequent link-click events at the top.
Start with the first Link Click event, number 14, and go to the Variables tab. The Click URL variable should have the text “tel:” followed by our phone number.

Next, go the event number 15, the second Link Click. Our Click URL variable this time would have “mailto:” followed by our email address.

Now we were able to define our trigger specifically to our needs.
Go back to Google Tag Manager and select the All Links trigger we have already configured.

Instead of all link clicks, we only want our trigger to fire on the conditions we specify. In this case, we only want it to trigger when the user clicks on the link to call or message us.
Click on our Trigger configuration and select Some Link Clicks. Set the “Click URL contains tel:” as the condition.

Change the name for this trigger, then click Save.

Next, let’s create a second trigger for email link clicks.
Click on New.

Our trigger configuration should mostly be the same as our telephone link clicks trigger. Our trigger type remains Just Links, and the condition should also be for Click URLs.
The difference is that this time, the Click URL should contain “mailto:” Name this trigger and click Save.

Our triggers are now ready to be used. The next step will be for setting up our tags. We looked at the documentation earlier and saw the equivalent event code for each event type. What should we do if we don’t want to deal with code?
Add a Template to Your Workspace
In our case, Templates come to the rescue.
Go to Templates → Search Gallery for the tag templates.

Look for TikTok and select the TikTok Pixel official template by TikTok.
Click on Add to Workspace.
Since this template is from the community gallery, a window opens showing all the permissions you need to confirm to use the tag template.
Click on Add to proceed.
Our tag template is now ready to be used. We’re now ready to define our tags.
Creating a Tag Without Parameters
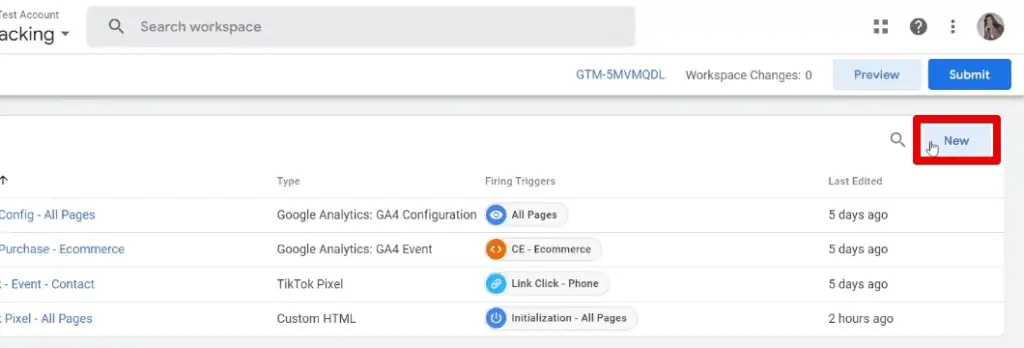
Let’s go to Tags → New.

Select Tag Configuration → TikTok Pixel.
To set up TikTok event tracking with GTM, we will need our Pixel ID.
Go back to our TikTok Ads Manager and click on Complete Setup.
We can then see our Pixel ID in the upper left corner of the window. Copy this value.
Go back to Google Tag Manager and paste the Pixel ID in the space provided. Next, select Contact for our trigger event.
Here, we can see all the different events we can implement for TikTok event tracking. All the events we saw in the official documentation are available to use here.
We’ll skip the advanced matching configurations for now, and take things one step at a time. For this section, we’ll only set up an event without any parameters.
We will have a look at dynamic values in a later section of our tutorial.
Go to Object Properties and select No Contents.

Next, click on Triggering to set our trigger.
We have already made a trigger for both telephone and email link clicks. These can be seen in the trigger list that comes up.

Select either one of these triggers. To add the other trigger, simply click on the + button for the firing triggers.
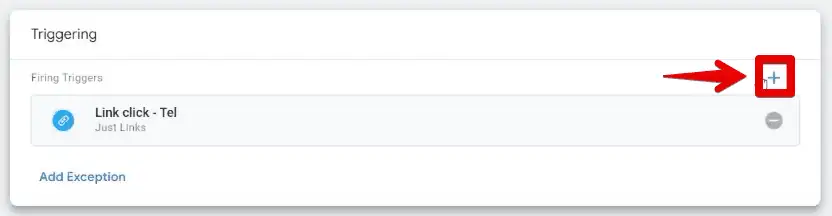
If you add multiple firing triggers, you’ll notice that it is set to the OR condition, meaning the tag will fire for either trigger. Provide a name for the tag, then Save it.

The last thing we need to do to complete our TikTok event tracking setup is to test out our tag.
Test Your Implementation
Before we begin testing, we’ll install the extension called TikTok Pixel Helper.
This extension helps you verify and troubleshoot pixel installation by checking for errors and providing implementation recommendations for your website. Using this extension will help in our TikTok event tracking.
💡 Top Tip: If you want to know about more Chrome extensions that can be helpful to you as a marketer, check out our definitive list of the 11 Essential Analytics Chrome Extensions.
Select this extension in the Chrome Web Store and click Add to Chrome.
Confirm installation by clicking on Add extension.
To access it more easily, go to your extensions and pin the TikTok Pixel Helper.
The TikTok Pixel Helper extension icon should show up in our toolbar.
Let’s go back to Google Tag Manager and click on Preview again.

Once again, go to the Contact page and click on the links to both our phone number and email address. Similar to our test earlier, our latest events should be two link clicks.
Click on the first Link Click event and confirm that our TikTok event tag has been fired successfully.

We should also check the second Link Click event to confirm that our email address link click trigger works. If it is working correctly, our TikTok event tag should also show under tags fired.

This is a good sign that we’ve set up our events correctly. As another layer of assurance, let’s go back to our website and have a look at the pixel helper.
Click on the TikTok Pixel Helper extension. Here, we have the base pixel Page View and two Contact events. Click on one to expand. Notice that a warning message shows up.
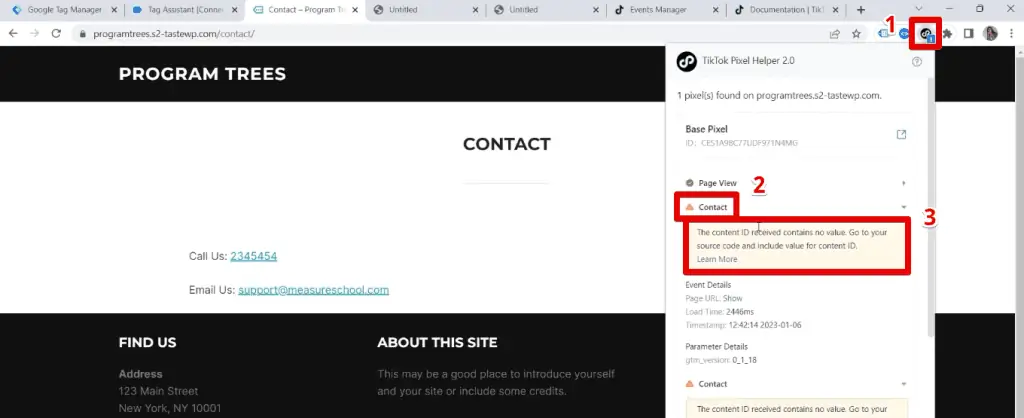
This notification tells us that the content ID received contains no value. Should we be worried that we got this message?
If you remember, we selected the no contents option in the Google Tag Manager. We intentionally sent this event without any parameters yet, so for now, this is perfectly fine. If you’re following along and you see this message, you can just ignore this warning.
Our event tag seems to be working properly. Let’s go back to GTM and publish our tags live on our website.
Click on Submit.

Add a version name, then click Publish.

The final and most definite test to see if our TikTok event tracking is working correctly is to go back to our TikTok events manager and see if our events are being tracked there,

Don’t worry if you’re not seeing events here immediately. It might take a while for your events to be recorded, but seeing your events here is the most definite confirmation that you’ve successfully implemented TikTok event tracking.
TikTok Event Tracking with Dynamic Values
Let’s dive deeper into TikTok event tracking and take it up a notch by introducing dynamic values. Tracking events with values on TikTok opens up a whole new range of possibilities for optimizing your campaigns and understanding user engagement.
Whether you’re an advertiser, marketer, or business owner, we’ll help you set up your tracking correctly so that you can make data-driven decisions.
Why Dynamic Values?
Let’s look at an eCommerce store with multiple products with varying prices.

If we continue with the process before, not only do we need to account for the different products and their prices, but we also need to consider different combinations with varying numbers of products.
With this amount of consideration, we can no longer track those values statically. We want to optimize our campaigns by sending additional information that better describes our products.
How is this doable technically? Let’s begin with the documentation.
Checking TikTok Documentation
Again let’s look at the TikTok documentation for standard events and parameters.

Here is where you can find information about standard events. Scrolling down a bit, you’ll see a list of supported standard events. Here, you can also see a description of the event, the recommended parameters, and the event code to use.
For example, let’s look at the Add to Cart event,

Here we can see that this event should fire when a user adds an item to the cart. We can also send some additional parameters, which are the data points that describe our event better. These include the content type, quantity, description, content ID, currency, and value.
Next, we can also look at an example of the snippet of code that we should install to implement TikTok event tracking with dynamic values.
Go to the About Parameters section. Next, click Setting up dynamic values with custom code. The snippet of code is right below the header.

When we implement this code on our website, we should change the corresponding values of the parameters such as content ID, type, name, value, price, and currency.

A developer usually handles this step because it involves installing this snippet in the source code. We’ll look at a way around this so that you can set it up on your own.
The Data Layer
Many businesses with an online store that uses GA4 usually also have eCommerce tracking implemented. With this implemented, we can use the GA4 data layer to send events to TikTok.
💡 Top Tip: If you haven’t already, check out our guide on How to Set Up Google Analytics 4 eCommerce Tracking to implement eCommerce tracking on your website.
It might be a little confusing but stay with us. We’re getting there!
A data layer is a JavaScript object that passes the information from your website to Google Tag Manager. Let’s look at an example.
Here, we are looking at the Google documentation of the data layer.

This code snippet adds information to the data layer. Key-value pairs define a data layer object. These are the lines in the middle. In our example, this information relates to books. We can see the book category, title, and author.
In our case, we should have the information related to our items.
The data layer lives in the background. It’s impossible to see anything directly on our website. This little helper does everything behind the scenes and passes the data to GTM.
With the help of the data layer, we can set up our tracking. The developer usually implements the data layer, but we can also do it with the help of a plug-in.
We have discussed the step-by-step procedure for using the GTM4WP (Google Tag Manager for WordPress) Chrome extension in our GA4 eCommerce tracking guide, so check it out if you also use WordPress for your online store.
GA4 eCommerce Data Layer
Once you have GA4 eCommerce tracking implemented, you should also have your data layer in place. Let’s have a look at it together.
Go to Google Tag Manager and click Preview.

Provide the URL of our website, then click Connect.

Now, let’s make a test purchase. Add any product to the cart, checkout, and complete the order.
Let’s go to the Tag Assistant and see what happens. We have the purchase event, and it fires whenever a user purchases.

If we look at the API Call, we can see the GA4 data layer we can use.

Let’s look at how we can reuse this information for our TikTok event tracking.
Setting Up a Tag with Dynamic Values
Let’s go back to GTM and have a look. Remember that we used the TikTok template for our previous tag, and we’ll use it again to set up our event.
1. At the Tags section, click New.
2. Next, click Tag Configuration.

3. Select TikTok Pixel.
Next, we need to provide the Pixel ID. We’ll show you now another way to obtain this value.
4. Go to the TikTok events manager by clicking Tools → Events.

5. Under Web Events, click Manage.

6. Here, we can see our pixel. Copy the pixel ID below.
7. Go to Google Tag Manager and paste this ID.
8. Next, select the CompletePayment trigger event.

If we click on the drop-down menu, we can see a list of TikTok events we can track. Since we want to track a product purchase, we will select the complete payment event.
9. The next option to note is the Advanced Matching Configurations.

With advanced matching, you can hash customer information with pixel events. It can help you attribute more conversions and reach more people.
Hashing customer data is extremely important, but we will not cover this in this tutorial as we will not collect data about our users.
The TikTok pixel template is smart enough to understand that we use the GA4 data layer. It can translate those values into the correct format, so TikTok will automatically collect those GA4 event parameters.
10. Open the Object Parameters section. Here, check the Use Google Analytics E-commerce Data Layers option.

You will still see terms related to Universal Analytics like – Enhanced eCommerce and Standard eCommerce.
However, when we hover over the question mark icon and click Enhanced E-Commerce, we redirect to the official GA4 documentation.
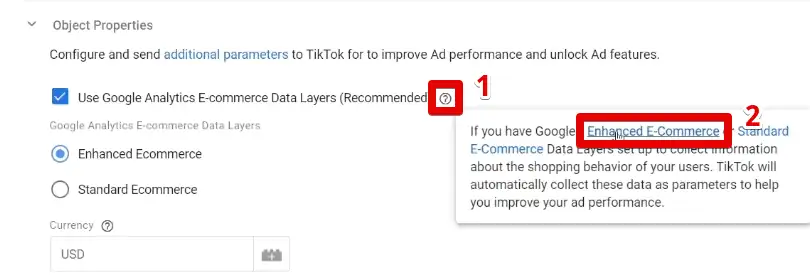
We’ll only focus on GA4 in this tutorial. We will no longer show the solution for Universal Analytics because, unfortunately, UA is sunset. It is time to say goodbye to Universal Analytics.
Don’t be surprised if they change this template to remove the UA options. We’ll probably see only one option in the future, an additional third option for GA4 eCommerce, or no change.
We are also curious how this template will change, if at all.
11. Finally, there is one more setting that we should check. Go to Advanced Settings → Tag Sequencing.

In Germany, there is a famous expression that goes “Ordnung muss sein” (there must be order). Order is essential for TikTok event tracking, and we must ensure that our tags fire in the correct order. We want the base to fire first, then our event next.
12. Select the option Fire a tag before Untitled Tag fires. Next, select the base TikTok pixel tag.
Next, we’ll provide the trigger condition.
Configuring a Trigger
1. Click Triggering.

So, when should we fire our tag? Remember that we made a test purchase that triggered the purchase event. We can use this event as the trigger for our new tag.
2. Select the Trigger Configuration.

3. Select the Custom Event trigger type and type purchase for the event name.
4. Provide a name for the trigger, and then click Save.

5. Provide a name for the tag and click Save.

We have one last setting to double-check for dynamic TikTok event tracking because we used tag sequencing.
6. Select the base TikTok pixel tag.
7. Here, select the Once per Page tag firing option.

Verifying Your Implementation
For our last step, we will review the implementation again.
We have to make another test purchase. But first, do you remember that you can verify your implementation with the TikTok Pixel Helper Chrome extension?
This time, we want to show you how to do it directly with the TikTok ads manager.
In your TikTok ads manager account, click My Base Pixel.
Since we want to test our events, go to Test Events.

We need our website URL, so let’s go to our website. On the address bar, select and copy the URL.

Paste the URL in the indicated field, then click Generate QR Code.

Here, we have the QR code that we should scan.

Next, pull out your mobile phone to scan this QR code.
However, what if we want to continue our testing with our browser? How can we scan it?
We can easily install this QR Code Reader Chrome extension.
💡 Top Tip: Check out our updated Top 10 Chrome Extensions for Digital Marketers list to discover more extensions you can use for digital marketing.
While we’re still on this page, click on this extension. It can take some time to process. Once it’s done, we will have the URL for testing our events. Copy this URL.

Go to the preview tab and paste the URL in the address bar.

Now, we have the Google Tag Manager preview with the testing mode in TikTok.
To verify that we have enabled TikTok’s testing mode, check the URL for the tt_test_id query string containing the TikTok test ID.
🚨 Note: Query strings or URL parameters are tails added onto URLs that carry information and communicate with tracking tools to enhance your data. UTM parameters in GA4 are specialized query strings that help identify the campaign that refers traffic to a website.

Now, let’s make a test purchase. Add a product to the cart and place the order.
Back to the events manager, we can see the Complete Payment event. Click on it to see the parameters we sent along with this event.

Here, we have the contents, currency, and value. If you see this information, it means you have set everything up correctly.
As a final check, let’s also check the Google Tag Assistant.
We have the purchase event, and our TikTok event tag fired successfully.

If you see all this data, it means that you have managed to set up your TikTok event tracking successfully.
To save our changes live on our website, we need to publish our GTM container.
Go back to Google Tag Manager and click Submit.

We recommend providing a Version Name. Finally, click Publish.

There we have it! We have successfully configured TikTok event tracking with dynamic values.
FAQ
How do I configure events in TikTok Ads Manager?
To configure events in TikTok Ads Manager, go to your ads manager and click on Assets → Events. Then, select Manage under Web Events. Install the TikTok pixel and create your pixel to lay the foundation for event tracking.
How do I create a TikTok pixel?
To create a TikTok pixel, go to the TikTok Ads Manager, click on Assets → Events, and select Manage under Web Events. Then, click on Create Pixel and choose the TikTok Pixel option. Follow the instructions to install the pixel code via Google Tag Manager (GTM) or manually on your website.
How do I set up TikTok event tracking using GTM?
After creating the TikTok pixel, you can set up event tracking using GTM. Copy the pixel code from TikTok Ads Manager and create a new tag in GTM using the TikTok Pixel tag configuration. Paste the pixel code, select the trigger event, and configure the tag settings. Test the implementation using the TikTok Pixel Helper extension and publish the tags live on your website.
Summary
Great! So, those are the steps to create your TikTok event tracking setup. We started with creating a TikTok Pixel, then made a TikTok base pixel tag in GTM, set up our triggers specific to our use case, and then used the tag template to create the event tag.
Next, we looked at how to set up TikTok event tracking with dynamic values. We discussed leveraging the data layer for eCommerce events and setting up a tag with dynamic values.
If you want to be notified of errors on your website, check out our guide on How to Receive Slack Notifications for 404 Errors on your Website.
We hope you managed to set up your TikTok event tracking correctly. What events would you track on your website? Do you have any specific TikTok pixel setup topics you want us to discuss? Let us know in the comments below!


")