
Last Modified on June 27, 2024
Whether you’ve been using web analytics tools for a long time with Universal Analytics (UA) or are just recently starting in the online world, you need some analytics tool to analyze your website’s performance.
Google’s tools are one of the most frequently used because of the wide availability of their free versions. Google Analytics 4 is Google’s latest addition to its analytical tools.
If you haven’t installed GA4 on your website, then now is the time to do so because July is only a few months away when UA will go away for good (for free users).
The sooner you do it, the more data you will have available in your GA4 account to analyze later on because GA4 is inevitable unless you’re planning to move to other analytical tools.
There are several methods of installing GA4 on your website but using Google Tag Manager (GTM) makes things easier. You can install Google Analytics 4 with Google Tag Manager even if you’re entirely new to GTM by following the steps in this post.
Here’s the overview of what you’ll learn below:
- Why Should I Use GTM to Install GA4
- Creating a Google Analytics 4 Property
- Creating a Google Tag Manager Account
- Steps to Install Google Analytics 4 with Google Tag Manager
- Verifying GA4 Tracking
Let’s install Google Analytics 4 with Google Tag Manager and start getting all that data to analyze.
Why Should I Use GTM to Install GA4
Before we get to the how part, let’s go back to the blackboard and discuss why it’s a good idea to install Google Analytics 4 with Google Tag Manager.
Using a tag management system (TMS) like GTM helps to simplify the implementation of other tools like GA4.
All you have to do is to install the GTM container code on your website and then use TMS to install the GA4 tracking code and send events with different parameters.
It also gives you more flexibility because you can easily add or remove tags without changing your website’s code every time. This takes away the dependency on a developer at least for the simple tags.
With GTM, you can send custom events with any custom parameters more easily and you can, later on, add them as custom definitions in GA4 to view in reports.
This is one of the major reasons which can be easily overlooked – centralized tag management. GTM will allow you to manage all your tags in one place, nice and organized.
This might not seem like a lot when you just have a couple of tags, but with time, when you add more tracking to your website, you’d be so happy to see and manage them all in one place.
Lastly, one of my favorite features in GA4 is the DebugView and it lights up when you use GTM’s Preview Mode to check what data you’re sending to GA4 in real-time.
This helps us to catch any mistakes before we go ahead and implement our tracking, which saves us from polluting the data and gives us more confidence in what we see in GA4.
So there it is! Several good reasons why we should install Google Analytics 4 with Google Tag Manager.
Creating a Google Analytics 4 Property
You can’t install Google Analytics 4 with Google Tag Manager unless you create a GA4 property first.
Assuming you already have a Google Analytics account, click on the Admin cog in the bottom left → Click on the blue Create Property button under the second column.

This will open a GA4 property setup interface where you have to name your property, select the reporting time zone, and choose the currency of your business. These settings can be changed later on.

The next step is where you provide more information about your business, i.e., industry, business size, and how you intend to use GA4.
All of this info isn’t mandatory, but it helps Google to tailor your experience by providing relevant benchmarking insights to compare against.

After clicking on the Create button, you will be greeted with a screen where you’re prompted to choose your data source, aka data stream, i.e., Web, Android App, or iOS App.
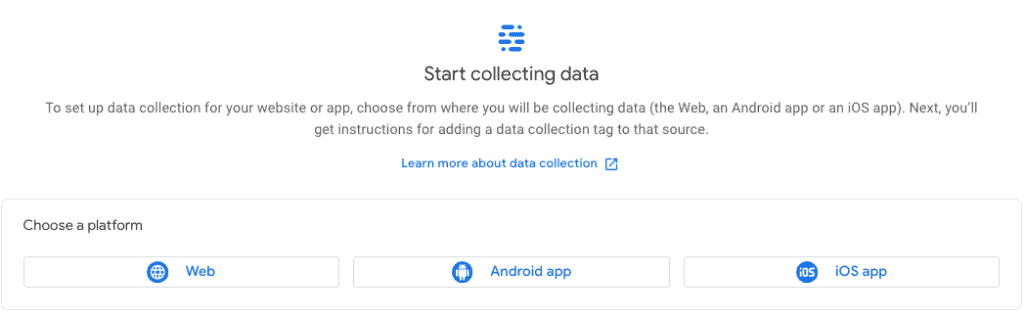
After you select Web as your data stream, you have to provide some information about the website which is mainly the URL and Stream name, as well as configure Enhanced measurement settings, and click on the Create stream button.
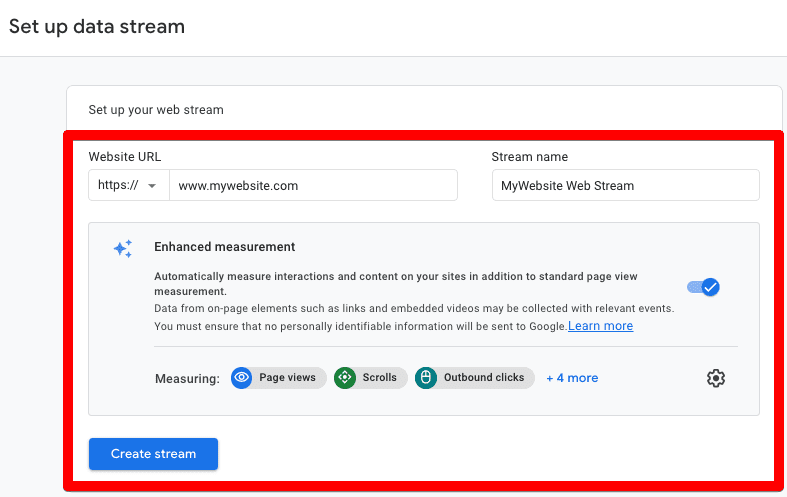
Once you create the data stream, you can see the Measurement ID that we can use to set up tracking on the website. You can also edit the Stream Name and URL that we entered in the above step, by clicking on the pencil icon on the top right.

If you scroll down further on the same page under Events, you can find settings for Enhanced measurement, Modifying Events, and creating Custom Events.

Under the Google tag section, you can configure cross-domain linking, internal traffic, and unwanted referrals, along with other settings, and find helpful instructions on how to implement the tag directly without GTM (not something we’ll cover in this blog).

Finally, you can now see the newly created GA4 property with the web stream when you click on Data Streams under the property column of the admin panel. You can always come back and change stream details and/or the settings.

So now that one part of this puzzle is solved, we can head to GTM to complete the process there.
However, check out this guide if you want to delete an account in GA4.
Creating a Google Tag Manager Account
You can skip this section if you already have a GTM account or container you want to use to install GA4 and move to the next section – Steps to Install Google Analytics 4 with Google Tag Manager.
Let’s log in to Google Tag Manager and click on the Create Account button on the right side.

This will open the account setup interface that will have two parts:
- Account setup with Account name and country.
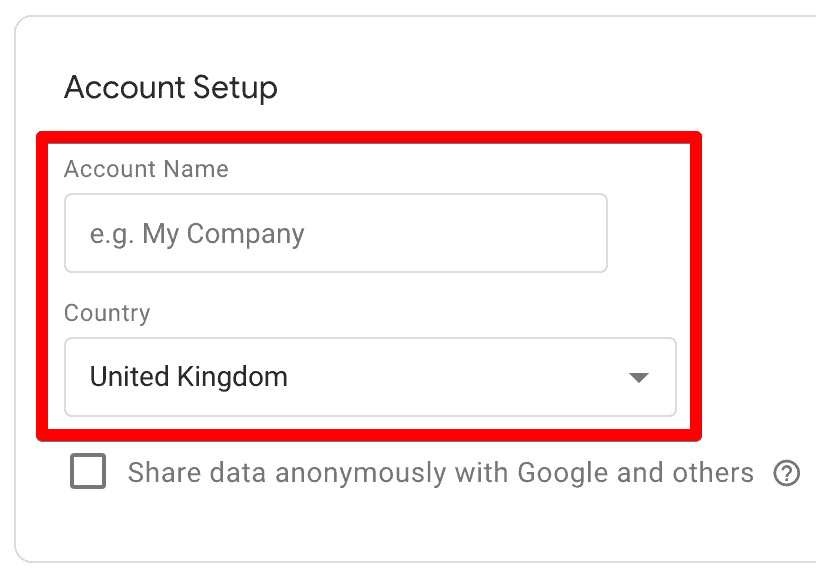
- Container setup with Container name and Target platform (Web, iOS, Android, AMP, and Server).

Once you click on the Create button and accept the terms of service agreement, your account will be created and you will be given the GTM code snippet that needs to be installed on your website like below:

You can also see the GTM container ID similar to GA4’s measurement ID as highlighted in two places in the above screenshot. You can find this ID in several other places in your GTM account.
This is the only time you will be installing a code directly on the website because from here onwards, you can use GTM to manage different tracking tools on your website.
If you already have a GTM account, then you can go with creating a container route by clicking on the 3-dot menu on the right and selecting the Create Container option.

Notice how the same Container ID is also mentioned under the account details.
Once inside your GTM container, here’s how your newly created account/container will look, again, with the container ID at the top.

Steps to Install Google Analytics 4 with Google Tag Manager
Now that our GA4 property and GTM account are set up, let’s install Google Analytics 4 with Google Tag Manager. Here are the setup steps:
- Click on the Tags on the left side.

- Click on the New button on the right side.

- You will now see a Tag configuration interface where you can name the tag, choose the tag type, and select the trigger, i.e., when this tag fires.

- Click on the tag configuration section and choose the Google Analytics: GA4 Configuration tag type from the list.

🚨 Note: The GA4 configuration tag has been replaced with the new Google Tag.
- Enter the GA4 Measurement ID. For this example, we’ll use G-LT3CJ5KKL6, which is for the GA4 property we created above.

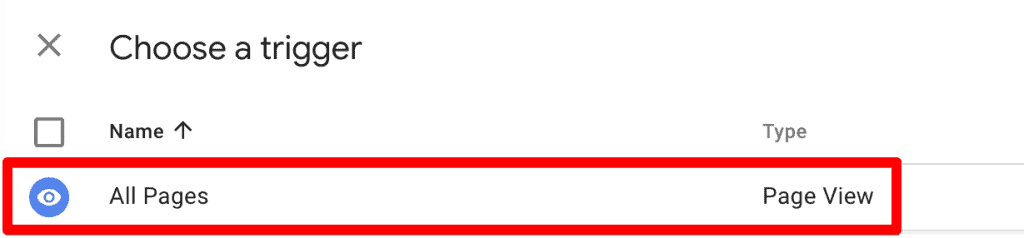
- Now, let’s set up the trigger, i.e., when we want to send the page view events to GA4. For the configuration tag, it will be every time someone visits our website, so hit All pages and Save the tag.
- Click on the Submit → Publish button. It’s a good idea to give a Name or add any description here, so anyone can look back and understand what changes were made. Then, click on Continue.

That’s it! You’ve set up the GA4 tag. You will now see a confirmation screen and once you close it, you will again find the summary of tags you published along with details.

But how do you know if your GA4 tracking is set up properly?
Verifying GA4 Tracking
There are several ways to verify your GA4 tracking, but we’ll look at three of them.
GA4 Account
The quickest way is to simply log into your GA4 account to see the data, though, it can take up to 24 hrs for the data to show up in your account.
If you go to the Home report, then you will see the confirmation that tracking is active.

GTM Preview Mode
This option lets you utilize GA4’s powerful DebugView feature and is more useful for verifying any specific events, their parameters, and values versus only GA4’s tracking code. It’s good to know there’s still that option. Here’s how to use it:
- Click on the Preview button at the top right.

- Enter your website’s URL in the new tab that opened and click on Connect. This will open another tab on your website.

- You can now see that the GA4 Config tag we installed is firing, as well as mentioning how many times. You can also click on the tag to see more details.

- In GA4, go to Admin → DebugView and you will see events lighting up there, as well.

Clicking on these individual events like page_view will give you more info about them, but that isn’t important to verify GA4’s tracking code.
Google Tag Assistant Extension
You can install Google’s tag assistant extension and quickly see if your installed GA4 tag shows up or not. The good thing is, this extension also shows any other Google products that are installed on your website through GTM.
You can find the GA4 tracking code under the Global site tag (gtag.js) which matches what we added in the GTM tag. You can also see the GTM container ID through which we installed the GA4 tag.
Don’t mind the blue icon color icon in front of the GA4 tag, as it is a known issue with the extension. There are also other extensions that you can use to verify if the GA4 code exists on your website.
FAQ
How do I create a Google Analytics 4 property?
To create a GA4 property, you need to access your Google Analytics account and follow these steps:
1. Click on the Admin cog in the bottom left corner.
2. Under the second column, click on the “Create Property” button.
3. Follow the setup interface to provide property details, such as property name, reporting time zone, and currency.
4. Optionally, provide information about your business to receive relevant benchmarking insights.
5. Choose the data source (Web, Android App, or iOS App) and provide relevant details.
6. Configure settings for enhanced measurement, events, and Google tags.
7. After creating the data stream, you’ll receive the Measurement ID needed for setting up tracking on your website.
How do I install Google Analytics 4 with Google Tag Manager?
To install GA4 with GTM, follow these steps:
1. In GTM, click on “Tags” on the left side.
2. Click on the “New” button on the right side.
3. Name the tag and choose the tag type as “Google Analytics: GA4 Configuration.”
4. Enter the GA4 Measurement ID obtained from your GA4 property setup.
5. Set up the trigger to fire the tag on all pages.
6. Save the tag, submit it, and publish the GTM container.
7. Verify the GA4 tracking using methods such as checking the GA4 account, GTM Preview Mode, or using the Google Tag Assistant extension.
How can I verify if my GA4 tracking is set up properly?
There are several ways to verify GA4 tracking:
1. Check your GA4 account: Log in to your GA4 account and go to the Home report. You should see a confirmation that tracking is active.
2. Use GTM Preview Mode: Click on the “Preview” button in GTM, enter your website’s URL, and connect. Check if the GA4 Config tag is firing and view details in the DebugView of GA4.
3. Use Google Tag Assistant extension: Install the Google Tag Assistant extension, visit your website, and see if the GA4 tracking code appears under the Global site tag (gtag.js) section. The extension also displays the GTM container ID used for installing the GA4 tag.
Summary
Now you know how to install Google Analytics 4 with Google Tag Manager.
While there are other methods to install GA4 on your website, you have learned how GTM can be more efficient in the long run.
Finally, we also looked at three methods of verifying the GA4 tracking on the website. Ideally, one of them will do the job, so don’t worry about the other two.
If you’re interested in how you can debug any tracking issue, have a look at our overview of GA4’s DebugView feature.
Let us know in the comments below if you’ve used GTM to install GA4 and how it has helped you. We are curious!


")