
Last Modified on January 7, 2025
Would you like to see information from your eCommerce store in your GA4 reports?
You are running your eCommerce store and everything seems to be working well. You would like to know how users are interacting with your products or services, but have no idea how to do it or where to start.
This may seem like a mystery, but there is no need to worry as there is a way of doing it with the help of Google Analytics 4 and Google Tag Manager.
Sending eCommerce information to GA4 is probably the best customization you can do to your tracking. There will be some technical implementation involved, but rest assured that we will make it understandable.
In this tutorial, we’ll show you the proper Google Analytics 4 eCommerce setup to implement eCommerce tracking on your purchase pages.
Here is an outline of what we’ll cover:
- eCommerce Report Overview
- What is an eCommerce Interaction?
- What is a Data Layer?
- How to Deploy the Data Layer on Your Website?
- Sending Data to GA4
- Purchase Tracking Example
Let’s dive in!
eCommerce Report Overview
First, let’s look at a sample GA4 merchandise store account so that we get an idea of what data we should expect to see when we implement Google Analytics 4 eCommerce tracking.
Go to your Google Analytics account → Reports → Monetization → E-commerce purchases.
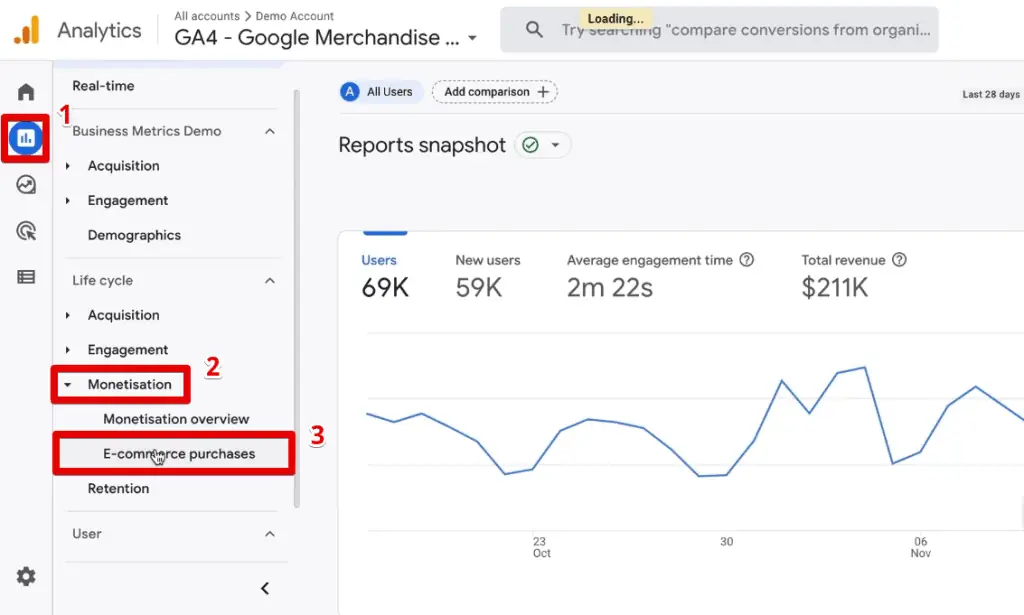
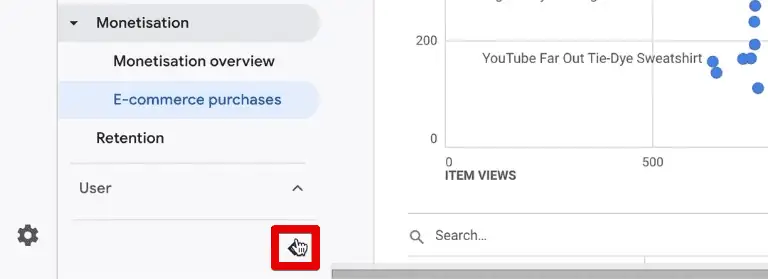
To see more details in our report, click on the < arrow at the bottom-right corner. This will minimize the reports list pane.
Scrolling down a bit on our report, you’ll see a table showing various eCommerce information on the products we have in our store.
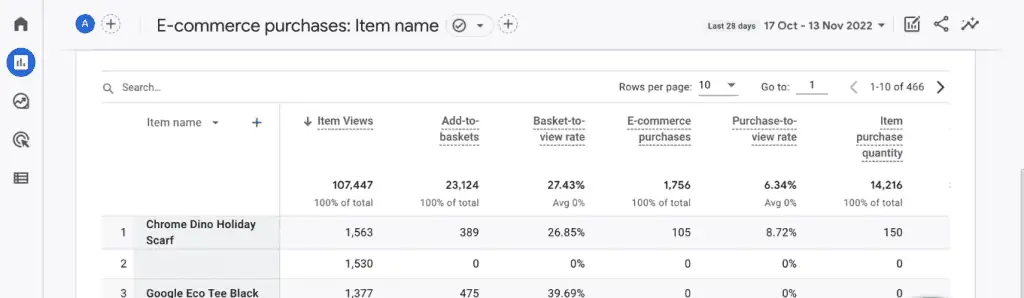
We have information about how often a product was viewed, added to the basket, and purchased. There are also other metrics like the purchase-to-view rate.
This is similar to a conversion rate when you implement Google Analytics 4 eCommerce tracking correctly onto your website.
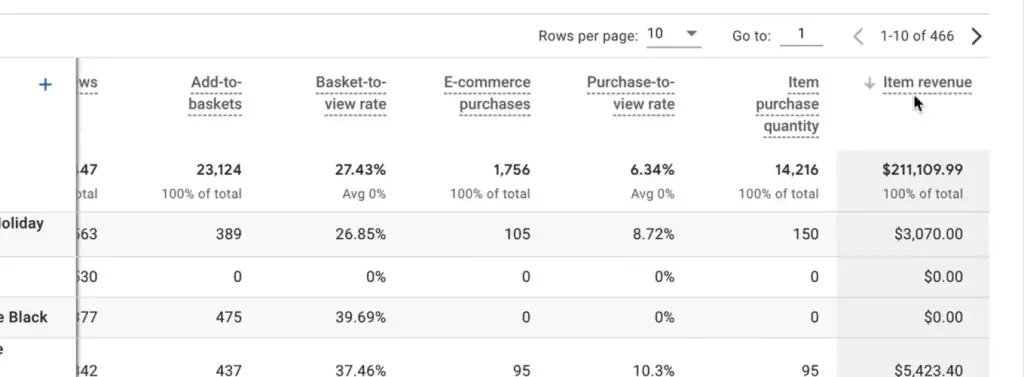
Scrolling across the end of the table, we can also see the item revenue.
This information and the whole e-commerce purchases report are not available by default.
We need to do a bit of implementation with the help of Google Tag Manager to get information like this into your GA4 account.
What is an eCommerce Interaction?
Let’s get started in implementing Google Analytics 4 eCommerce tracking.
First, we need to be aware that an online store has different interactions that are important to Google Analytics.
If you want to view a product list or a specific product in more detail, then you’ll go to a specific product page by clicking on the product. This is an example of an eCommerce interaction.

Other eCommerce interaction examples include clicking on Add to cart, checkout, and completing a purchase. All of these are interactions that Google Analytics would like to know so that it can build these reports for you.
By default, however, this information is not available and there is no quick setting that will allow Google Analytics to understand your website and pull eCommerce data. You need to tell GA this information so that it has the data available to build the report.
How do you make this data available in Google Analytics 4? You build a data layer.
What is a Data Layer?
If you don’t know what a data layer is all about, going to Tag Assistant can provide us with a hint.
On the summary step or most steps in general, you’ll see a Data Layer tab.
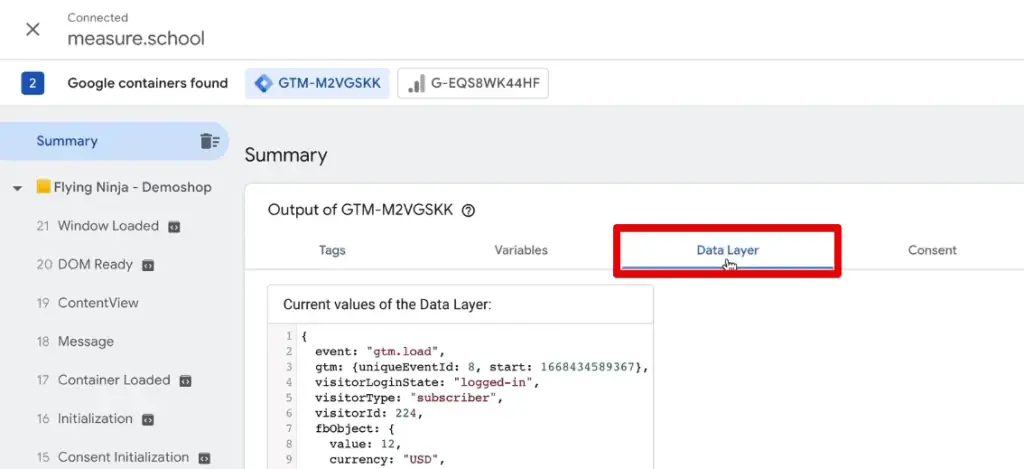
Here is what the data layer looks like:
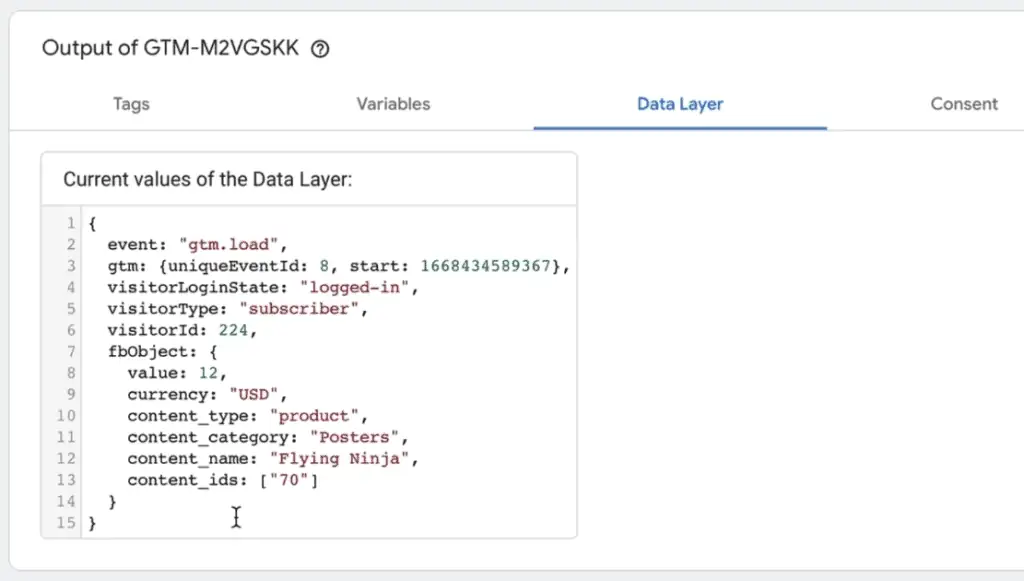
This is a layer that holds various pieces of information and is separate from what the user sees on your website. Looking at our example, the user is a logged-in subscriber.
There is also a Facebook object where we have data on the product- its name, category, price, and ID.
While this information is useful, this is not the specific information that we would need for GA4. So, what is the Google Analytics 4 eCommerce information that we need?
Look no further than Google’s Measure eCommerce documentation.
This page contains detailed instructions on how we can use Google Analytics 4 for eCommerce tracking. Specifically, the implementation section provides details on what a typical eCommerce implementation looks like for various actions.
Looking at each action shows an example of how we should format the Google Tag Manager DataLayer with the correct parameters that can be used inside GA4.
Among these, probably the most important one is the Make purchases or refunds.

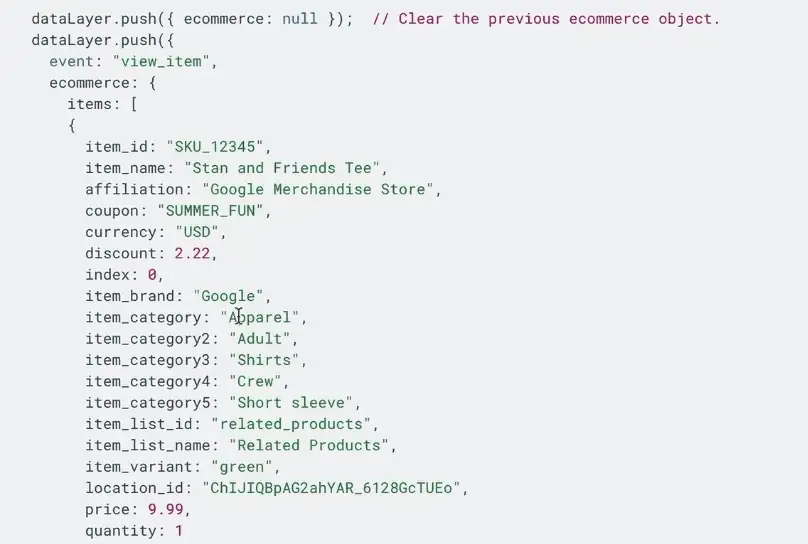
Going to this section of the documentation, we get a quick description of the implementation and the corresponding data layer format we need to implement.

For the uninitiated, this may seem complicated, but it’s quite straightforward when we focus on the key-value pair in each line closely. For example, we can see the transaction ID, value of the order, currency, and the items array containing all the different products for this order.
This example/template gives us a clear understanding of the kind of information we need to implement Google Analytics 4 eCommerce tracking.
This is just one data layer for a purchase event, but we also have other events that we can track like adding a product to the wishlist.
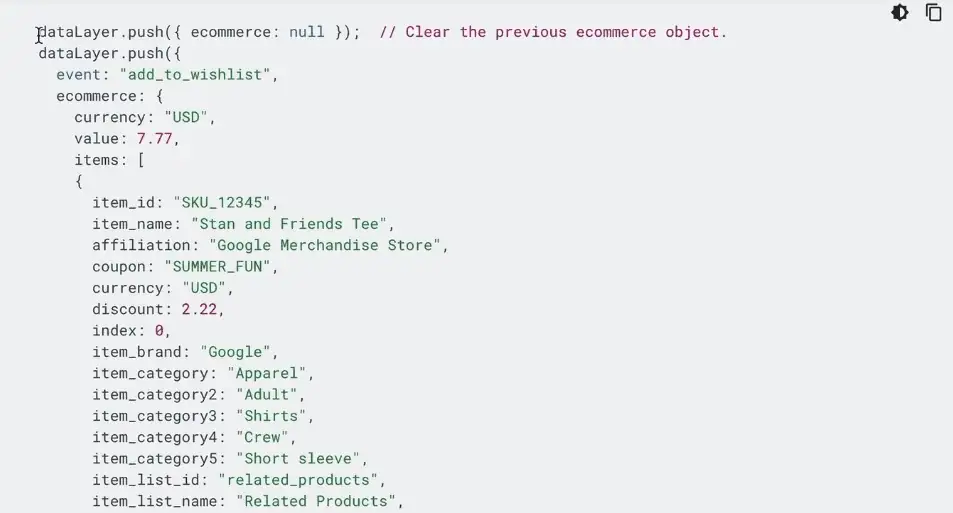
As you may notice, these are just codes. Therefore, we need to deploy these data layers programmatically on our site.
How to Deploy the Data Layer on Your Website?
There are three distinct ways we can deploy these data layers.
Number one: You can do it yourself. This would involve copying the codes one by one and putting them into your backend system. Depending on what backend you have running, it might get a little complicated to do so.
🚨 Note: You would need to know what you’re doing to implement Google Analytics 4 eCommerce tracking on your website by yourself.
For example, we have WordPress for our back end. In this case, we need to use PHP. However, for Shopify, it would be something different. For other systems like Magento, for example, you would need to be an expert in the shop system that you’re using.
The second way is to ask your developer to implement these data layers. This is a good way to go if you are not an expert on the platform and you have a support person that could build these data layers for you.
To make sure they implement exactly what you want, you need to give them the proper documentation. You could give the Google documentation we showed earlier and that would be a good place to start.
💡 Top Tip: If you want a more detailed explanation, our GA4 eCommerce DataLayer Specs Tool, available only to our MeasureMasters members, is a great resource to use.
Let’s look at a purchase event to demonstrate how this tool works.
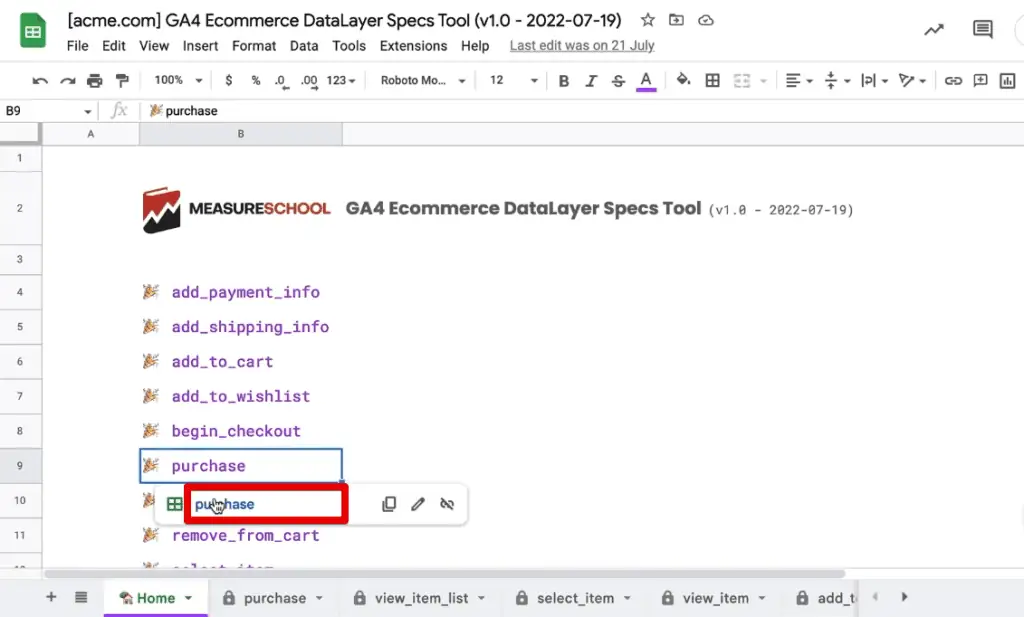
We came up with this template, which gives us the ability to create some specifications for the developers. Don’t be deceived and think that this is a basic tool because it is presented in Google Sheets. It is simple to use, but it can handle powerful executions.
For our purchase event, we can enter our values and parameters. Once you’ve filled in all the information, simply click on the Generate Code button.
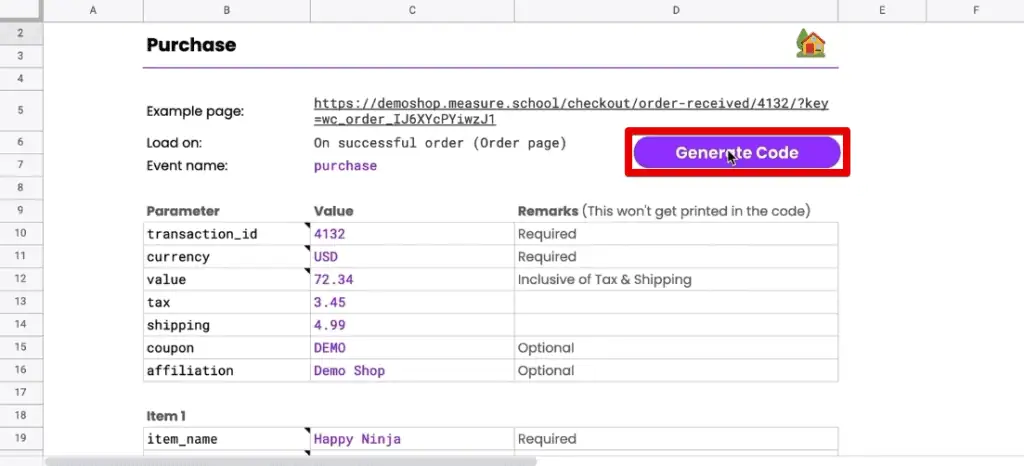
This button will generate the code for the developer so that they know exactly what we want to have in those fields. Here is an example of the code it generates:
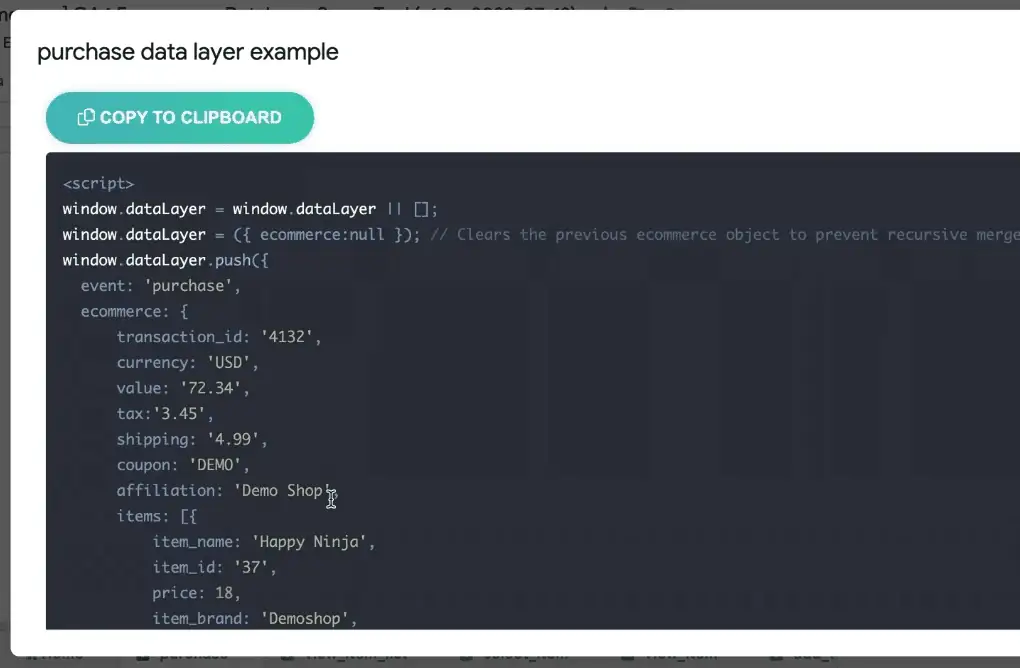
If you are a MeasureMasters member, you should check out this tool and generate your data layers. You can then send this data to your developer so that they don’t have to read through all of the documentation.
The third and final way is probably the most preferred. Note that this way, despite being the easiest and the most ideal option, is not available for all websites. It involves using a plugin or a native integration.
Shop systems like WooCommerce often provide many different plugins that you could utilize to deploy the data layer.
In our case, we’ll look at the plugin called GTM4WP (Google Tag Manager for WordPress).
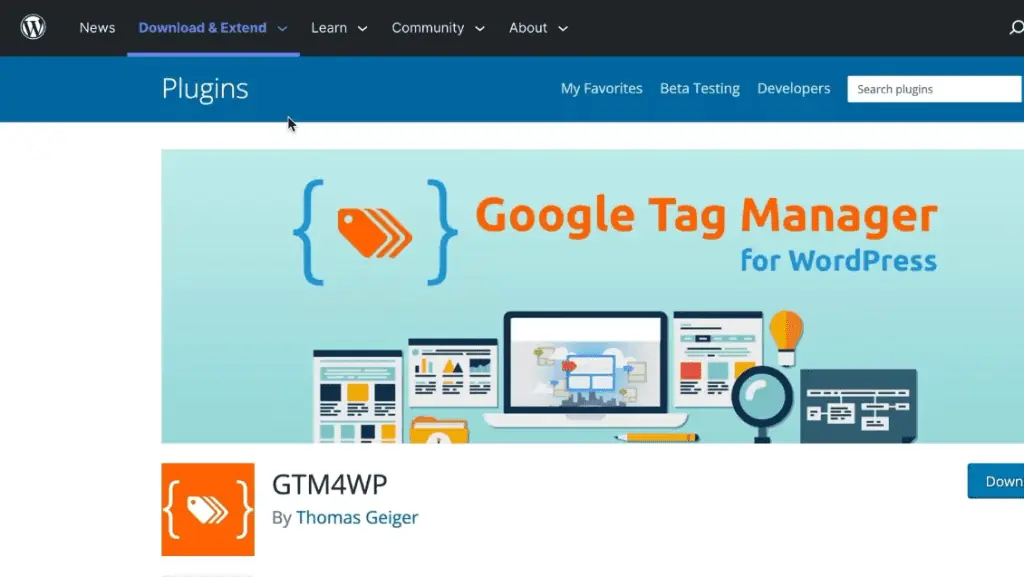
As the name suggests, it does everything Google Tag Manager-related for WordPress, and it can also deploy data layers for us.
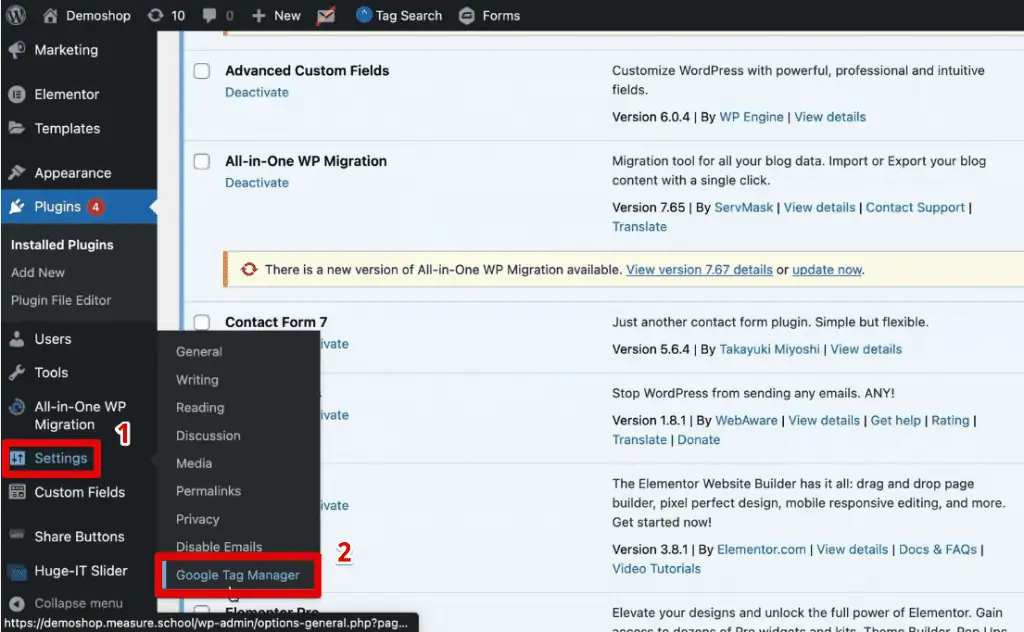
After installing and enabling this plugin on your store, go to Settings → Google Tag Manager.
Next, click on Integration → WooCommerce → Track enhanced e-commerce.
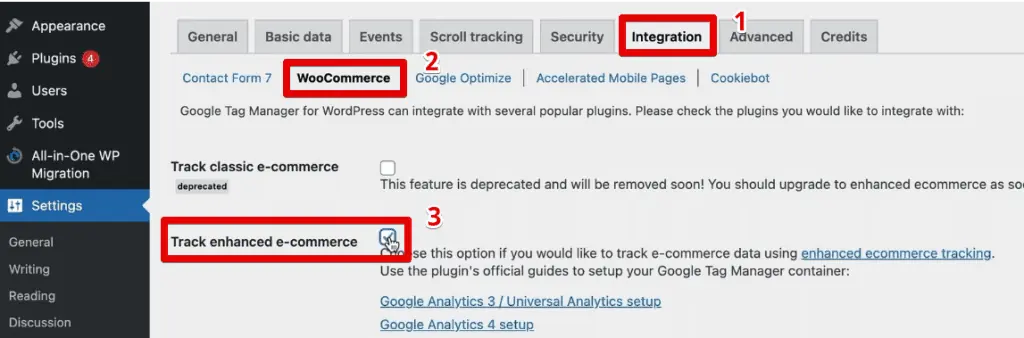
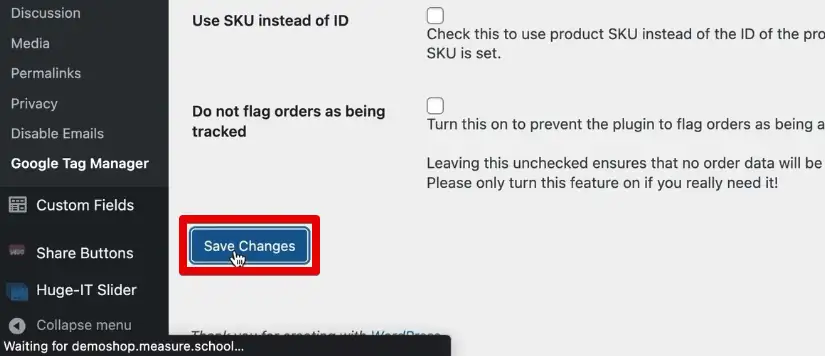
Finally, click on Save Changes.
Now, let’s test if we’re successfully receiving eCommerce events and if the correct information is pushed to the data layer.
Let’s go back and refresh our product page.

Going to the Tag Assistant, we’ll see that we have the view_item event and its accompanying data layer.
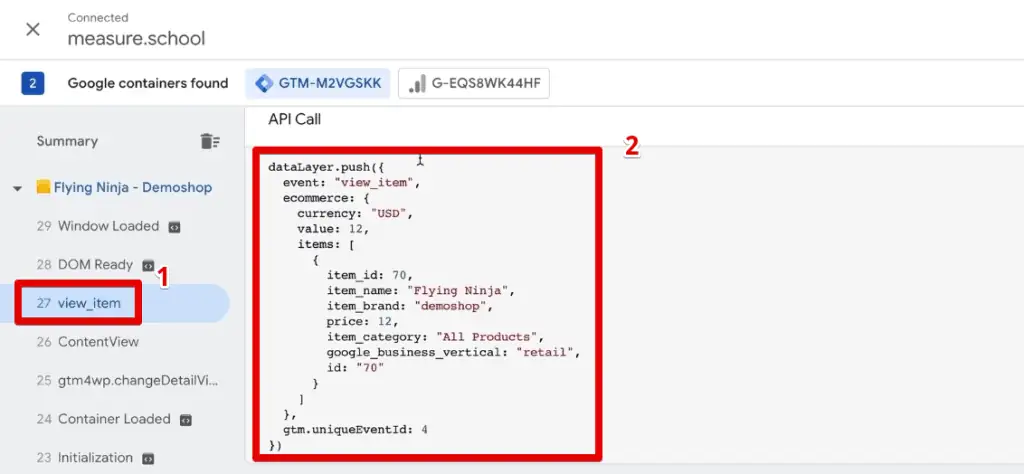
This is great because it is the exact data we need to have when we’re viewing an item. If you’re not convinced, this is what the documentation for the view_item event looks like:
What’s also great about this is that our implementation is dynamic in terms of the data we see here. If we were to view another product, its corresponding details in the data layer like the name, price, category, etc. would change accordingly.
Next, let’s test if the purchase event is being sent correctly.
Add an item to the cart, check out, and place an order. You should arrive at an order received or thank you page.
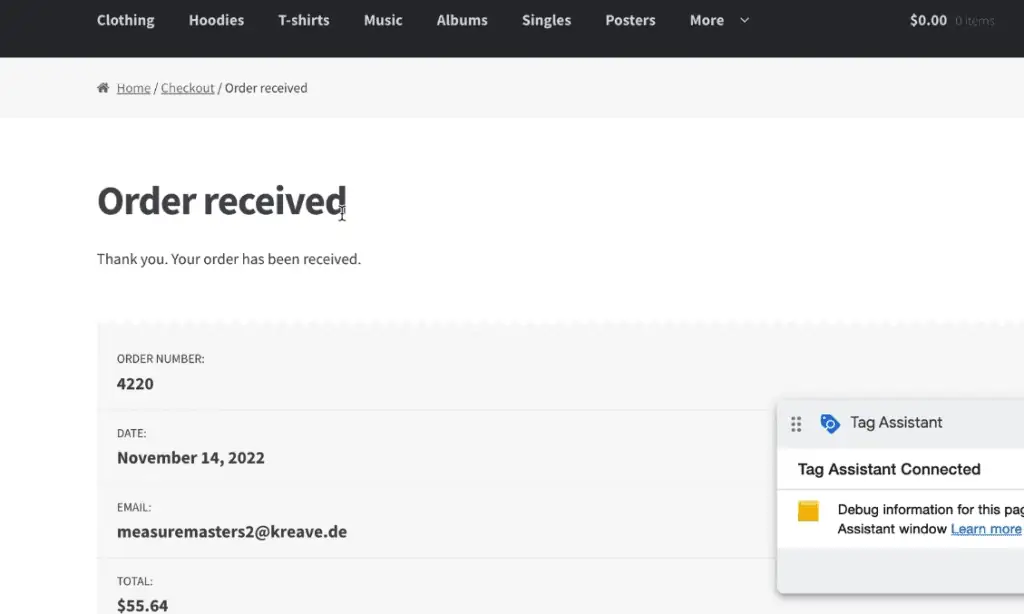
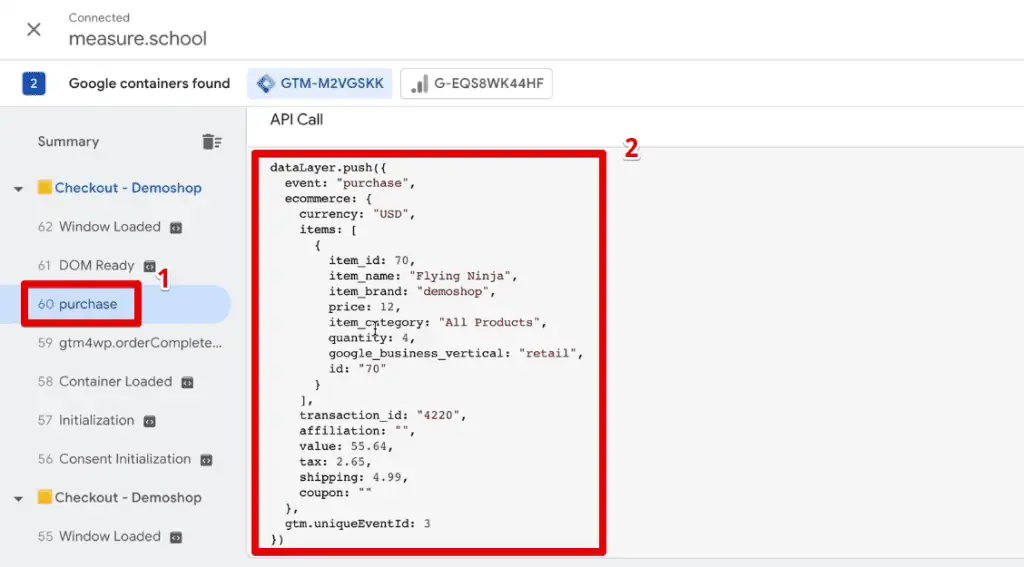
Going back to the Tag Assistant, we should see the purchase event and its corresponding data layer being sent correctly.
Great! All this information is now available in Google Tag Manager.
Now, we just need to forward this information to Google Analytics 4.
Sending Data to GA4
How do we send data to GA4? First off, go to your Google Tag Manager account and make sure you already have a GA4 configuration tag.
🚨 Note: The GA4 configuration tag has been replaced with the new Google Tag.
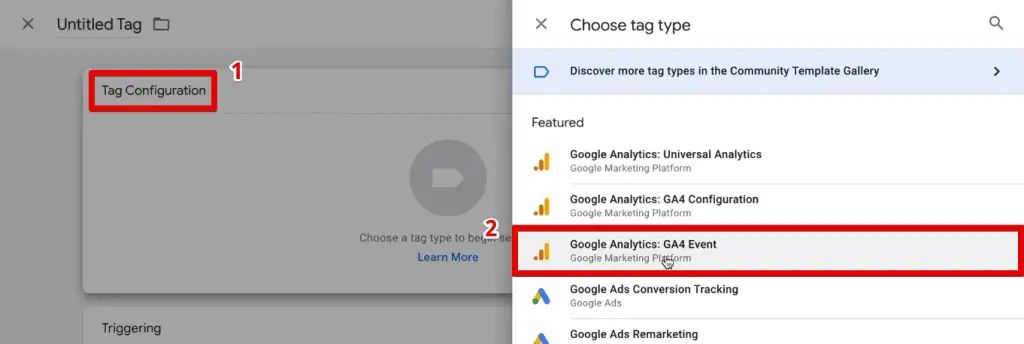
Next, we’ll create a New tag.

Click on Tag Configuration → Google Analytics: GA4 Event.
Next, we need to input our configuration tag and the event name. If you’re familiar with the GA4 recommended events, you would know that there is a list of events that GA4 wants to see for specific cases and there is a dedicated section for online sales events.
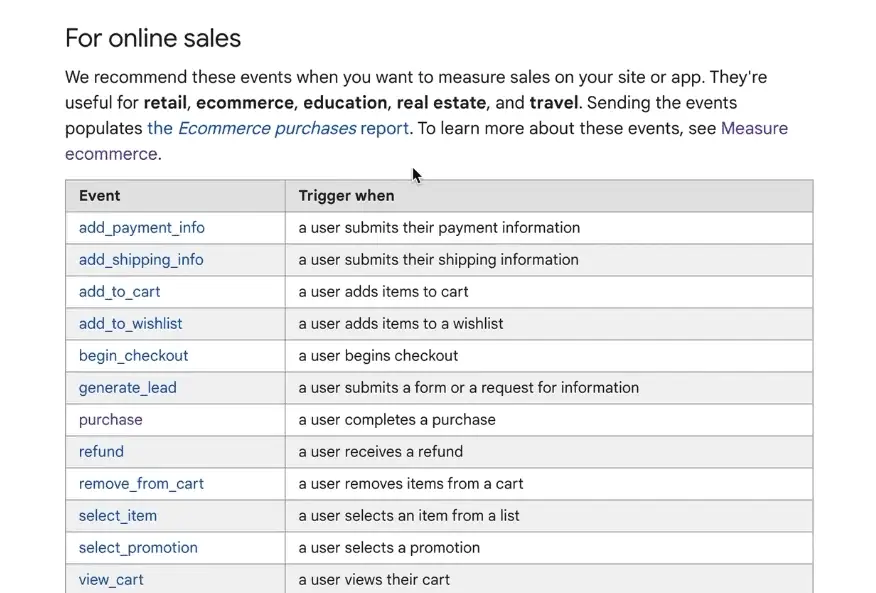
For this example, we’ll start with the purchase event.
Select our configuration tag, then type in purchase for the event name. Finally, click on More Settings → Send E-commerce data.
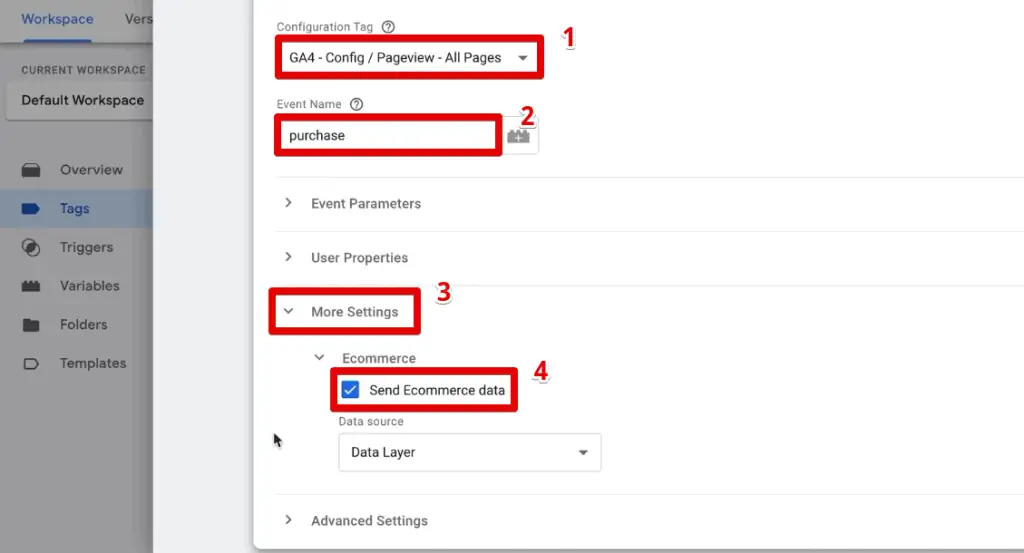
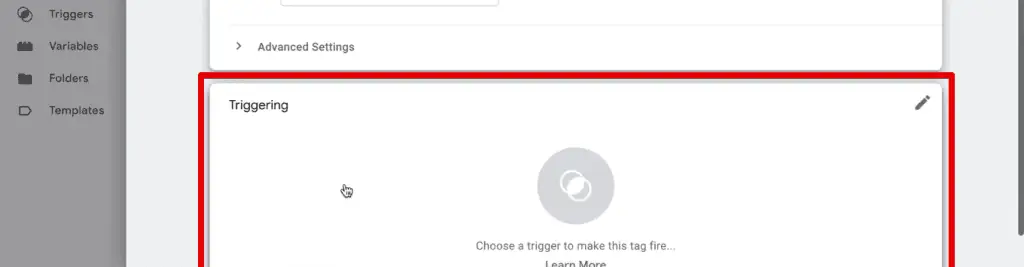
For the data source, our data layer should be selected by default, so there is no need to change anything. Next, we have to select a trigger.
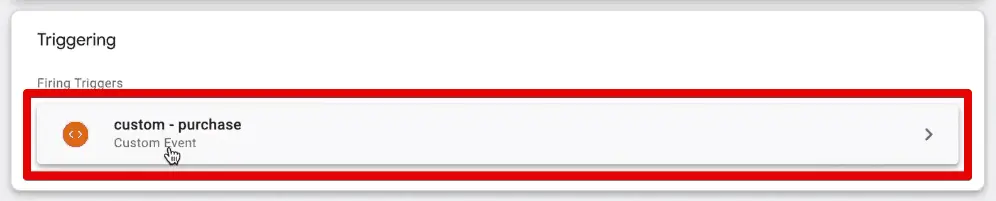
Click on Triggering.
Since we’ll track specific Google Analytics 4 eCommerce events, we’ll have to build a custom trigger.
Click on + in the upper-right corner.

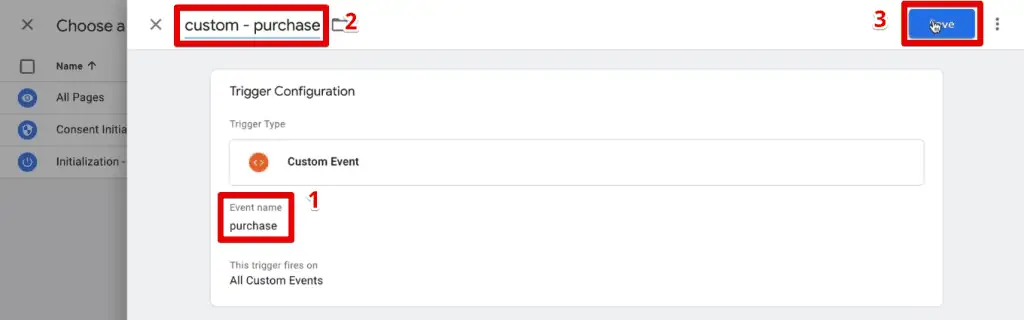
Select Trigger Configuration → Custom Event.

Put in a purchase for the event name, and then provide a name for our custom trigger. Finally, click Save.
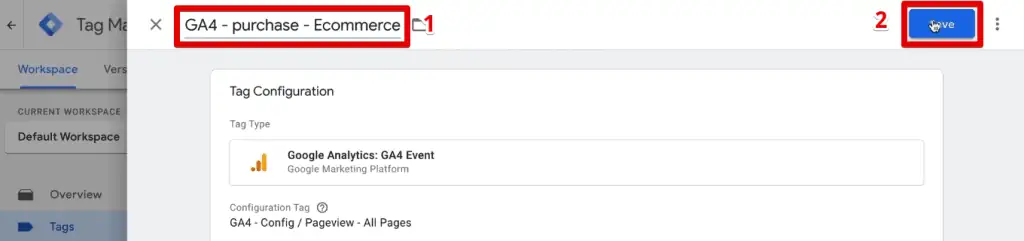
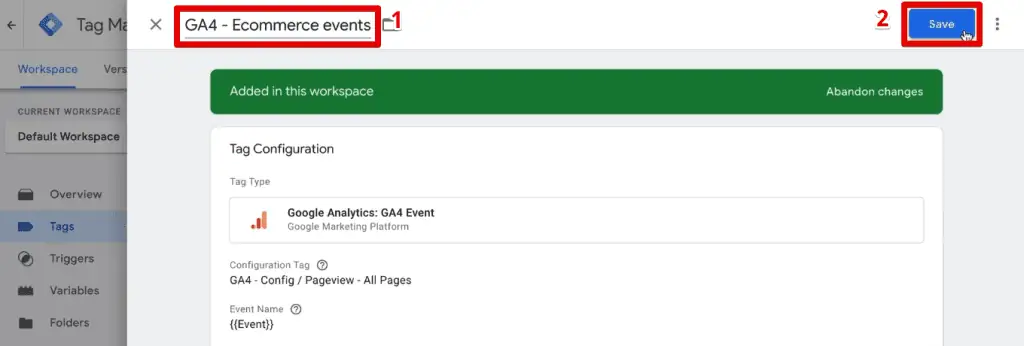
Then, provide a name for our GA4 event tag, and Save the tag.
We could repeat these steps and create an individual tag for each eCommerce event, but that would be tedious and time-consuming. Is there a more efficient way?
Let’s look at a smart trick so that we have only one GA4 event tag for all eCommerce events we want to track.
Going back to our GA4 tag, remove the purchase, and click on the lego button under the event name.
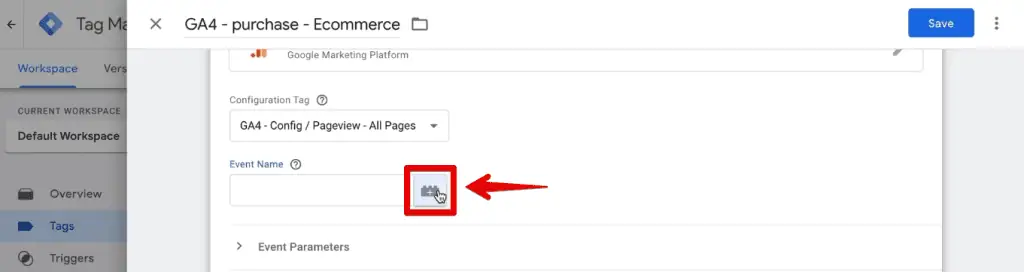
Instead of going through each event, you need to replace the event name with a built-in variable called Event.

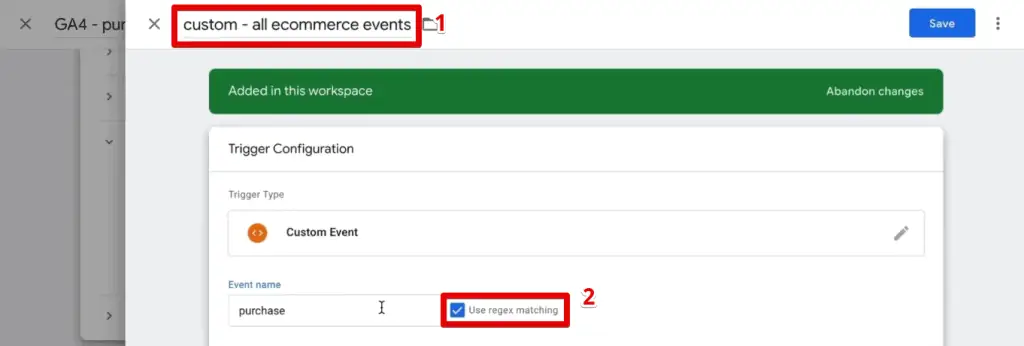
Next, we have to modify our trigger to fire not only for purchase events but for all eCommerce events. Let’s click on our trigger.
First, let’s rename our trigger so that it’s clear that we’ve made changes to it. Now, the trick is to tick the box for Use RegEx matching.
RegEx or regular expressions are a great tool to add to your tracking arsenal. It may seem complicated to some, but we’ll do our best to make it simple and concise. As such, we’ll only discuss the RegEx we’ll use and not dive deeper into all its capabilities.
💡 Top Tip: Check out our guide on How to Use RegEx for Google Tag Manager if you want a thorough discussion on regular expressions.
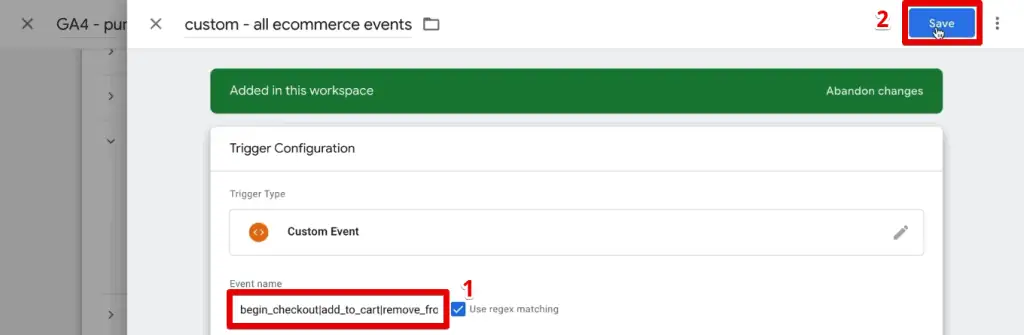
We have already prepared the RegEx we’ll use to capture all our eCommerce events.
begin_checkout|add_to_cart|remove_from_cart|view_item|select_item|view_item_list|select_promotion|view_promotion|purchaseYou’ll notice that we listed all the event names and combined them with a pipe ‘|’ symbol between each one. The pipe symbol means “or” and indicates that the trigger should fire if the event name matches any of the events we listed.
Now, paste our RegEx to the event name field and click Save.
Next, let’s also change the name of our GA4 event tag and Save our changes.
So, we have our event name inside our variable which pulls the value corresponding to the event key directly from the data layer. We’ve also filtered down the event trigger to only the eCommerce events we have entered using RegEx.
Let’s Preview our tag.
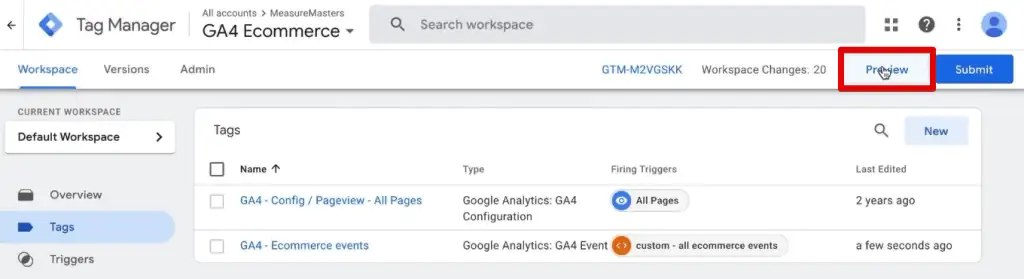
We’ll be directed back to our homepage. Let’s click on any product.

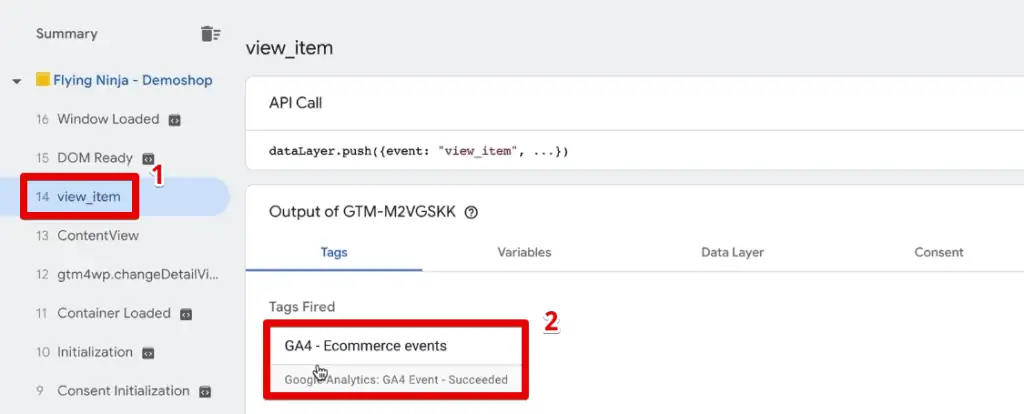
We should still see a view_item event when we check the Tag Assistant. We should also see that our Google Analytics 4 eCommerce events tag has been fired during this event.
To complete our testing, we need to check if this information has been sent to GA4.
Go to your Google Analytics account and navigate to DebugView. Here, we should also see our view_item event.

If we select this event, we’ll be able to see what information has been brought over along with this event. The information we need to check can be seen in the Items tab.
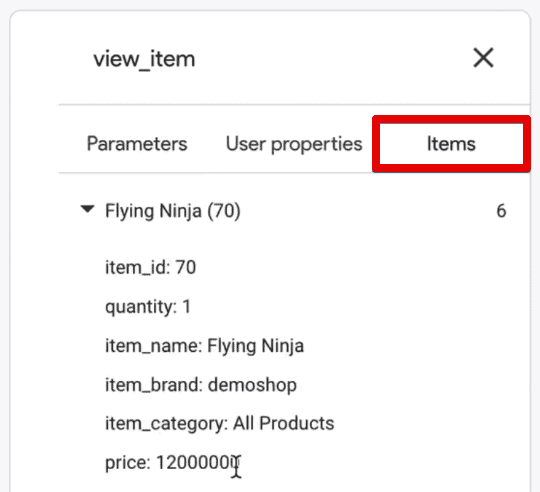
Great! We can see information about the product we are looking at. This means that our eCommerce data was sent over correctly.
Now, on to the most important one – our Google Analytics 4 eCommerce tracking example.
Purchase Tracking Example
Go ahead and order something from the demo shop. For this example, we continued adding the Flying Ninja product to the cart and completed the purchase.
Let’s check Tag Assistant again and verify that our purchase event has been sent and also check the information pushed to the data layer.
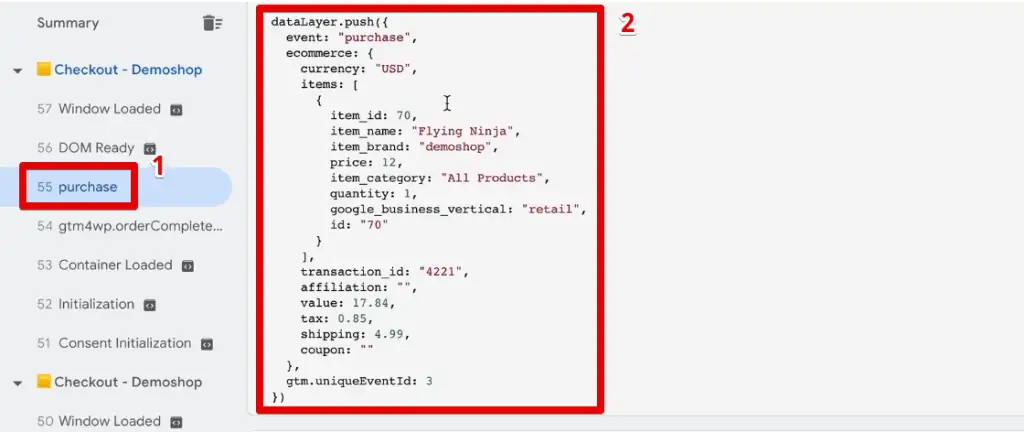
Going back to our DebugView, we can see our purchase event, which will be automatically marked as a conversion.
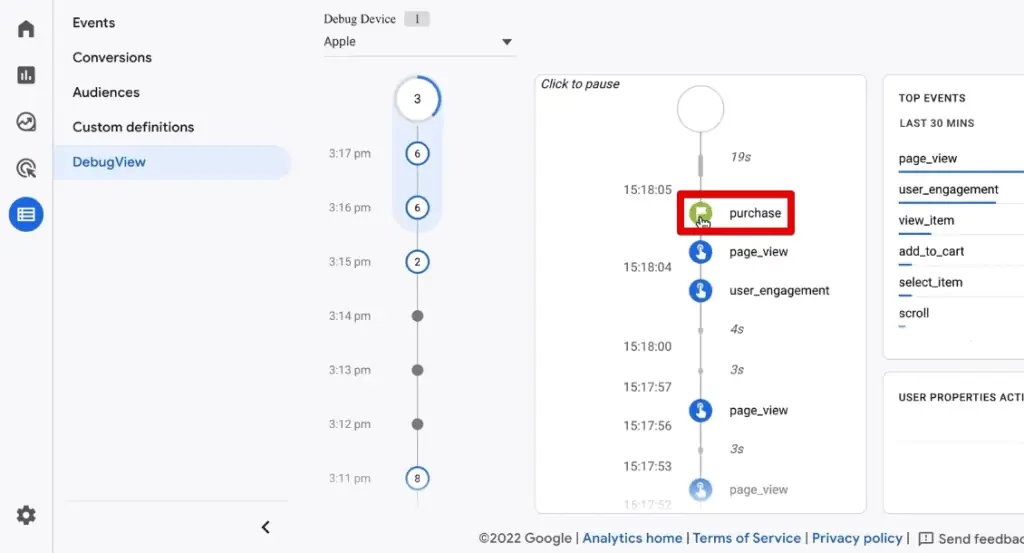
Clicking on the purchase event and going to the items tab will display information about all the items that were bought. Other details like the value and transaction ID can be seen in the parameters tab.
Great! That’s how we can see Google Analytics 4 eCommerce information. Since this is now available in GA4, we can now build our eCommerce reports.
FAQ
Why is eCommerce tracking important?
eCommerce tracking provides crucial data on user behavior, conversion rates, revenue, and other key metrics. By implementing eCommerce tracking, you can understand the effectiveness of your marketing campaigns, optimize your website for better user experience, and make data-driven decisions to improve your online store’s performance.
What is a data layer, and why is it important for eCommerce tracking?
A data layer is a separate layer of code that holds important information about user interactions and eCommerce events on your website. It acts as a bridge between your website and Google Analytics, allowing you to send relevant data for tracking. Implementing a data layer is crucial as it provides the necessary information required to build accurate eCommerce reports in Google Analytics 4.
Can I track multiple eCommerce events with Google Analytics 4?
Yes, Google Analytics 4 allows you to track various eCommerce events such as product views, adding items to the cart, removing items from the cart, completing purchases, and more. By setting up the appropriate data layer and configuring tags, you can capture and analyze these events to gain insights into user behavior throughout the customer journey.
Summary
There you have it! That’s how you set up Google Analytics 4 eCommerce tracking. This is a relatively simple implementation that can be done with a few clicks.
However, it is not necessarily an easy one because you need to set up the data layer correctly before you can send any eCommerce information to GA4. So, ensure that your data layer is created correctly.
If you want to dive deeper into your Google Analytics 4 eCommerce data, then check out our guide on How to Create Funnel Exploration Reports.
What eCommerce interaction is the most important for your business? Will you be tracking all the eCommerce events? Let us know in the comments below!


")
Thanks so much! You made the first manual that makes sense, comprhensive and clear! I got it working 😀
i think there are a mistake here, when you are adding purchase trigger at the first you choose custom event and named it purchase then it will fire at all custom events.
i think you need to tell the trigger when it should fire such as
page path : ( thank you page)
Thank you so much for your post. I’m beginner and learning everythings about this. This is save my life! Your are awesome!
Hi, tell me please how to send the purchase event if the site on a subscription model, there is no product, it is not ecommerce, can I do not specify items:[]?