
Last Modified on February 3, 2025
Wouldn’t it be great if you could track the interactions on your popups?
With the Element Visibility trigger in Google Tag Manager, we can easily track popup views on our website — and get some more insights into our website interactions.

Sign up to the FREE GTM for Beginners Course...
In this guide, we’ll learn how to set up a trigger for tracking popups, and how to link this trigger to an event Tag in Google Analytics.
Popup tracking is comprised of just two simple steps:
So let’s dive in!
1. Set Up Element Visibility Trigger
We’ll start with our Google Tag Manager account by creating a new trigger. To do this, click on Triggers → New.

Using the Element Visibility trigger, we can detect whether something is visible on the viewer’s screen. So let’s select that.

Next, we need to give Google Tag Manager an identifier in the code (a CSS selector) of the element that we want to track.
A basic understanding of CSS and HTML will be helpful to complete this part of the configuration. But I’ll guide you step by step to make it easier for you.
Inspect the Elements that Are Visible in the Site
First, we need to inspect the element that is visible to us.
To do this, let’s go to the product page and open the popup that we’re tracking. Then, right-click on the popup window and choose Inspect.

This will open a panel on the right half of your screen. The Elements panel will be filled with different nodes on each line.
Try to go as high up on the panel as possible, then choose the node that allows you to inspect the popup.
💡 Top Tip: You can also try finding this node experimentally. Close and re-open the popup on the website. The node that changes in the console is the one that we want to inspect.
Some nodes might not have an ID in their code. In such cases, we’ll need to use the CSS selector for our popup tracking.
Selecting CSS Selector
First, find the node for the popup screen and copy its CSS Selector. We can use the Document.querySelectorAll() command to find the element from the Document Object Model (DOM) tree.
When using Document.querySelectorAll() to locate an element, you might need to test multiple CSS classes to find one that identifies the specific element you want.
This is because some classes are shared by multiple elements in the DOM, and using such a class could return a list of elements instead of just one.
If your code expects a single element but receives multiple, it could lead to errors. So, be careful!
Example 1 in the image shows several returned elements, while Example 2 in the image shows just one. Example 2 is what you should be looking for.

You can also close and re-open the popup to make sure that the class changes with the change in the element. If so, we can use it as a trigger to detect any changes in the popup and fire an event.
Once you have the correct element, copy the CSS Selector. This is the text between the double quotes from the div class that returned your single popup element.
Then, paste this CSS selector to our new trigger.
In our trigger configuration, we’ll choose when to fire the trigger. Since we can have multiple elements on the same page, we’ll fire the event Every time an element appears on the page.
You should also select the percent visibility of the element required to fire your trigger.
50 percent is usually optimal for popups (at least half the popup must be visible for the trigger to fire), but this can vary according to your website’s needs.
There is also an option to Observe the DOM changes. These are the changes that happen on the website’s DOM tree.
When you click on this, you will be alerted with a warning that monitoring these elements might result in diminished site performance.
This doesn’t affect the loading speed of the website, but it will take some time for Google Tag Manager to monitor these triggers if multiple triggers fire at the same time.
As long as we don’t have a lot of triggers running on our website, we are good to go with the Observe the DOM changes option.
You can also filter this trigger to fire only on certain elements, pages, or products. But for our example, we want to track all popups, so we won’t need to filter them.
After you have set up the information, give a name to your trigger and Save it.
Testing Your Trigger
Once the trigger is configured, we can test it out.
In GTM’s preview and debug mode, open a popup on your website. If you configured the trigger correctly, you’ll see an API call event appear in the preview console on the left side.
This data gets fired every time a popup appears on the screen.

All we need to do now is attach a Tag to this trigger so that we can send the data to a tracking tool.
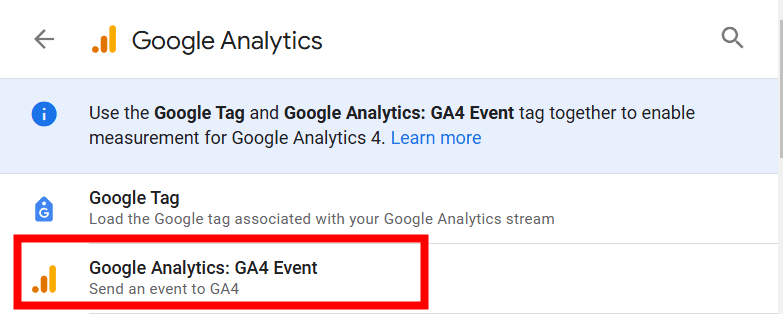
2. Creating an Event Tag
Go to Tags → New to create a new Tag, then select the Google Analytics: GA4 Event Tag type.
For this Tag, I recommend event parameters that will help describe the popup or campaign that you are tracking.

The values of your parameters can be any customized name that helps you track your campaign. For instance, you can use the name of the product for which the popup appears.
You’ll need to fetch the product name from the Data Layer to track it. This is a little more complicated, so we have a separate guide for Data Layer Variables if you want to do this.
🚨 Note: To see these parameters in your report, you must register them as custom dimensions. You may view them temporarily in the Realtime report and debugView but not in standard Reports or Explorations.
Next, you’ll need to fill in your Measurement ID. You can find it in your Google Analytics account in Data streams. Go to Admin → Data collection and modification
Finally, attach the element visibility trigger you created earlier. With this, our event Tag is ready to track popups.
Where to See Popup Events in GA4
You can see your popup events in Standard reports and in Explorations.
For Standard reports, go to:
- Reports.
- Engagement.
- Events.

In Explorations:
- Go to Explorations.
- Create a Blank exploration.
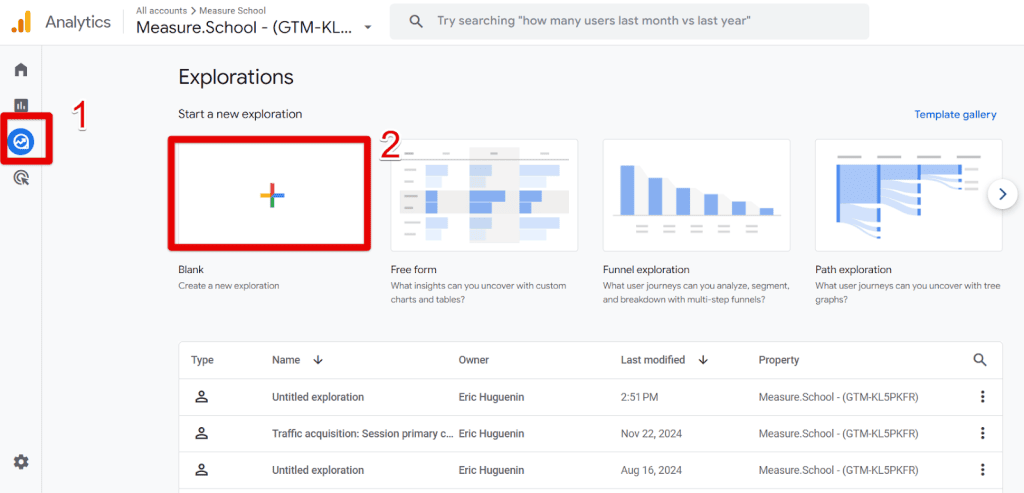
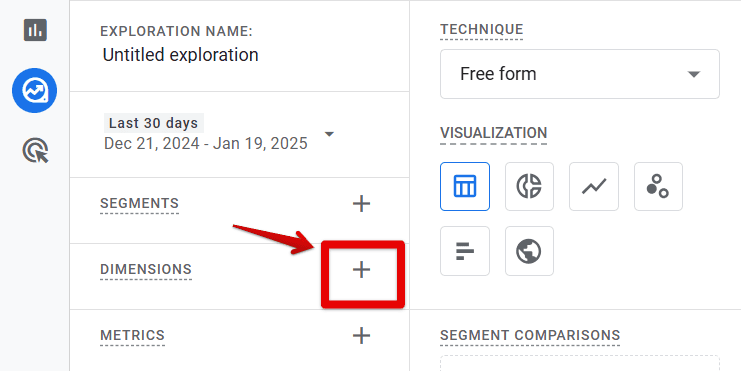
- Add dimensions and metrics by clicking the plus sign beside them.
- Type Event name in the search bar and click Confirm to add it to your canvas.

Follow the same steps for metrics. As you can see, we imported Event count as a metric.
To import your custom dimensions (the custom parameters we sent with our event in GTM), click the Custom tab, expand the Custom section, and select your event parameters.
We had interaction type and status.

To add the custom dimension (and any dimension or metric) to your report, double-click them. Here we’ll double-click:
- Event name
- Interaction Type (or your parameter)
- Status (or your parameter)
- Event count (or your desired metric)

- In the Settings panel, create a filter with this condition:
Event name exactly matches popup (or the event name you created for your popup event). - Click Apply.

You should have now a report similar to this one:

Different Types of Popup Tracking with GTM
When it comes to tracking popups in Google Tag Manager (GTM), there are several methods you can use depending on the resources available to you and the features of your popup provider. Here are the main approaches:
1. Using Existing Code
If your popup provider shares code snippets in their developer documentation or community forums, using these as a starting point is a good idea.
These resources often include ready-to-use event listeners or other code tailored to their platform. Following their guidelines, you can track your popups efficiently without wasting time.
Sometimes, the popup provider includes an event listener that you can leverage. Add a dataLayer.push to send your custom event and parameters to GA4 in these cases.
Once that’s done, you only need to create a Custom HTML tag in GTM and set up an appropriate trigger.
If this process sounds overwhelming, don’t worry. Measureschool’s head of analytics, Praba, enhanced a code snippet precisely to track Ninja Forms.
Looking at this example illustrates how you can adapt similar methods to your needs. Measureschool blog covers numerous tracking topics and methods. Use these resources to your advantage.
2. Tracking Popups with the Element Visibility Trigger
Another powerful method for tracking popups is using the Element Visibility trigger in GTM. This is particularly useful if the first method is not an option.
With this approach, you can track when users “see” the popup on their screens—technically, when the element enters the viewport.
To set this up, you must use CSS selectors to identify the popup.
Once configured, the same technique can be applied to track success messages, notifications, or other elements. This method is flexible and highly effective for visual engagement tracking.
3. Using Popup Provider Integrations
Some popup providers offer direct integrations with GA4. This is often the most straightforward method, as the configuration usually involves enabling a feature within the provider’s platform.
Check if your provider offers this functionality before diving into more complex tracking setups. Knowing this option can save you considerable effort and streamline your tracking setup.
4. Learn the Basics of CSS Selectors
Understanding at least the basics of CSS selectors is essential. This foundational knowledge will help you troubleshoot and work more efficiently with tools like AI.
For example, you need to know what a dot (.) or hash (#) signifies in CSS and how to test your selectors in the browser console. We also have an article that will guide you on how to use AI to generate CSS selectors.
5. Test Methods and Clean Up Afterward
After selecting and testing a tracking method, seek admin access to the plugin or platform receiving popup submissions.
This access will allow you to delete your test entries directly, saving you the hassle of repeatedly asking administrators to clean up test data.
While you can filter out test traffic in GA4, it may be more challenging in a client’s CRM. Always check whether the client uses a filtering option.
6. Request a List of Popup Pages
Ask your clients for a complete list of pages containing popups they want to track. This will help you avoid back-and-forth communication if a popup is overlooked and allow you to complete your work in one go.
7. Address Challenges with Multiple Popups
Addressing tracking challenges is particularly important for sites with several popups across different pages.
Sometimes, a tracking setup that works for one popup on a page won’t work for the same popup on another page. For example, the shortcode for a popup may be embedded in an iframe on a different page.
In such cases, the only solution is instructing the support team or developer with iframe access to implement a dataLayer.push method.
Testing Pop-Up Event Tracking in GTM
Once you’ve set up popup tracking in Google Tag Manager (GTM), it’s essential to test it thoroughly to ensure accuracy.
Here’s a step-by-step guide:
- Enable Preview Mode in GTM: This allows you to see in real-time which tags are firing as you interact with your website.
- Visit Your Website: Navigate to the page where the popup should appear.
- Interact with the Popup: Whether it’s simply viewing the popup, clicking a link within it, or submitting a form, perform the desired action.
- Check GTM Preview Pane: The tag assistant will show which tags have fired. Ensure that your popup tracking tag is listed.
To be sure, click the Element visibility event trigger in the Summary pane (This will only appear after you’ve seen or interacted with the popup). Verify if your tag has fired.

- Challenges in Testing: Some popups are set to appear only once or under specific conditions. If you’re not seeing the popup again, then:
- Use “Empty Cache and Hard Reload” in your browser.
- Clear cookies or use an incognito/private browsing window.
- Check any conditions or triggers set for the popup to ensure they’re not preventing its display.
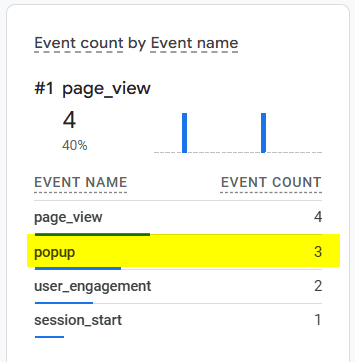
- Verify in Google Analytics: If you’re sending popup tracking data to Google Analytics, ensure that the events are correctly registered in the real-time events report.
Go to Reports → Realtime overview and see if your event appears in the card called Event count by Event name. Here we can see our popup event:
You can also have a look at the DebugView. To go into the DebugView, go to Admin → Data display. Then click DebugView.
The popup event should appear after interacting with the popup:

Click on it, and you should be able to find your custom parameters as well. The ones we configured before were interaction_type and status:

Summary
So that’s it! This is how you can track popups on your website using Google Tag Manager.
This is a great way to track user engagement on your website.
If you have an eCommerce website, it’s especially good for telling you which products are viewed most frequently. You can also gain insight into which products are bought after getting viewed.
After you track your data on Google Tag Manager, you can also analyze this data on Google Sheets!
We have covered different ways of tracking popups. Which method did you like best? Any techniques we missed? We’d love to hear your thoughts in the comments!
FAQ
Can I track multiple popups on the same page?
Yes, you can track multiple popups on the same page using GTM. Each popup can have its element visibility trigger with a unique CSS selector. By configuring separate triggers and event tags, you can track and analyze interactions for different popups independently.
Are there any performance implications when using the “Observe the DOM changes” option?
Enabling the “Observe the DOM changes” option in GTM allows the trigger to monitor changes in the website’s DOM tree. While this option may result in slightly increased monitoring time for multiple triggers firing simultaneously, it does not significantly impact the loading speed of the website. It is generally safe to use this option unless you have a large number of triggers running concurrently.
Can I customize the event parameters for popup tracking?
Yes, you can customize the event parameters for popup tracking based on your specific requirements. In the tutorial, the recommended event parameters are Track Type, Category, and Action. However, you can modify these parameters and add additional ones to provide more context and detailed information about the popups you are tracking.
Sign up to the FREE GTM for Beginners Course...


")
Hi, this is great thanks!
I’ve tried it with a Kartra popup checkout box but it doesn’t work, I can’t find any way of tracking that – nothing appears at all in debug mode after clicking the button.
Is it because it loads as app.kartra.com and they make it private?
Is there any way at all to track Kartra enhanced e-commerce with GTM?
Thanks so much,
Sophie
I have implemented using popups using element visibility in GTM, but when I checked the data between GA4 and poptin, here I got to see that 25% error rate between ga4 & poptin
Can you please suggest any alternative way for implementing the popups