
Last Modified on January 7, 2025
Are you wondering why your respective marketing tools do not receive any data?
Issues with consent, ad blockers, and browser protections can prevent you from getting high-quality data.
With the help of a Google Tag Manager server, you can better control your data by sending them server-side, improving your marketing data accuracy and enhancing your website’s performance.
We’ll guide you through setting up Google Tag Manager server-side tagging by provisioning a server on the Google Cloud Platform, configuring it, and integrating it with Google Analytics 4.
Here is an overview of what we’ll cover for the GTM server-side tagging setup:
- Set Up a GTM Server Account and Container
- Provision a GTM Server on the Google Cloud Platform
- Configure and Preview the GTM Server
- Deploy GTM Server-Side Tagging
- Additional Considerations and Recommendations
Let’s dive in!
Step 1: Set Up a GTM Server Account and Container
Let’s get started by going to tagmanager.google.com.
We already have an account set up here. If you don’t have one yet, sign up with your Google account and create one there.
💡 Top Tip: Check out our guide on Installing Google Tag Manager for a more detailed overview of GTM account creation.
In your server account, create a new container by clicking on the three dots to open more options and select Create Container.
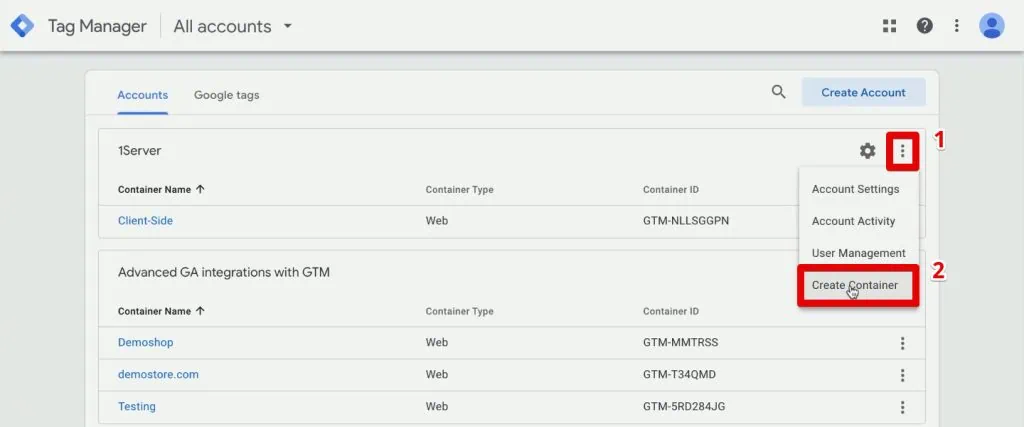
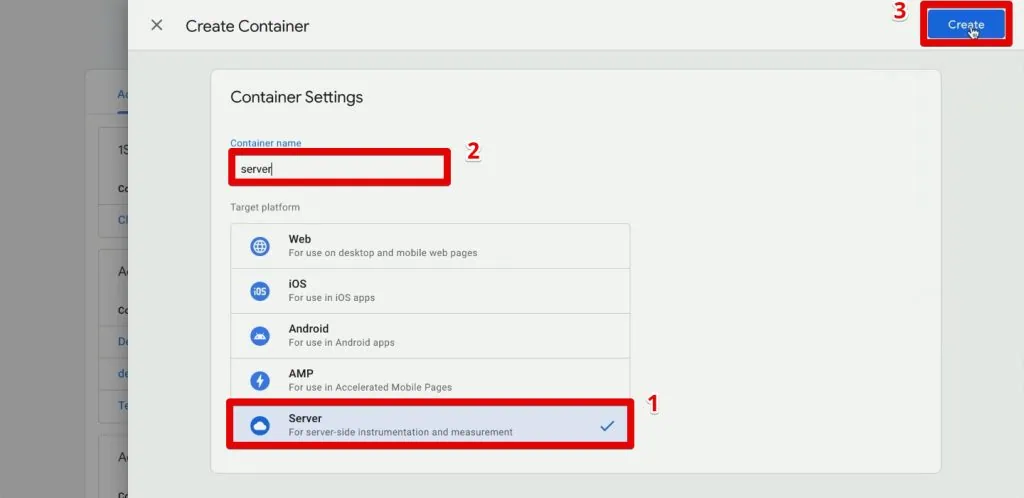
It will open this interface where you will choose the target platform. For our case, select Server. Next, provide a container name, then click Create.
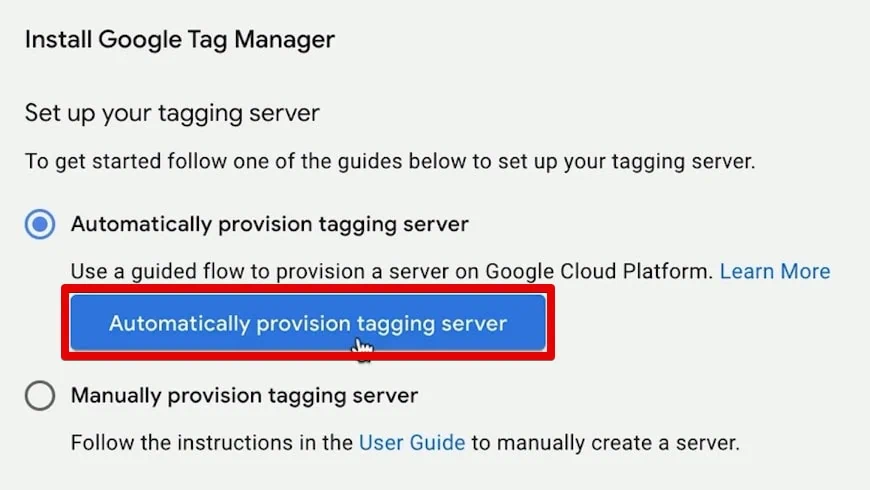
That brings us a setup menu to provision a tagging server on the Google Cloud.
Step 2: Provision a GTM Server on the Google Cloud Platform
The Google Cloud is Google’s cloud infrastructure. Amazon has Amazon Web Services (AWS), and Google has the Google Cloud Platform (GCP). Our GTM server will live here in the GCP.
Let’s go ahead and select Automatically Provision Tagging Server.
Next, select your billing account. If you don’t have one, you can create one from this menu by selecting Create a new billing account in Google Cloud Platform.
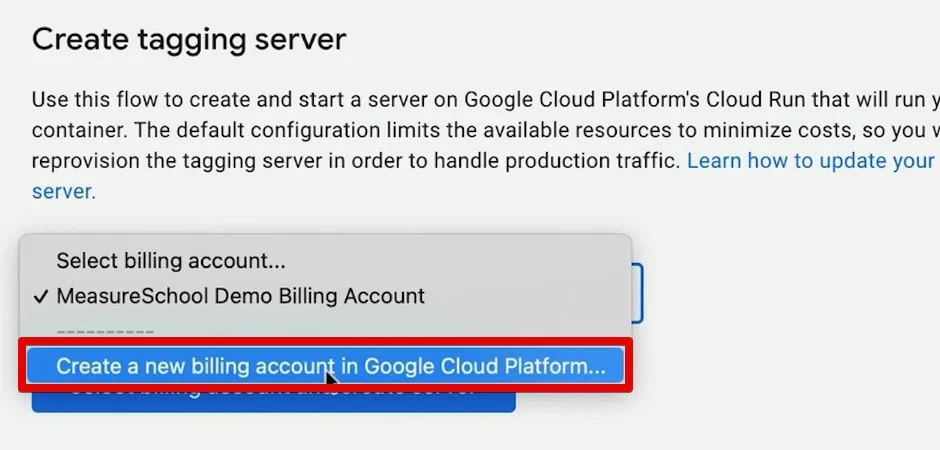
You need to follow a few steps and enter your credit card details. If you’re creating a billing account for the first time, you’ll get a free tier that gives you credits for a long time if you’re only testing out the server-side setup.
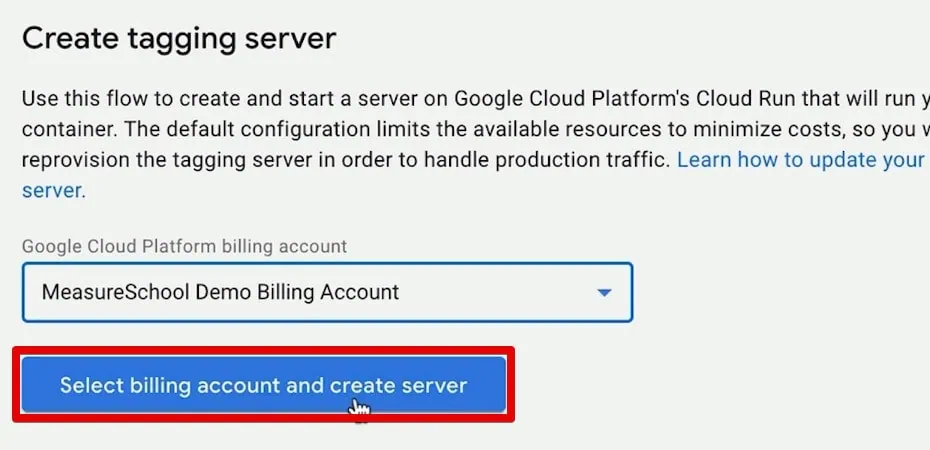
Once you already have a billing account, choose it from the list, then click Select Billing Account and Create Server.
Now, you will have to wait a bit as Google Cloud will do the heavy lifting of setting up your server and installing the instance (which is the GTM server software).

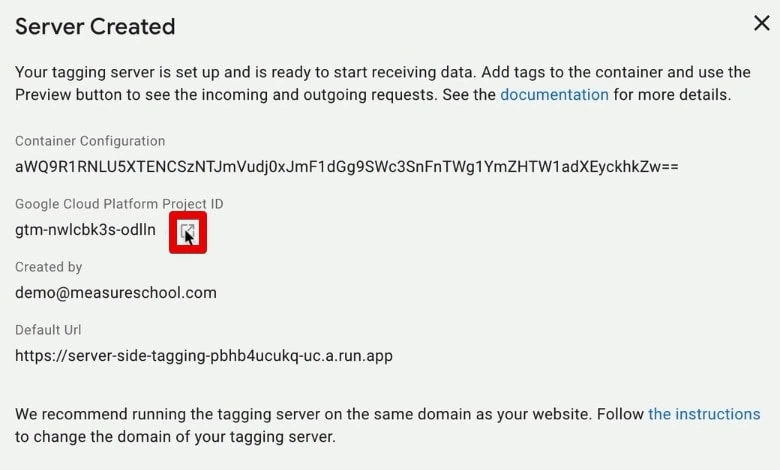
After a few minutes, we’ll have our server created.
We’ll see a window with our server details, the container configuration, the Google Cloud Platform project ID, the email that created the server, and the default URL.
Clicking on the Google Cloud Platform project ID will take us to Google Cloud.
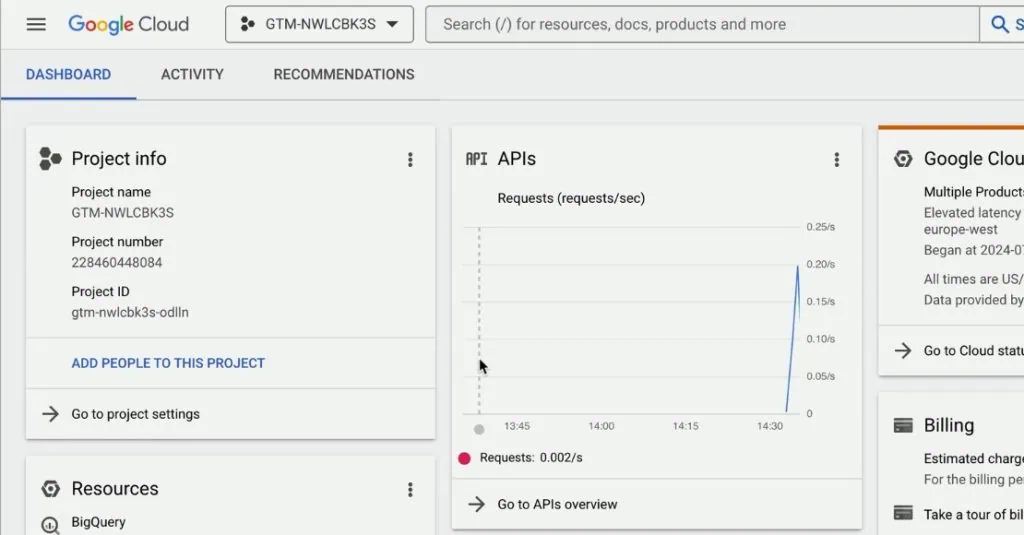
It will take us to the project dashboard, giving us more information about our new GTM server now set up.
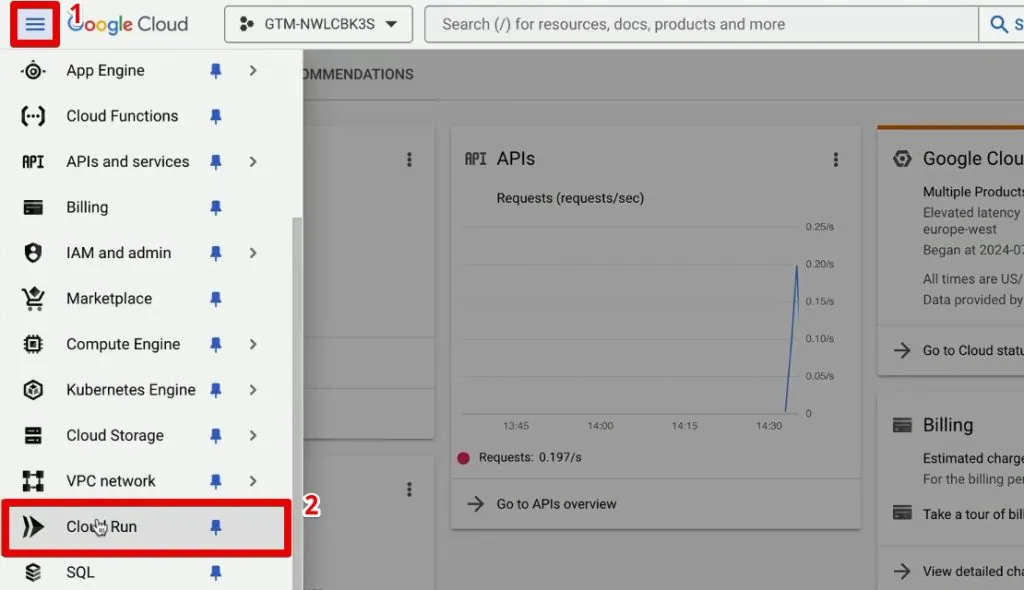
The automatic provisioning process has created a Cloud Run instance for us. To view it, open the navigation menu at the top-right corner, then select Cloud Run.
Here, we have two servers for our GTM server-side tagging: a primary server and another one that runs our preview.
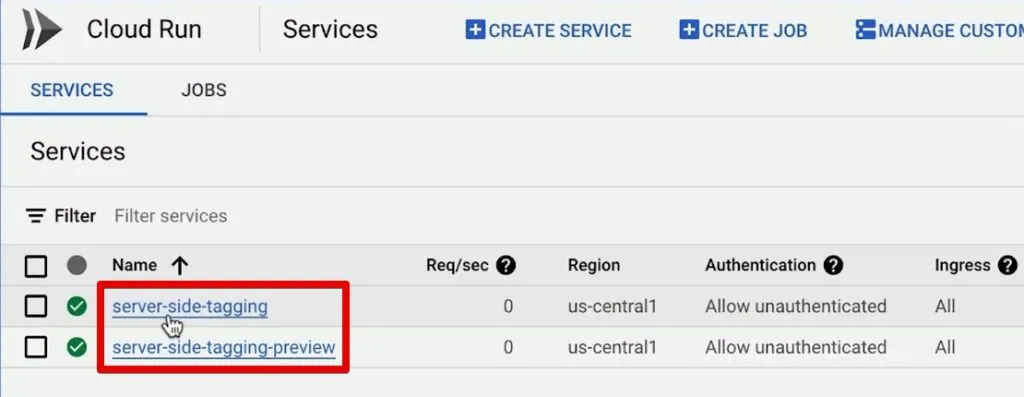
Notice that there is a downside to the automatic provisioning process – you can only create your server in the US central.

🚨 Note: If you want to set the region your server is based in to a different location, you will need to go with the manual route.
Now, what does our GTM server look like?
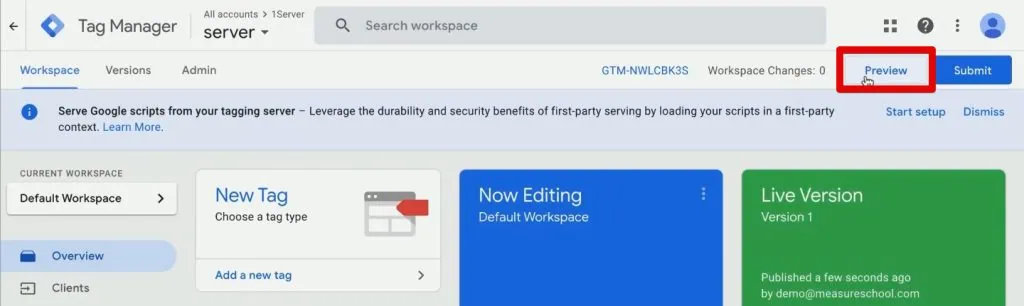
Let’s go back to Google Tag Manager, where we can see the default URL.
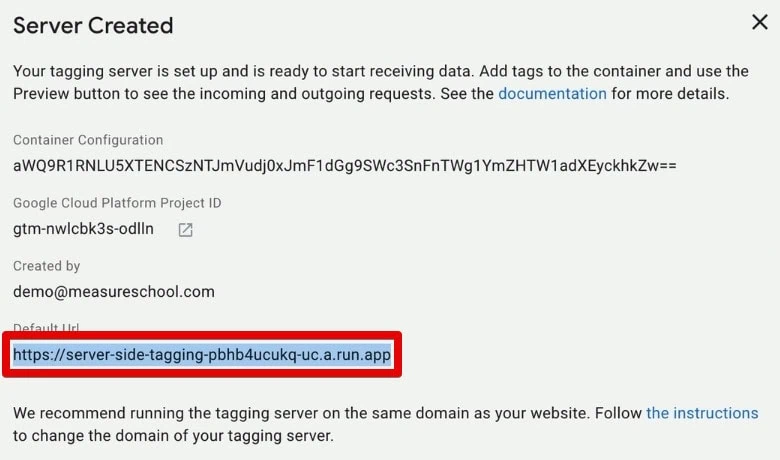
Copy this URL and close the window. Next, click Preview to open up GTM’s preview mode.
It will look different compared to the preview mode from the client side because a GTM server is entirely different from a GTM client-side implementation.
Here, we have a window into our GTM server instance where we see what tracking requests come in.
Step 3: Configure and Preview the GTM Server
If we enter our default URL into the address bar, it will send a request to our server.
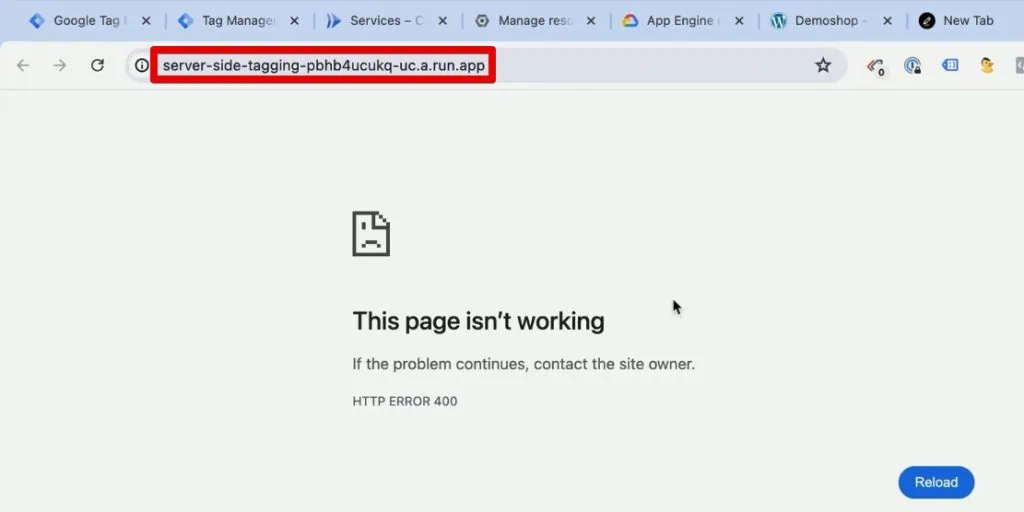
Now, our server is not a web server in a traditional sense, so it doesn’t give us any HTML back. We will not see anything here.
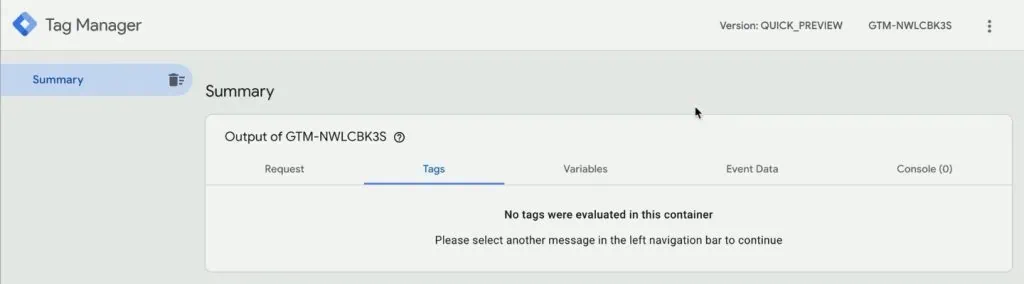
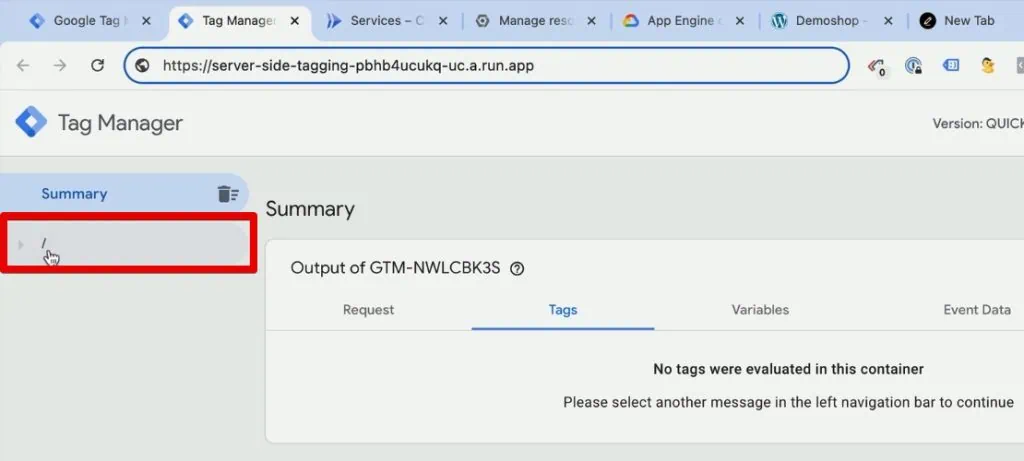
In our preview mode, however, we will see a new request.
Going to the Request tab, we’ll see details about the Client, Outgoing HTTP Request from Server, and Incoming HTTP Request.
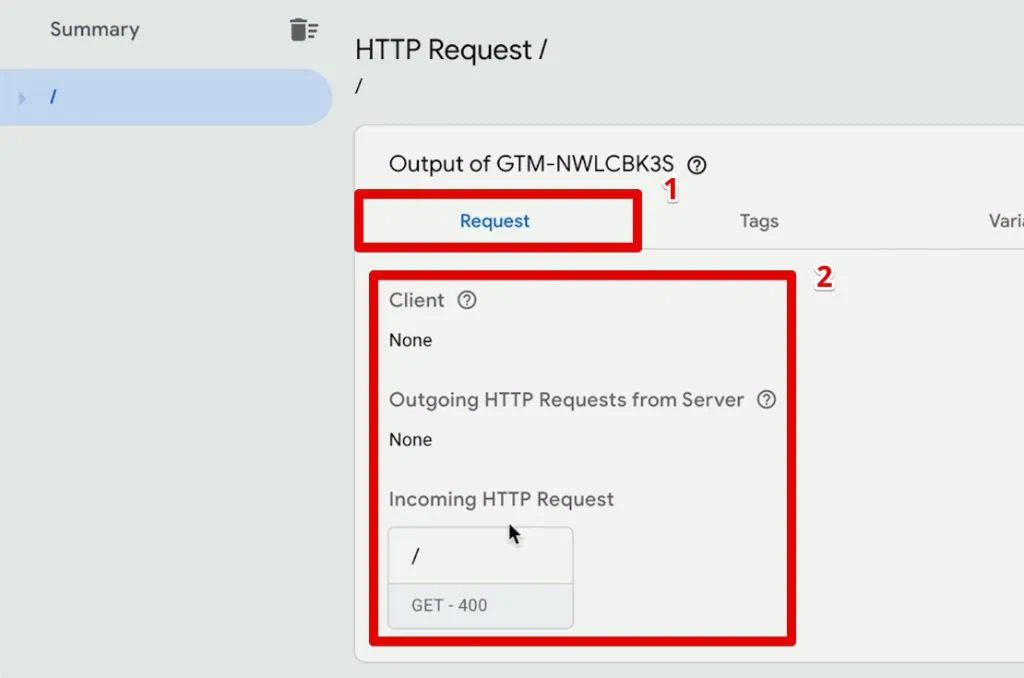
We didn’t put any information in our request, so we won’t see any information here.
On the server side preview mode, you will see the request that came in, if it was claimed by something called a client, and the tags that fired with the request.
If you have come this far, you have set up a GTM server. It is fully operational, and you can already do your first GTM server-side tagging deployment.
Step 4: Deploy Google Tag Manager Server-Side Tagging
How would a Google Tag Manager server-side tagging deployment look like?
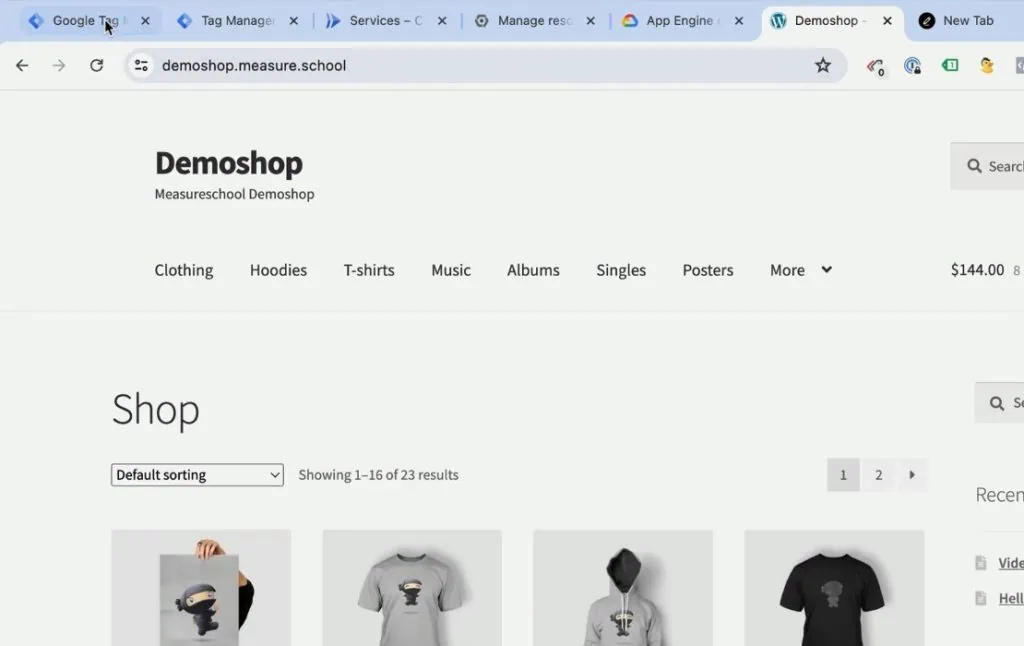
First, we have a tracking deployment on our demo shop, a client-side implementation.
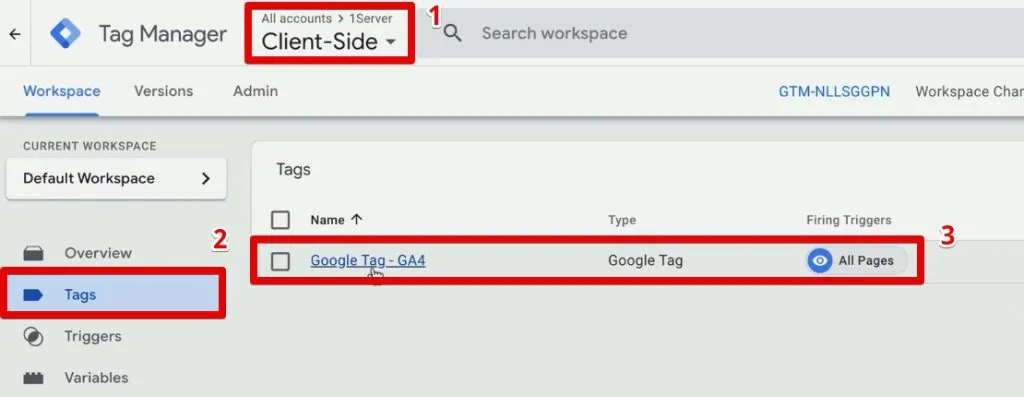
Next, go to Google Tag Manager and open our client-side container. In the Tags section, we have the Google tag for GA4 deployed.
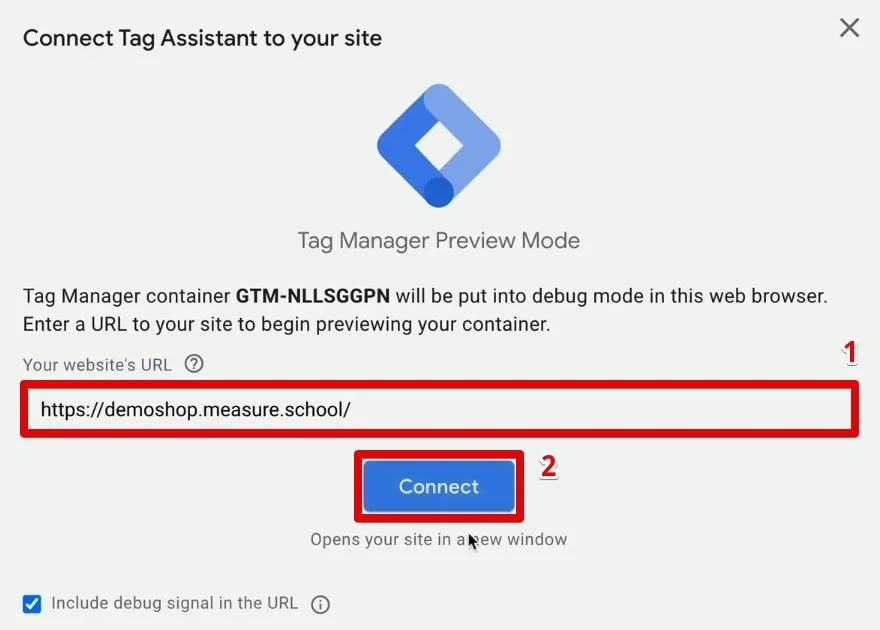
Next, go to the preview mode. Enter our demo shop URL, then click Connect.
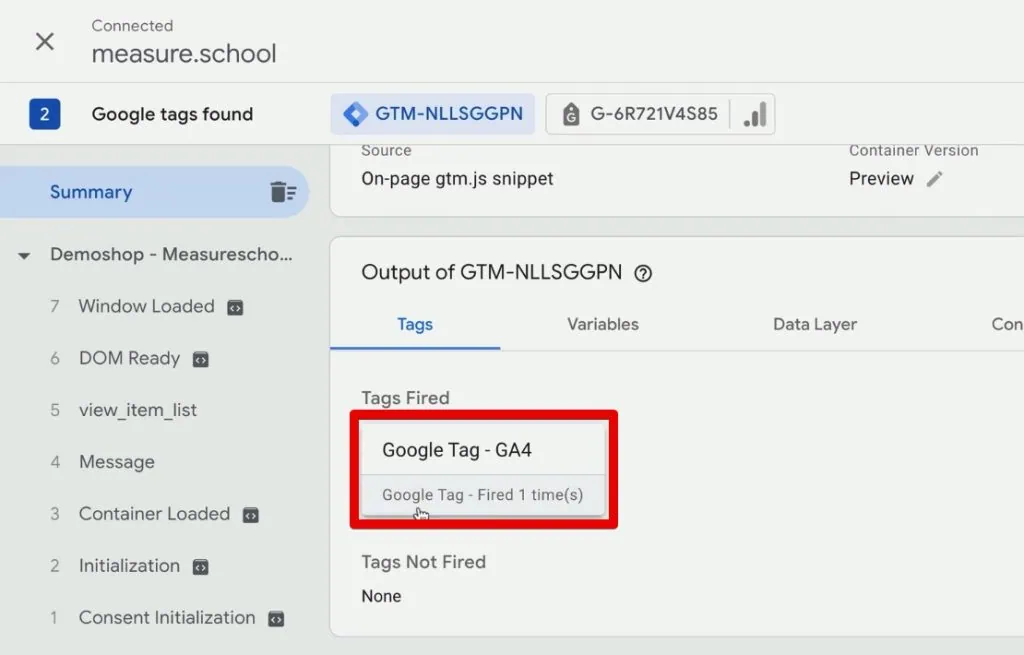
In the Tag Assistant, we can see that our tag fired successfully, and Google Analytics is sending data from our client over to GA4.
What if we now want to use our GTM server? We would send that data not to GA4 directly but to our server-side instance.
Here is a summary of the steps:
- Add the transport_url parameter to the Google tag in the client-side implementation to transfer the data to the GTM server.
- Set up a GA4 Client in the GTM server container to claim the data.
- Set up a GA4 tag in the GTM server container set to fire on all pages.
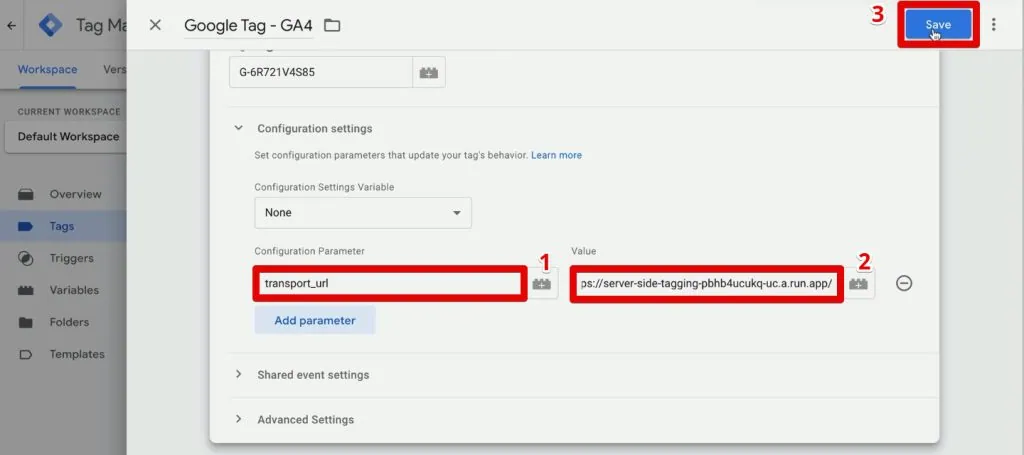
In our client-side GTM, open the Google tag. Here, we will change where the data is sent by adding a new configuration parameter. Click Add parameter.
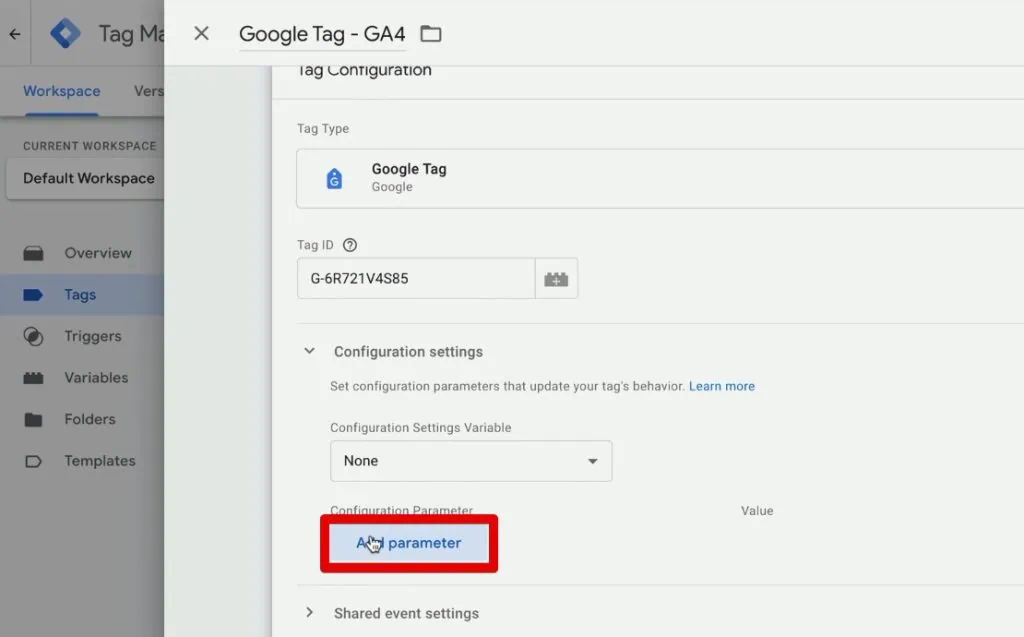
We will add the transport_url parameter, which dictates where to send our data. For its value, paste in our GTM server default URL. Finally, click Save.
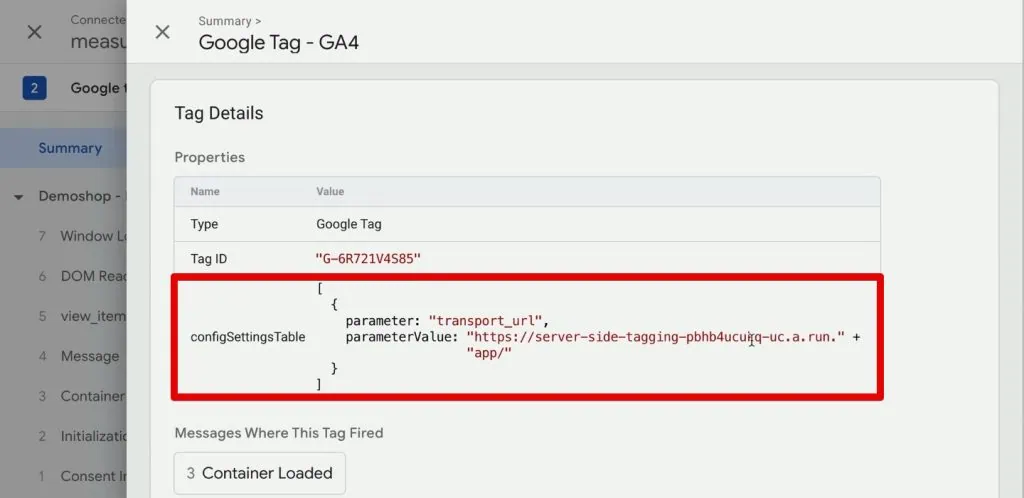
Enter the preview mode again. As the page loads, seemingly nothing has changed on the client side. We can still see that our GA4 tag has fired.
Looking into the tag details, we see this information was sent to our server URL.
Where can we see the data? We can see them in the preview mode of our GTM server instance.
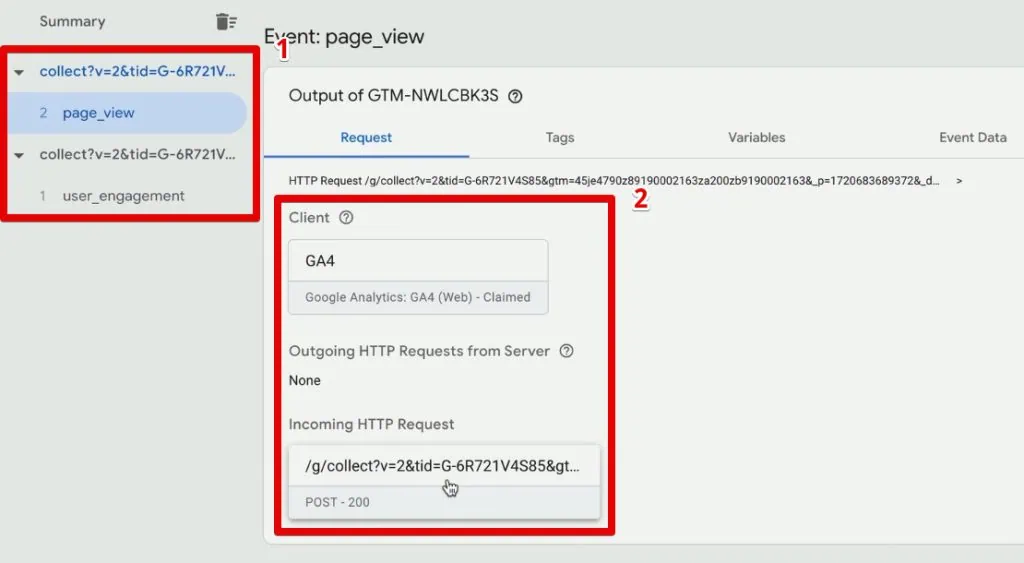
We will have to do a bit of juggling between our two GTM container preview modes here. First, refresh the preview of our GTM server instance. Next, reload the demo shop webpage.
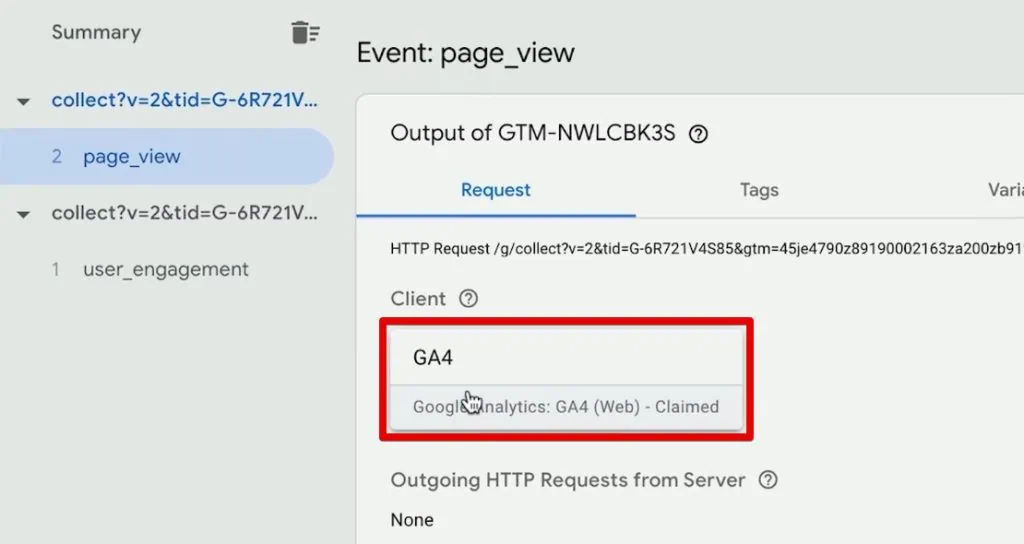
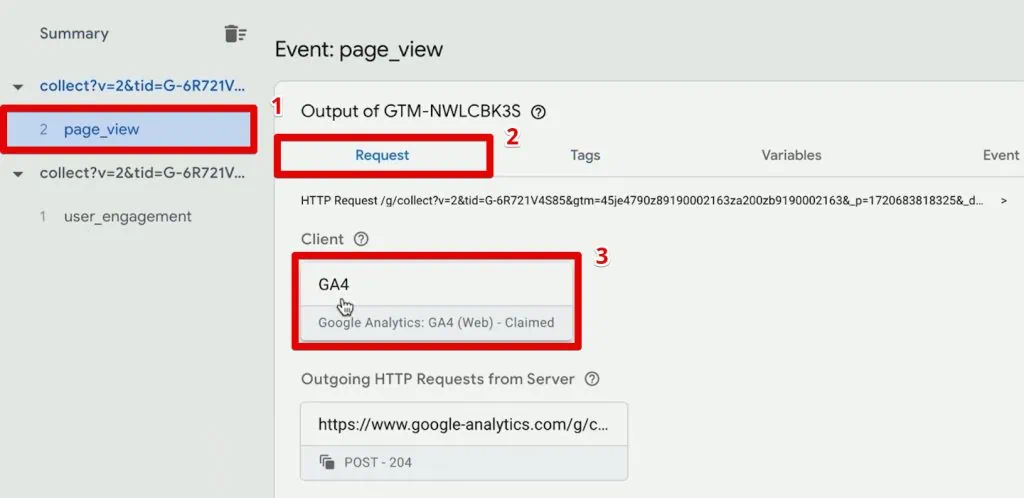
In our server instance, we see two requests: a user engagement and a page view. In the page view, we can see the request from GA4 coming in and the collect call.
Our GTM server doesn’t do anything with this data yet. We need to claim this request with something called a Client.
For that, go to the Clients section of our GTM server container. Here, we can see that the GA4 client is already automatically created for us.
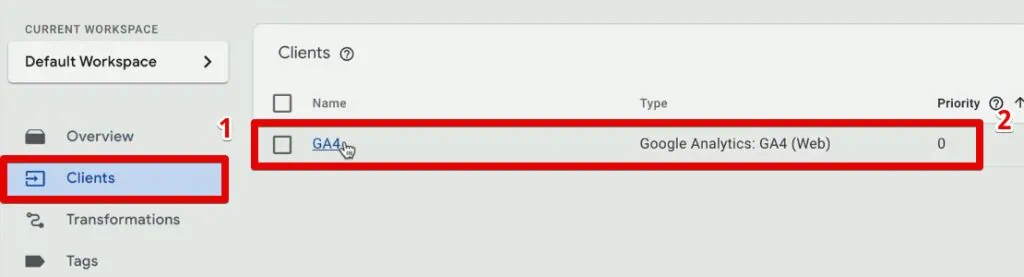
It means that GA4 should have already claimed the server request. Looking at our GTM server preview mode, we can confirm that the GA4 client has claimed the request.
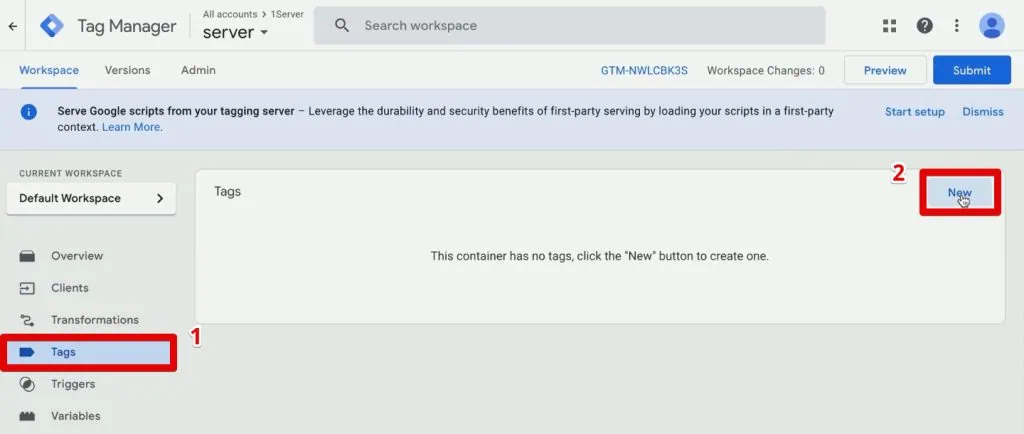
Now, let’s create a tag based on the Google tag data. Go to Tags → New.
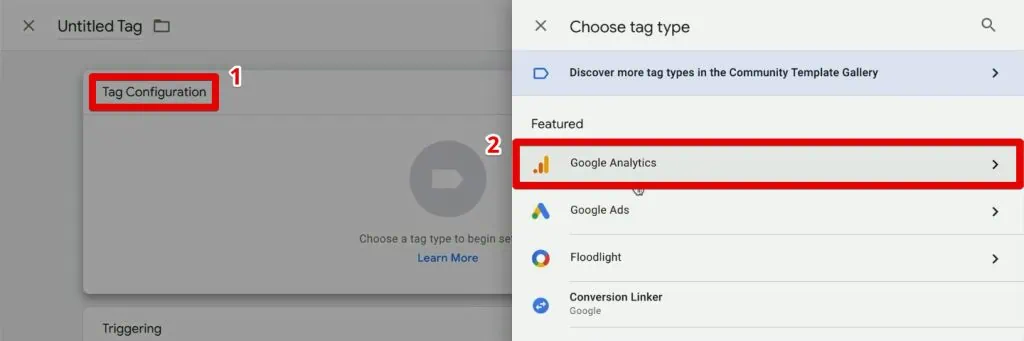
Click Tag Configuration → Google Analytics.
In the Google Analytics library, select the Google Analytics: GA4 tag. Leave both the measurement ID and event name empty.
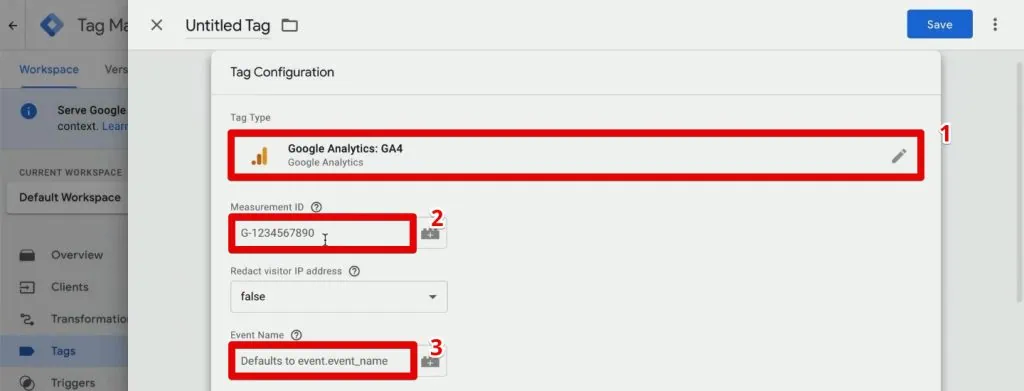
GTM will take the measurement ID and event name from the request that came into the server.
All we need to do now is to choose a trigger. For this tag, select the All Pages trigger. Finally, name the tag.
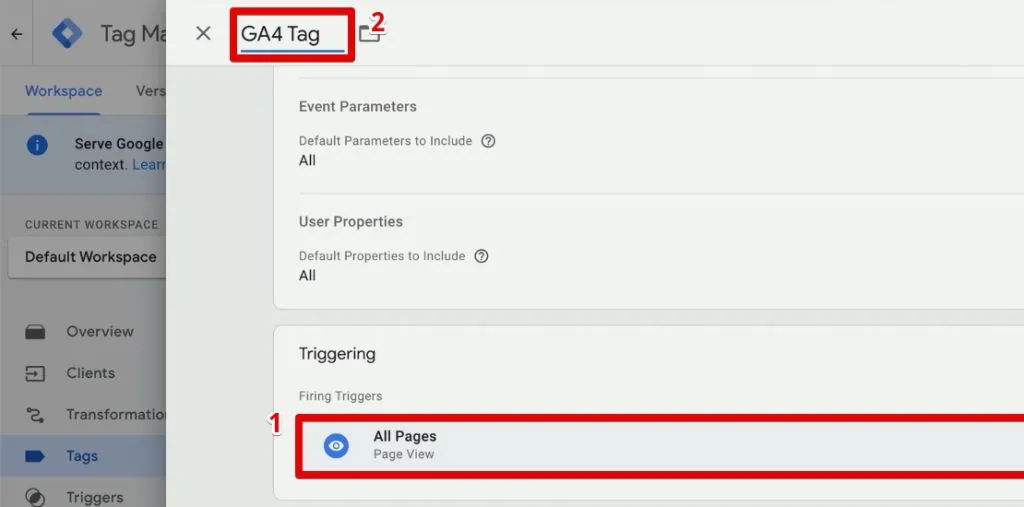
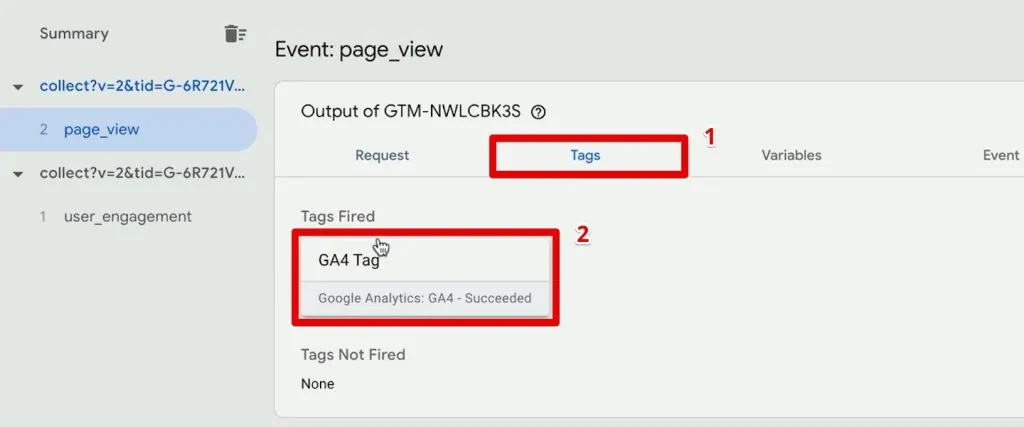
So, that is our GA4 tag in the GTM server. Save the tag and refresh the preview mode again. Send another request by refreshing the demo shop webpage.
We again have a page view come in. In the Request tab, GA4 claims this request.
In the Tags section, we can see that our GA4 tag has fired successfully.
Great! That’s how we route our data from our client to our GTM server side, then finally to Google Analytics 4.
To summarize, the steps to setting up GTM server-side tagging are:
- Set up a GTM server account and container.
- Provision a GTM server on the Google Cloud Platform.
- Configure and preview the GTM server.
- Deploy GTM server-side tagging.
Don’t forget to submit a live version of the client and server-side containers to all users.
Additional Considerations and Recommendations
Now, we need to mention a few caveats for Google Tag Manager server-side tagging.
- As mentioned, the Cloud Run instance is in the US central. For example, if you’re in Europe, you may want your data hosted in the European Union. You must set up your GTM server manually to choose a different region. You cannot utilize the automatic provisioning.
- To get the full benefit of GTM server-side tagging, you must add a custom domain to your server-side tracking. It could be the same domain of your website or a subdomain. That way, all your requests will go to a first-party context rather than a random URL that Google gives you. Therefore, we recommend tinkering with this process if you want to use this implementation in production.
- Finally, consider that it is a live server on the GCP. As you might have seen, GCP is not so straightforward sometimes, and you need to know what you’re doing, especially when the GTM server breaks down. If you need to scale any of these operations and have proper budgeting, cost control, and server optimization, you must administer and maintain it.
Take all these into consideration when setting up your GTM server.
🚨 Note: Discover how First-Party Mode compares to server-side tagging and why it might be the more efficient choice for improving data control and privacy.
Summary
Now you know how to set up Google Tag Manager server-side tagging. You first set up a GTM account and server container. Then, provision a GTM server on the GCP. Next, route your tags from the client side to our server. Finally, send these requests to our analytics tools endpoint.
If all these sound too technical, check out our Server-Side Tagging Services. We can set this all up for you. We also have a dedicated offering for a managed server.
You have set up your GTM server and are ready to take the next steps. Have you set up server-side tracking? How do you circumvent ad blockers? Let us know in the comments below!


")
Hi Julian,
Do you know if there is a possibility to integrate Google Ads with Tag Manager server-side?
We’re considering this as a potential solution for the third-party cookies, but we’re wondering about the integration with Google Ads.
There is an integration with Google ads. We were running both client and server pixels in parallel and noticed that the server pixel got more conversions.
Here’s the guide on how to set it up: https://developers.google.com/tag-platform/tag-manager/server-side/ads-setup
Hi Julian,
Have you ever used a different server as Google Cloud Platform? It seems to me that it requires a more complex configuration ?
hi Julian,
I am trying to use sGTM, and I have also established our subdomain, everything looks good, but I encountered a problem, because it is our subdomain, so every gtm/ga4/collect request will put a Large cookies are brought into the request header, resulting in a 400 error for this request. This server that requires Google to receive data is set to allow a larger http header, how should I deal with this problem?
error 400 means that the server is not allowed to handle the requests. Did you setuped the Tagmanager client in the tagmanager server container?
The client should know which webcontainer are allowed to handle. Enter the id of your webcontainer and the error 400 should be gone.
I followed one of your videos on setting the cloud run services for facebook server tracking, even though the test tool events seems to receive every event data, I get this CORS issue on the console browser:
Access to XMLHttpRequest at ‘https://ss.MYDOMAIN.com/data?v=1&event_name=page_view’ from origin ‘https://www.MYDOMAIN.com’ has been blocked by CORS policy: No ‘Access-Control-Allow-Origin’ header is present on the requested resource.
what could be the issue and how to fix it ?