
Last Modified on May 2, 2024
We all know that running marketing campaigns is not an easy task. But it gets even more difficult if we are not able to measure their performance.
This becomes quite a problem with so many different platforms, campaigns, ad types, and creatives.
This is especially true when you have a hard time explaining to your management where and how you’ve been spending the marketing budget, and well… getting more budget.
Thankfully, you can see your campaign data in Google Analytics 4 as well, although there are some changes in terms of where you can find your campaign data in the reports and what UTM parameters can be tracked in GA4.
By the end of this post, you will be able to refresh your knowledge of how UTM tracking works in general and how to track UTM codes in Google Analytics 4.
🚨 Note: Check out our tool that shows where your leads are coming from in your CRM.
We’ll be looking at:
- What is UTM Tracking and Why is it Important?
- What are UTM Parameters?
- How to Create UTM Codes?
- Where to See UTM Data in GA4?
- Best Practices for UTM-Tagging
Another day, another topic to learn about in the analytics verse. So, let’s get started!
What is UTM Tracking and Why is it Important?
UTM (Urchin Tracking Module) codes are the snippets that are attached at the end of the URLs to give the sources of your traffic more precisely including some required (and important data) like source, medium, and campaign.
In GA4, we can get data for 8 UTM parameters (more on this in the next section). These parameters can prove quite helpful in analyzing the performance of different traffic sources and/or any marketing campaigns.
Let’s try to understand it with an example. We at Measureschool are running a paid Cyber Monday campaign on Facebook and we want to know how it is doing in Google Analytics.
This is how our URL will look with the three required UTM parameters:

If we just knew that the traffic is coming from Facebook, we wouldn’t be able to judge the performance of our paid Cyber Monday campaign.
Similarly, if we add more parameters about the campaign, content, or the type of ad(s) being used, then we can pinpoint their performance.
It’s important to know how our specific campaigns, ads, or content (even copywriting) are doing so we aren’t wasting our resources on previously unsuccessful strategies.
These codes do not affect how the page performs or its speed. They give us useful information about our marketing campaigns as well as ultimately help with the attribution, and that’s why they are important.
🚨 Note: It’s also possible to track and analyze Facebook ads traffic in GA4. Check out our guide and find out how.
What are UTM Parameters?
UTM parameters are the codes that provide us with important additional information with their keys holding the value we add.
These parameters have three required sources as we discussed above. Others are optional, but using them can give even more information and put things in perspective.
In UA, we have 5 parameters, and GA4 now has 3 additional parameters, which takes the total to 8.
Here are the 8 UTM parameters available in Google Analytics 4:
1. Source
This required parameter tells us where traffic originates from and is important to do any kind of analysis. Commonly tracked sources are Google, Facebook, Bing, Linkedin, and Email list. E.g., utm_source=Google, utm_source=OctNewsletter.
2. Medium
This parameter tells more about the type of traffic we receive since now we know the origin of traffic in the source. Commonly used ones are PPC, paid_social, social, organic, email, referral, and so on. E.g., utm_medium=ppc, utm_medium=email.
3. Campaign
If you want to track an individual campaign’s performance, then this is the parameter that will help you. It’s commonly used to measure the performance of Facebook, Emails, and any other such campaigns on a platform. E.g. utm_campaign=blackfriday22, utm_campaign=halloween22.
Additional parameters from here onwards are all optional but can be very helpful with attribution and drawing rich insights from your data.
4. Term
This parameter is mainly used for Google Ads (paid search) than any other platform and helps you to know which keywords brought a website visitor to your site. E.g. utm_term=digital_analytics.
5. Content
If you have multiple ad creatives in a campaign, then this parameter could be used to differentiate between them. It’s not limited to ads, and it’s flexible in how you want to use it.
For instance, if your newsletter has multiple URLs, then you can use this parameter to differentiate which one the users clicked on. E.g. utm_content=banana_bluebg, utm_content=bodylink.
The following three UTM parameters are only available in GA4.
6. Source Platform
The parameter tells us about the platform that sent the traffic to our site and it collects the values of Google Ads, Manual, Shopping Free Listings, Search Ads 360, and Display & Video 360. E.g. utm_source_platform=GoogleAds.
7. Creative Format
As the name suggests, this parameter helps to understand what type of creative you’re using, e.g. display, video, native, search, etc. Similar to the utm_content, we can use this parameter to differentiate between the creatives as well. E.g. utm_creative_format: image_mountain.
8. Marketing Tactic
This is more about how you’ve done your targeting, i.e., remarketing, prospecting, etc. You can also use it for other information like bidding strategies, more details on audiences, etc. E.g. utm_marketing_tactic=remarketing_180days.
🚨 Note: The utm_creative_format and utm_marketing_tactic parameters are currently unavailable in GA4 reports.
How to Create UTM Codes?
There are multiple ways to create UTM codes for your campaign URLs, from free to premium web tools to spreadsheets. Let’s have a look at them.
Google’s Campaign URL Builder
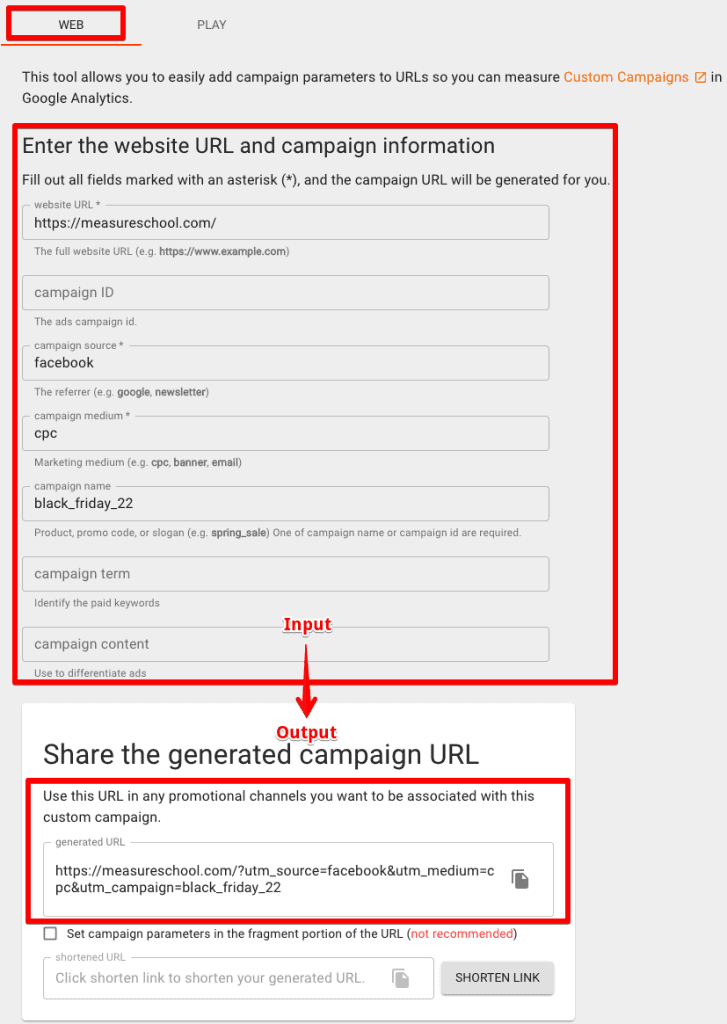
The most commonly used tool is Google’s campaign URL builder, where you can simply copy and paste the original URL and then type in the UTM parameters to get a final URL below that you can use for your campaigns.
🚨 Note: Make sure to select the web tab if you’re creating UTMs for the web.
Measureschool’s UTM Tool
We also have our UTM tool in the form of Google Sheets that you can use. Simply save it as a copy and start using it.
This tool will also help you to keep a track of all the UTM-tagged URLs in one place and you won’t have to copy-paste it from other tools every time you create one.
The ‘Campaign Tagging Tool’ tab is where you can create UTMs, whereas the ‘Examples’ tab will help you get started with some good examples.
Here’s a quick snapshot of how it looks:
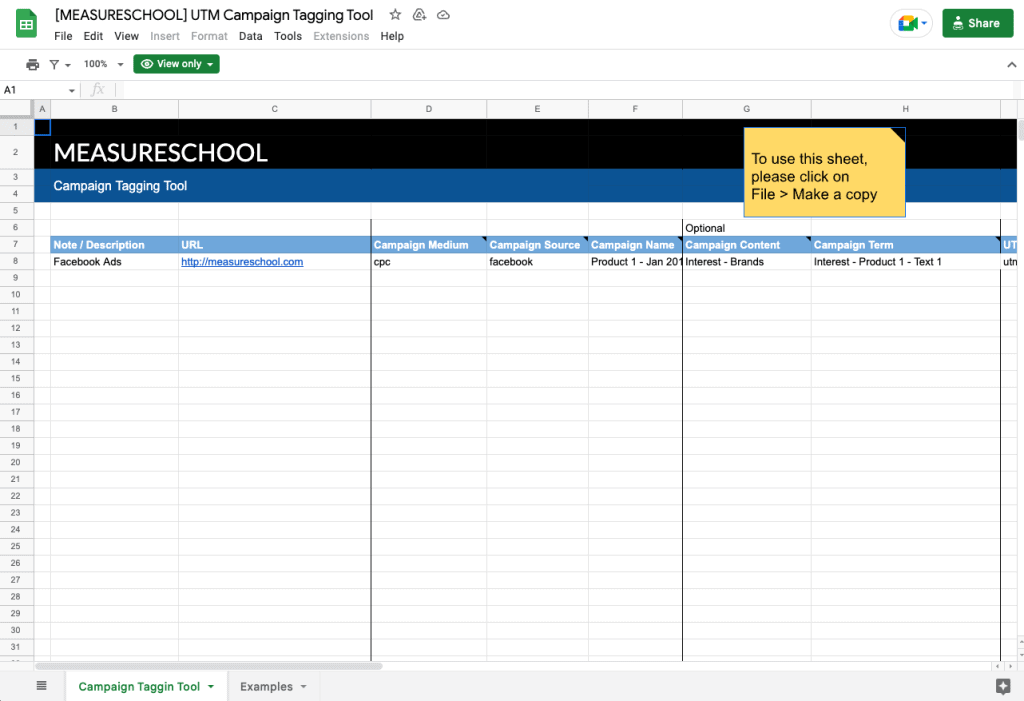
You can also customize this spreadsheet to suit your team’s needs and style.
There are also other freely available web tools to create UTMs that you can check out on the internet before settling on one of them.
Whatever tool you use is only as good as how effectively you tag the URLs to see the relevant data in GA4. More on that in the last section.
Where to See UTM Data in GA4?
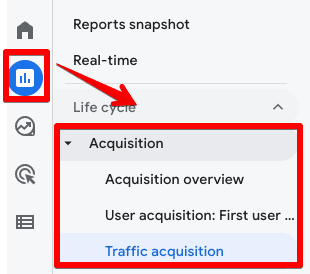
UTM data can be seen in the standard Reports under Acquisition in all three places:
- Acquisition overview
- User acquisition: First user default channel grouping
- Traffic acquisition
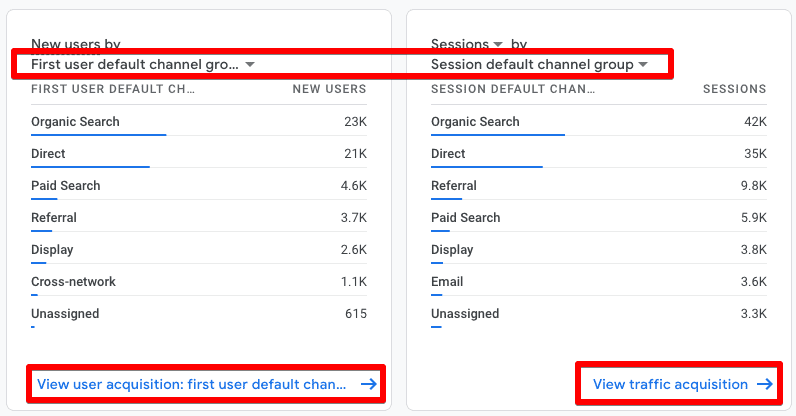
Acquisition Overview
This report is only good to get an accurate overview under the following two cards by clicking on the highlighted drop-down menus.
If you click on the blue text at the bottom right corner, it will take you to the other two main reports we talked about above.
User acquisition: First user default channel grouping
This report looks at the campaign data for first users only, and you can select what you want to look at by clicking on the drop-down menu as we did above.
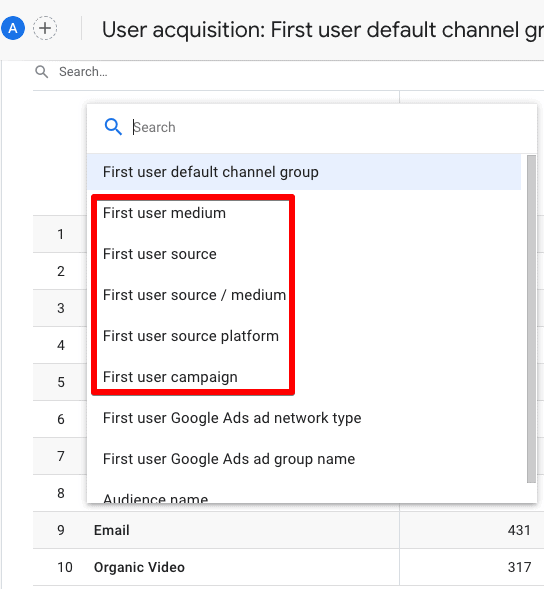
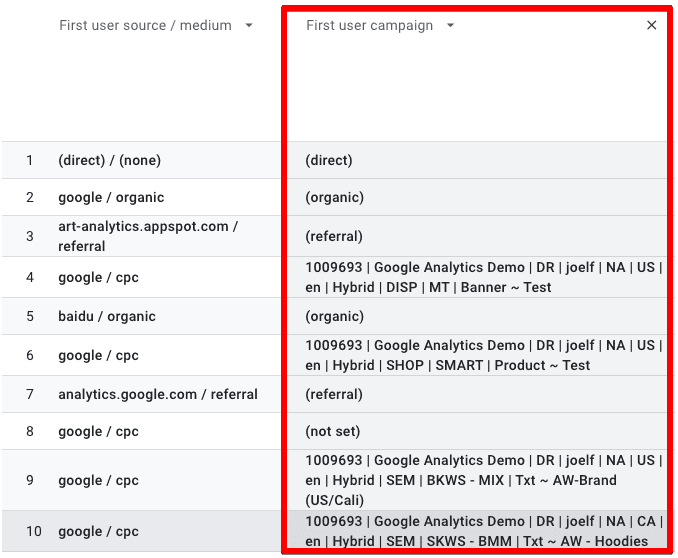
You can also further drill down by adding a secondary dimension if you click on the ‘+’ icon in the same column. For instance, seeing data for the First user campaign as a secondary dimension.
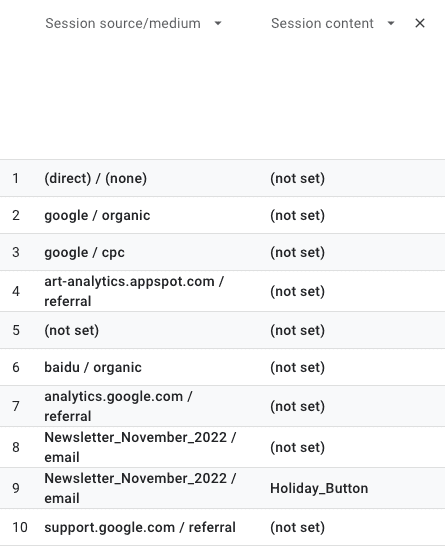
Traffic acquisition
This report works similarly to the First user report above but is focused on the sessions. You might see some additional options to add in for the secondary dimension, as well.
In a similar method, I’ve used Session content as a secondary dimension to see the UTM data which is only available for row 9.
Apart from these standard reports, don’t forget that you can also play around in the Explore section of GA4 to create custom reports with UTM data that might suit your needs.
Best Practices for UTM-Tagging
As you can see in the last example above, most of the source/medium had (not set) for Session content and this comes down to how the URLs were tagged.
Following are some best practices to make the most out of our campaign data. Let’s discuss some important ones.
- Naming Conventions – Developing naming conventions will help to standardize your URLs and make it easy for anyone to understand, even if they look at the data a few years later. It also keeps your data clean and organized vs fragmenting it, e.g. Facebook vs facebook.com.
- Keep it Simple – Use easy-to-understand names for your campaigns, content, and keywords. Keeping UTMs close to GA4’s default channel grouping names could also be quite helpful.
- Who created the URL – Adding the name of the person who created the UTM links would make it easy to go back to them in case of any questions, as well as to understand their logic.
- Lowercase vs Uppercase – Decide whether to use lowercase or uppercase to create UTM links. It’s recommended to use lowercase, though.
- URL Shorteners – People can often be scared when clicking on complex or lengthy URLs, and using shorteners will help alleviate this concern.
Following these practices will not only help you get clean data in GA4 but also make it easier for other users to make sense of the data even when you’re not there.
FAQ
How do I create UTM codes?
There are various ways to create UTM codes. One popular method is using Google’s Campaign URL Builder, where you can input the original URL and add the UTM parameters. Alternatively, you can use tools like Measureschool’s UTM Tool in Google Sheets or explore other freely available web tools to generate UTM codes.
Where can I see UTM data in Google Analytics 4?
UTM data can be viewed in the standard Acquisition reports in Google Analytics 4. Specifically, you can find it in the Acquisition Overview, User Acquisition: First User Default Channel Grouping, and Traffic Acquisition reports. Additionally, you can create custom reports using UTM data in the Explore section of GA4.
What are some best practices for UTM-tagging?
Here are some best practices for UTM-tagging:
1. Establish naming conventions to standardize your URLs.
2. Use simple and easy-to-understand names for campaigns, content, and keywords.
3. Add the name of the person who created the UTM links for future reference.
4. Consider using lowercase letters for UTM links.
5. Utilize URL shorteners to make lengthy URLs more user-friendly and less intimidating.
Summary
We’ve now established how to track UTM codes in GA4 along with a basic understanding of what they are, why UTM tracking is important, where to find UTM data in GA4, and some best practices to help us make the most of our data.
Whether you use Google’s tool, Measureschool’s UTM tool, or create your spreadsheet, it is important to have a system that works smoothly and makes it easy for any user to understand the UTM links.
Following Google’s default channel groups for naming conventions is a good place to start and you can read more about them in our how to use GA4 default channel grouping article.
Do you follow any naming conventions for your UTM codes? Tell us in the comments below how UTM tracking gives you helpful data and impacts your business.


")
Great post! Thanks so much! For some reason, the UTM parameters are not showing up in my GA4 report. I used this site to build out a good url: https://ga-dev-tools.google/campaign-url-builder/ but no luck. Any idea on what I can troubleshoot to get these working?
I have the same problem! Were you ever able to resolve this? If so, any tips would be much appreciated!
Hi Lisa, have you tried running tests in real-time to see how the traffic gets attributed?
Hi! Great post! 🙂
can I also get total revenue from user that proceed purchase from UTM link?