
Last Modified on January 7, 2025
Getting traffic to your website is one part of marketing. The other part is understanding how that traffic behaves once it’s on the website.
The answers to questions like what the user clicks on, how they interact with pop-ups, how many of them successfully submit the forms, and how many of them make purchases, among many others, are answered by tracking those actions.
Now, these actions could be tracked directly on the website with the help of the developers, and then the data can be sent to analytical tools like Google Analytics 4, but that means being heavily reliant on devs.
Tag management tools like Google Tag Manager (GTM) give us a lot of control minus the messing around with the backend code part, so we do not need to wait on devs for most of our tracking needs.
Whether you want to send data to platforms like GA4 or Facebook or do any consent management, GTM can be quite a powerful tool and triggers sit at the center of it all.
In this post, we’re going to cover all about the Google Tag Manager triggers, which include:
- What are Google Tag Manager Triggers?
- Trigger Types in Google Tag Manager
- Use Cases of Google Tag Manager Triggers
- Best Practices for Google Tag Manager Triggers
This will be a long one, so sit tight!
What are Google Tag Manager Triggers?
In simple words, a trigger defines when a tag should fire to dispatch an event to other tools that are installed with Google Tag Manager e.g. GA4, Meta, etc.
So, in essence, triggers keep an eye out for specific events, and when specific conditions are fulfilled, they fire the relevant tag and capture all the information that the tag is set up to collect.
These events range from simple button clicks and page views to form submissions and purchases. Since all these events are different, they guide us in deciding what type of trigger we should select.
For instance, we could say we want to track the clicks on the website’s navigation menu along with the text and the URL of the menu item; but, this may be better done with the click trigger and not other trigger types like the page views.
Therefore, it is important to know which trigger to use and when.
Trigger Types in Google Tag Manager
There are a total of 16 trigger types. It might sound a little overwhelming, but they can be grouped under 4 categories which should hopefully make it easier to absorb.
They are designed to serve specific purposes. Some of them are quite similar and sometimes they can be used interchangeably, while others are very specific in how they can be used.
These 4 trigger categories in Google Tag Manager are:
- Page View
- Click
- User Engagement
- Other
Let’s jump to these trigger categories.
1. Page View Triggers
These are initialized whenever a web page is first loaded into a browser. They are further divided into five types:
- Consent Initialization
- Initialization
- Page View
- DOM Ready
- Window Loaded

They all fire in the same order when we go into the preview mode from top to bottom. The first three-page view trigger types are included in every GTM container by default, i.e., you don’t have to create them, you can use them out of the box.
- Consent Initialization
A visitor’s consent settings for data collection must be respected before any other triggers fire. The Consent Initialization trigger is used to achieve that with the help of Consent Management Platforms (CMPs). It is the first one to fire by default.
This trigger pushes the gtm.init_consent event to the dataLayer.
- Initialization
It will fire after the Consent Initialization trigger and should be used to fire any tags that need to be fired right after the user consent is recorded. So, any tags that depend on user consent can then be fired (or not) using this trigger.
This trigger pushes the gtm.init event to the dataLayer.
- Page View
It fires immediately after a new page begins to load within the browser and can be used to get data from page impressions, aka views. In GTM preview mode, it is shown as ‘Container Loaded’ and sends the gtm.js event to the dataLayer.
- DOM Ready
It fires when the page’s full HTML structure is completed and the Document Object Model (DOM) can be accessed. In other words, the user can view all the elements on the page.
Therefore, any page view tags where variables get data from the DOM should be using this trigger so the correct values are available. It populates the gtm.dom event in the dataLayer.
- Window Loaded
Once the page is fully loaded, it is fired at the very end after all other page view triggers. This includes any embedded resources such as scripts (including JavaScript), images, and any other attachments on the page.
So, if you want to be sure that a tag fires after all elements of the page are loaded, then this trigger should do the job. It sends the gtm.loaded event to the dataLayer.
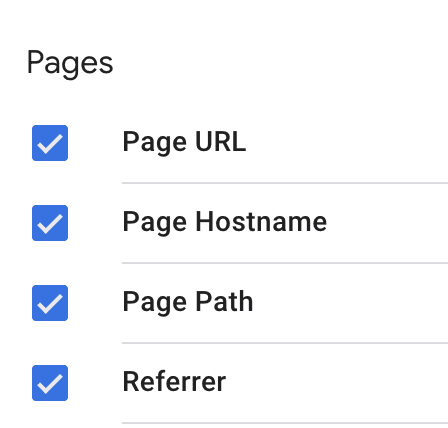
All the page view triggers automatically populate the following four variables, which you don’t have to enable:
- Page URL
- Page Hostname
- Page Path
- Referrer
2. Click Triggers
Click tracking is one of the most commonly used tracking types in the online world, as it can help us to understand user behavior by knowing what users are clicking and what not, and how many times they are clicking an element.
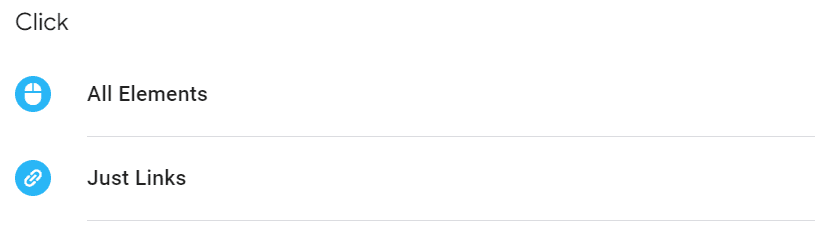
Every click can be categorized as a separate event and the collected values of those click events like the button text or click URL can be helpful to get more context. There are two types of click triggers:
- All Elements
- Just Links
When these click triggers are created in GTM, it listens for clicks and also automatically collects the values of the six built-in click variables (need to be enabled) which are Click Element, Classes, ID, Target, URL, and Text.
- All Elements
As its name suggests, this trigger tracks any elements that might be present on a given page. These include any banners, links acting like buttons, buttons, images, pop-ups, etc.
Since this trigger covers all element types, sometimes it can be used instead of the Just Links as well, provided you still get the click variable values as you expect because certain values might only be visible for the All Elements trigger.
It fires the gtm.click event into dataLayer.
- Just Links
As the name suggests, the Just Links trigger tracks only the clicks on traditional HTML links that use the anchor tag, i.e., <a> e.g. <a href=”www.measureschool.com”>Measureschool.com</a>.
Since it’s specifically to be used for links or elements acting like links as long as it has the anchor tag, it won’t work to simply track other elements. It results in the gtm.linkClick event in the dataLayer.
While page view and click triggers cover a lot of scenarios, there’s still a ton of room for user engagement and other triggers.
3. User Engagement Triggers
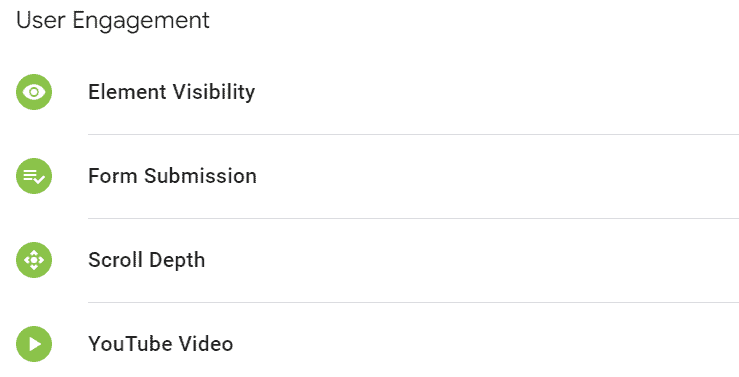
There are four triggers in this category that are based on how a user engages on the site. These are as follows:
- Element Visibility
- Form Submission
- Scroll Depth
- YouTube Video
Even though any type of interaction is engagement, these triggers take it a step further to measure user engagement actions.
- Element Visibility
This trigger works based on a selected element’s visibility in the web browser’s viewport, which is the visual area of the browser’s page. So, if an element is visible there then the user should be able to see it, as well.
The elements become visible when the page is loaded, scrolled, or any animations that cause them to appear on the screen, e.g., carousels, modals, etc.
This could be selected based on the element’s ID or CSS Selector and the trigger also provides other configurations to make it more useful.
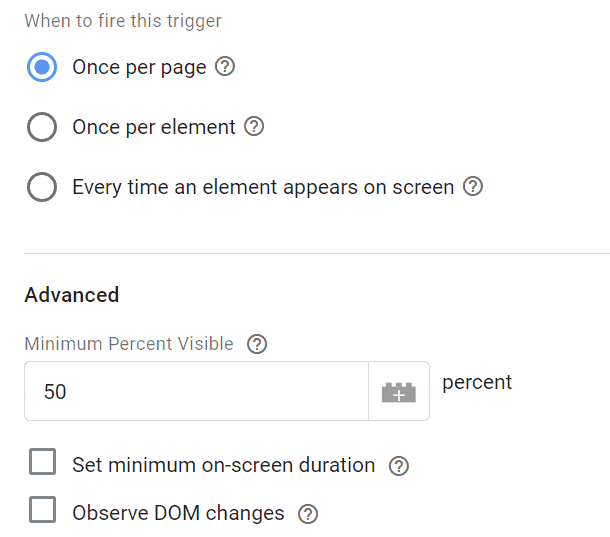
For instance, you can choose from three options to decide on how frequently you want it to fire:
- Once per page: It will only fire once on the page unless the page is reloaded. If multiple elements match the same ID or CSS selector, then only the first matched element will fire the trigger.
- Once per element: It will fire the trigger every time the matched element appears on the screen. If multiple elements match the same CSS selector, it will fire the first time each one of them is visible. But in case multiple elements with the same ID match, then it will only fire on the first element.
- Every time an element appears on screen: This option will cause the trigger to fire every time an element is matched, whether it’s automatic or due to user actions. This setting can cause a tag to fire multiple times in a short time if an action can cause the element to appear on the screen easily, which can also affect its performance.
There are also some advanced options that you can configure:
- Minimum percent visible: This is 50% by default. However, you can choose a different percentage value for the element to be visible on the screen for the trigger to fire. The lower the value, the quicker it will fire.
- Set minimum on-screen duration: You can set a minimum duration that an element should be visible on the screen before the trigger can fire. This is configured in milliseconds.
- Observe DOM changes: This one works well if the elements change based on user interaction. Make sure that the CSS selector or ID matches the specific element, or it can affect the page performance if GTM matches multiple elements with the same selector or ID.
Element visibility trigger fires the gtm.elementVisibility event in the dataLayer and also auto-populates two variables with numeric values: Percent Visible (0-100) and On-Screen Duration (in milliseconds).
- Form Submission
It is fired whenever a user submits any forms that are present on the active webpage. It can be further configured with two more options.

- Wait for tags: This allows you to delay the form submission until all other tags that depend on this trigger have fired or a certain time has passed (in milliseconds). If it’s unchecked, then slower tags might not fire before the next page is loaded after form submission.
- Check validation: You can check this option if you want to set the trigger to fire only when the form is successfully sent. Otherwise, it will fire the trigger every time an attempt is made.
This trigger sends the gtm.formSubmit event to the dataLayer.
- Scroll Depth
It measures all scroll events on the site (or specific pages) and comes with two main options:
- Vertical Scroll Depths – which fire when the user scrolls down on a page.
- Horizontal Scroll Depths – for when the user scrolls to the right of the page.
You can manually set the firing conditions based on the scroll depth percentage or the pixel count at which the trigger will fire.

The third option is when the trigger should be enabled. There are three options to choose from, which are the default page view events as we discussed above:
- Window Load (gtm.load): This is the default option and enables it after all initial content on the page has loaded.
- Container Load (gtm.js): This enables the trigger as soon as it can after the page begins to load.
- DOM Ready (gtm.dom): This enables the trigger to fire after the DOM is ready to be parsed.
This trigger pushes the gtm.scrollDepth event in the dataLayer and populates three variables: Scroll Depth Threshold (0-100), Scroll Units (percent or pixels), and Scroll Direction (vertical or horizontal).
- YouTube Video
This is pretty self-explanatory in terms of what it is about. you can use this trigger to fire tags when users interact with embedded YouTube videos.
Following event interactions can be manually selected when creating the trigger:
- Start
- Complete
- Pause, Seeking, and Buffering
- Progress (Percentages or Time Thresholds in seconds)

The ‘Enable this trigger on’ option has the same options as for the scroll depth.
This trigger sends the gtm.video event to the dataLayer. Lastly, you’ll have to enable the respective built-in video variables for the data that you would like to collect.
They can be found in Variables → Configure, and then scroll down to the video section.

4. Other Triggers
There are five triggers in the other triggers category, which are not covered in the above three categories:
- Custom Event
- History Change
- JavaScript Error
- Timer
- Trigger Group

- Custom Event
This trigger is used when the standard events cannot track certain user actions. It takes the name of the event as it is pushed to the dataLayer. This is often done by listeners for other tools/utilities like the Hubspot form listener.
So, the custom event trigger enables us to use any existing events in the data layer for us to fire the tags. So, if we push an event to the dataLayer ourselves, then we can use that event to fire our tags, which provides a lot of flexibility.
Since matching the event name is important, the trigger allows the Use regex matching option.

- History Change
This is used to detect changes in the URL or the history object within the browser and is used for single-page applications aka SPA websites.
The trigger fires the gtm.historyChange event in the dataLayer and populates four variables whenever a history change event occurs:
- History old URL fragment – What the URL fragment was before the page was changed.
- History new URL fragment – What the URL fragment is after the page is changed.
- History old and new state – These two have the old and new history objects as controlled by the site’s pushState.
- JavaScript Error
It fires tags that give contextual information about any uncaught JavaScript exceptions or compile-time errors, giving you the opportunity for error handling.
The JavaScript error variable can be used to collect and send the error message to any endpoint. It populates the gtm.pageError event in the dataLayer.
- Timer
As its name suggests, the timer trigger sends events to the Tag Manager at regular set intervals.
The trigger has options for:
- Event name – The default value of gtm.timer (as pushed to dataLayer) works for most cases. However, you can change it to something else and use it in your custom event trigger to fire a tag.
- Interval – It can be specified in milliseconds, after which the tag will fire.
- Limit – You can specify a value to limit the number of times the tag will be fired.
- Enable this trigger when all of these conditions are true – This gives further flexibility to be more specific.

- Trigger Group
This is a unique trigger where you combine two or more triggers into one group by creating dependency.
The tag will fire when all the triggers in the group have fired at least once. The triggers in the group don’t necessarily have to be the same type or added only once.
You can add the same trigger more than once, but that would mean that the trigger will fire the same number of times before the trigger group can fire. It pushes the gtm.triggerGroup event to the dataLayer.
One thing that is common in all the triggers is the option of “This trigger fires on” on “All [trigger name/type],” or “Some [trigger name/type]” to be more specific, where we can use any built-in or custom variables with an operator and a value for the trigger to work effectively.

Use Cases of Google Tag Manager Triggers
Use cases are not limited to what we discuss in this post. Sometimes they can be used in a hacky way as a stop-gap solution as well to solve a tracking issue. Let’s explore how we can use different trigger types.
Page Views
- Consent Initialization – Used whenever the consent state for your website needs to be updated or set. It is primarily used to trigger the Consent Management Platform tags only.
- Initialization – Used when you want to make sure certain tags are fired before the page loads so that the information is sent to the respective tool(s) right away. There could be two use cases:
- If a user has already granted the consent in the past, then it will update their consent status before other tags are fired on other lower priority page view triggers.
- It’s recommended to fire the GA4 configuration tag first, so all data is properly pulled into analytics before other tags fire. This can be expanded to other tools, as well.
- Page View -Used when you want to collect data generated from individual page views. It is most commonly used for tracking tags like the previously mentioned GA4 configuration, Google Ads remarketing, Meta Pixel, any ab testing tools, and so on. This can also be used for any thank-you pages to send any conversion events.
- DOM Ready – This should be used when you want to extract something from the site’s HTML structure like a product title, any drop-down menu, or a radio button selected, and send their values with an event. If you send the event with the above-mentioned three page view triggers, then you won’t have the values available in the DOM to be sent.
DOM Ready should also be used if you’re using any variables that get the value from the page, like the Auto-Event Variable, DOM Element, Element Visibility, or other user-defined variables.

- Window Loaded – Since this trigger fires at the very end, it’s best used for any remarketing tags or tags that will need to use some embedded scripts or widgets. For instance, if you wanted to make sure you get proper heat maps, then tools like Hotjar could be fired with this trigger.
Other examples could be when you want to track interactions with any embedded maps or a chat widget whose script loads late on the page. In general, if you don’t need to fire tags for super accuracy, then window loaded can be used.
Some people recommend moving tags to window loaded for increased page speed. It might not have a huge impact if you do that. However, it’s understandable that if you want to load scripts as soon as possible, it might have some effect on the speed.
Clicks
- All Elements – This trigger covers all the elements on your website, whether it’s just the buttons, forms, links, pop-ups, modals, and so on. So, there could be multiple use cases for this trigger where you want to track clicks on an element, even if it’s clicking on the close button for a pop-up.
- Just Links – A good example is to track any outbound links, and/or navigation menu link clicks. Another use case could be to find out if users click on any affiliate links on your site with this trigger, so you can analyze which ones are getting more clicks.
User Engagement
- Element Visibility – One of the best use cases for this trigger is to see if a visitor saw a specific element like a video or a form, and whether they chose to interact with it or not. This trigger can be quite useful to measure user engagement rather than just scroll depth. E.g., you can find out if they have seen a certain heading or a text of content.
- Form Submission – The use case for this trigger is quite specific, i.e., whenever a user submits or attempts to submit the form on the site.
- Scroll Depth – Here is another trigger with a specific use that can be used to see how much a user scrolls vertically or horizontally. One interesting use case is where this trigger can be used to detect if a sudden traffic spike in GA4 is caused by bots, as they won’t trigger the scroll event.
- YouTube Video – This trigger is only useful if you have YouTube videos embedded on your site and want to track how users interact with them.
Others
- Custom Event – This is quite a flexible trigger and use cases can vary from case to case. For instance, you can push an event like userABTest to dataLayer when a user is part of an experiment and trigger a tag based on this event’s name using a custom event trigger.
The same trigger can use existing events in the dataLayer to fire tags. Many form listeners push an event to the dataLayer when the form is successfully submitted, E.g., Hubspot ones have hubspot-form-success, which can be used to fire a tag to send data to tools like GA4.
Video player interactions not covered by the YouTube Video trigger can also be tracked by using video vendor listeners that push a custom event to the dataLayer.
- History Change – It’s used for tracking single-page applications (SPAs) page views, and since there’s no page load after the initial one, they are generally called ‘virtual pageviews’.
- JavaScript Error – This trigger is good for collecting error messages on the site since it not only provides the exact JavaScript error messages but also the URL for the page where the error occurred along with the exact line number in the code.
- Timer – This is used whenever there is a need to measure how much time each visitor spends browsing a web page or completing a specific task, like filling out a form or reading through a blog.
One of the most common use cases for this trigger is to show pop-ups after a user has spent a specific time on the site, meaning they have shown some interest and might be easier to subscribe to your newsletter/offer.
This trigger can also be combined with another trigger to make it more effective, which is what the trigger group is for.
- Trigger Group – This trigger type is good for measuring user engagement, among other things. For instance, you can select the same trigger three times when a user views product images three times or three different images, so you can send an event like image_viewed.
Another example is where you can combine the timer with element visibility and fire a trigger when a user spends at least 30 seconds and then views a specific element on blog pages, measuring that the user spent a certain time and then viewed the content which signals more interest.
These are just a few use cases for the triggers. Some are quite limited in what they can do, but others like custom event, click all elements, element visibility, and trigger group, are quite versatile in how they can be used.
Best Practices for Google Tag Manager Triggers
Here are some best practices to keep in mind when working with Google Tag Manager triggers:
- Only the three page view triggers are enabled by default. So, if you’re not seeing a certain trigger type in the GTM’s preview mode, then it means the trigger is not enabled to listen for that action.
- Enable relevant variables for the triggers to see their values and use them in your tags.
- Think through how you intend to track an action and then decide on using the trigger. If how the user behaves can change in the future, then account for that behavior.
- All triggers have the option of “This trigger fires on” on “All [trigger name/type]” or “Some [trigger name/type],” and it should be leveraged to ensure the trigger doesn’t have vague firing conditions.
- Utilize the blocking triggers, as they can be quite helpful in configuring your tags.
- Know the strengths and weaknesses of the different trigger types, so they can be leveraged according to the situation.
- CSS selectors can be very useful. However, it’s important to be as specific as you can or your triggers will fire when other elements match with those selectors. This is even more important when using the observe DOM changes option in the element visibility trigger because if multiple elements match with the CSS selectors, it can cause performance issues.
- Certain triggers like page view, scroll depth, and trigger group don’t work well with SPA sites. This should be taken into account as the page isn’t technically reloaded when a user navigates from one page to another after the first time, or when there’s a hard reload.
- The scroll depth trigger won’t work well on pages with infinite scrolling, so it’s better to use element visibility.
- Having a proper naming convention for triggers is a good practice to keep your GTM container organized, e.g., trigger type + where it’s implemented.
This is just a short list, but it’s a good starting point from which you can build upon other practices depending on the trigger types and situations.
Summary
If you made it here, kudos to you! Triggers are a very important part of how GTM works, so they deserve some detailed explanation.
We started with covering what Google Tag Manager triggers are and then looked at 16 types of those triggers under four categories.
We also looked at some use cases of these triggers. Some of these triggers are quite specific in their use case, as long as you understand the possibilities.
Finally, we learned about some best practices when using Google Tag Manager triggers and how they can help to ensure our tracking setup has some optimization designed into it.
We mentioned how these triggers can be used to fire ‘tags. Here’s a post about Google Tag Manager Tags Explained (with Examples) to understand how tags work.
What are some of your favorite triggers in GTM? Are there any cool ways you’ve used Google Tag Manager triggers? Let us know in the comments below!


")