Last Modified on October 30, 2024
As technology has progressed more and more, people have realized the importance of data and tools that help us to collect and analyze all that data.
This advance also resulted in more features available in tools like Google Tag Manager to track how users interact with your website.
The Google Tag Manager Custom JavaScript variable (CJS) is one of those features that can help collect / store data that other variable types cannot do. How we use that stored information is another part of the same story.
Often people think that they need advanced level JavaScript knowledge or coding to use this variable. However, while prior knowledge can be quite helpful, you can still use it after you’ve understood how it works.
So, we will cover all about this cool variable in GTM covering the following topics:
- What is the Google Tag Manager Custom JavaScript Variable?
- Use Cases of Custom JavaScript Variable
- Custom JavaScript Variable Best Practices
Let’s get started!
What is the Google Tag Manager Custom JavaScript Variable?
Custom JavaScript Variable is a user-defined variable in GTM that allows you to return values based on JavaScript code.
It’s not the same as the user-defined JavaScript variable. The other place where you can use the JavaScript code in GTM is the Custom HTML Tag (but we are not covering that here).
So, a CJS is essentially a function that is set to return values that are generally difficult to get with the other built-in and user-defined variables.
It also provides a lot of flexibility when we want to implement complex logic/solutions by extracting certain info from DOM, performing calculations, combining different information, and modifying what’s collected.
Unlike other variables, a Custom JavaScript variable can return different data types, i.e., string, boolean, number, array, and object.
There are two important building blocks of any Google Tag Manager Custom JavaScript variable:
- It should have an anonymous or an empty function. A function is something that is invoked by something, which is GTM, and it invokes it every time the condition is fulfilled.
- It should have a return statement or it will return undefined and it could also affect how the container behaves.
Here’s what a sample code looks like:
function() {
    return "Welcome to MeasureSchool” ;
}
This code will return the static string value of “Welcome to MeasureSchool.” But if it’s written like the code below, then GTM won’t even save it as a variable saying that a function should be defined with a return value.
function() {
}
Once a Custom JavaScript variable is created, it can also be referenced in other areas of GTM (where variables can be referenced).
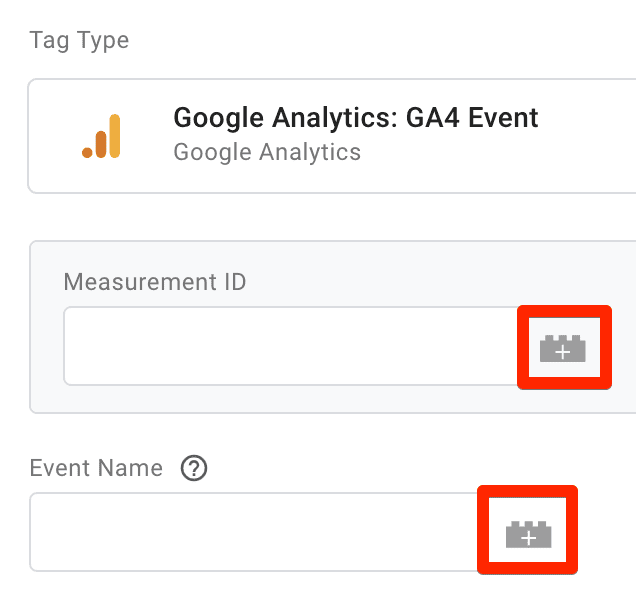
For instance, if the variable is named ‘cjs – MeasureSchool,’ it can be called in GTM wherever the variable icon is present or with the double curly brackets e.g. {{cjs – MeasureSchool’}}. The screenshot below shows the variable icon as seen in GTM.

To sum up, CJS variables can be quite helpful for two major things:
- Creating custom logic that allows you to get data that you cannot access with other variables.
- Reusing the functions defined in Custom JavaScript variables across different tags, triggers, and variables by simply using the CJS.
Use Cases of Custom JavaScript Variable
The versatility of the Google Tag Manager Custom JavaScript variable means it can be used for many different reasons/goals so it will be a bit hard to list them all here but we’ll touch on some of the major ones.
1. Capitalize the First Letter of Every Word
Generally, you will find many examples of how you can use the CJS to change the text of the value to uppercase or lowercase which can be done with a simple function, as shown below:
function() {
var welcome = "Welcome to MeasureSchool”;
 return welcome.toUpperCase();  // use toLowerCase() function to convert to lowercase
}
The double forward slashes mean that text is being commented which is to leave any important notes on a single line etc. For multiple lines, we use /* this is a comment */ method.
Coming back to the original use-case, i.e., capitalizing the first letter of the word. This can be achieved by using the below code where we are using an auto-event variable that captures the Element Text.
We want to keep things uniform by capitalizing the first letter of each word.
function() {
    var myString = {{aev - Element Text}}; // Replace this with the string or variable you want to capitalize

    return myString.split(' ').map(function(word) {
        return word.charAt(0).toUpperCase() + word.slice(1);
    }).join(' ');
}
Here’s a quick explanation of what’s happening in the code:
- split(‘ ‘): Splits the string into an array of words based on spaces
- map(function(word) { … }): Iterates over each word in the array
- word.charAt(0).toUpperCase() + word.slice(1): Capitalizes the first letter of each word and concatenates it with the rest of the word
- join(‘ ‘): Joins the array of words back into a single string with spaces in between
So, here’s what it looks like in the Preview Mode which shows how the Auto-Event Variable’s value is transformed with the Custom JavaScript Variable:

This works well if it’s all a simple string. But, if there’s punctuation or other special characters it will not work as well because it doesn’t account for it.

However, we can use the replace() function with a regular expression to deal with punctuation and special characters, as per the below code:
function() {
    var myString = {{aev - Element Text}}; // GTM variable or string to be capitalized

    return myString.replace(/\b\w\S*/g, function(word) {
        return word.charAt(0).toUpperCase() + word.slice(1).toLowerCase();
    });
}
And here’s what it results into this time:

Let’s see what else we can do with it.
2. Traversing the DOM
This is one of the most useful ways a Custom JS variable can be used, as it allows capturing values up or down the DOM.
To traverse up, we use the closest() method which is specifically designed to search for an ancestor element that matches a given CSS selector.
It is useful in scenarios where the element that is being interacted with by GTM’s auto-event listeners (click, element visibility, etc.) doesn’t have a value of its own that’s meaningful, but its parent, aka ancestor, has something that will give more context.
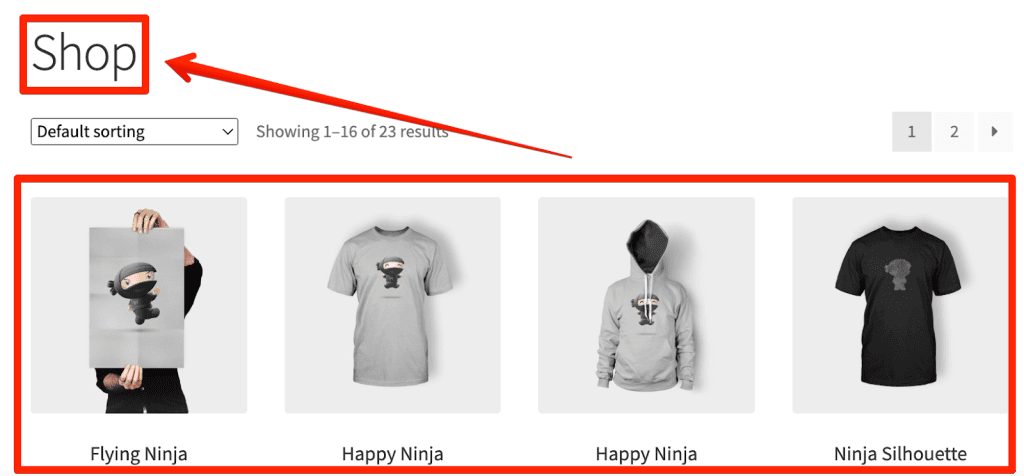
For instance, you click on multiple images, but what you want is the heading text or ID/Class attribute of that element to determine where those clicks are coming from.
Like when you click on one of the products below, it should return the class name of the ‘Shop’ text:

The below code will return the value of the class attribute of the clicked element:
function() {
  var e = {{Click Element}};
  var closestClass = e.closest('[class]');
  return closestClass.className;
}
You can also find the ID or any other attribute’s value by replacing it with their name, e.g., if we want the value of the attribute ‘role,’ the code will look like this:
function() {
  var e = {{Click Element}};
  var closestAttr = e.closest('[role]');
  return closestAttr.role;
}
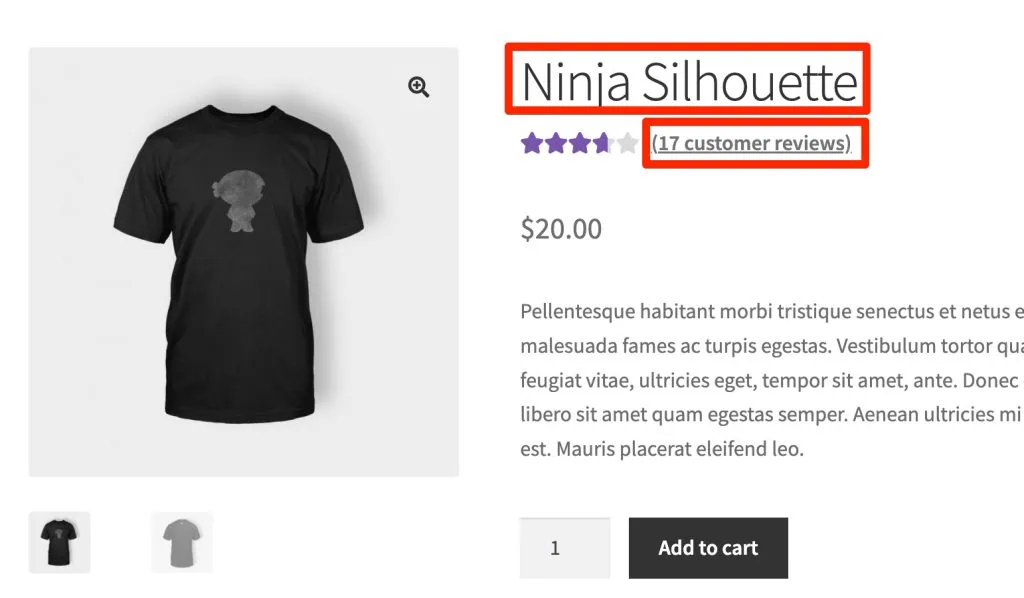
You can also be specific with a class name (or other CSS selectors) to target only specific elements. For instance, when someone clicks on the reviews, we want to get the product title.

The following code should get us this:
function() {
  var element = document.querySelector('.woocommerce-review-link');
  if (element) {
    var closestTitle = element.closest('.summary.entry-summary').querySelector('.product_title.entry-title');
    if (closestTitle) {
      return closestTitle.innerText;
    }
  }
}
The Preview Mode confirms that:

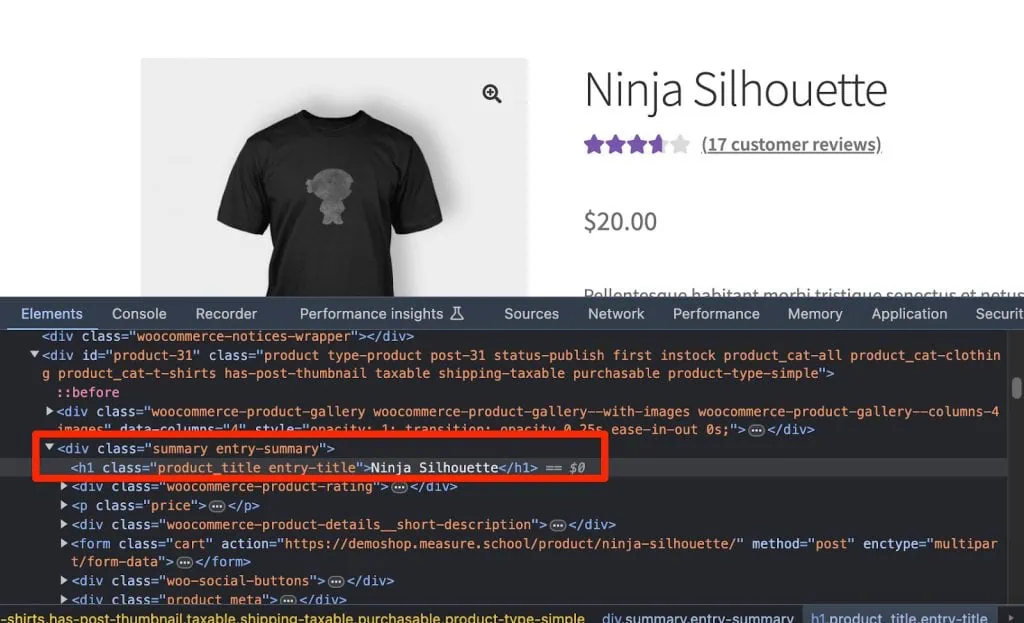
To capture what you want, whether it’s the class, ID, or any other attribute, right-click on the element and click on Inspect.
This will open the Developer Tools in Chrome and you should be able to see your DOM / HTML structure under the Elements tab.

We looked at how you can traverse up the DOM, but the following code can help you travel down.
function() {
    var element = {{Click Element}};
    var summary = element.closest('.summary.entry-summary');
    if (!summary) return 'No summary found';
    var title = summary.querySelector('h3');
    return title.innerText;
}
It finds the closest ancestor with the class summary entry-summary from the clicked element. If no such ancestor is found, it returns the message ‘No summary found.’
If the ancestor is found, it searches within this ancestor for an h3 element and returns the inner text of the h3 element.
There are other ways of traversing down using query selectors, first child, last child, nth-of-type, nth-child, nextSibling, and previousSibling.
3. Google Analytics 4 Event Timestamp
Let’s wrap it up with a simple use case, i.e., using the Google Tag Manager Custom JavaScript variable to get each event’s timestamp that can be sent to Google Analytics 4.
function() {
  return new Date().getTime();
}
That’s it! This will get the timestamp whenever a certain event occurs. It is beneficial because client-side GA4 collects events in batches and assigns the timestamp of the batch, not when the individual event occurs.
However, a recent release by Google showed “batch_event_index” in GA4’s export schema to GA4.
This would probably add sequence numbers to the events as they are collected in a batch, so you might not need it as much if the sequence numbers do the job for you.
These three use cases hardly do any justice to the Custom JavaScript variable because there’s a ton of stuff you can do with it that we couldn’t cover here. After all, it can be overwhelming.
This variable can have a lot of use cases depending on what you’re trying to achieve and since it’s very customizable, the sky’s the limit! Below are some other examples:
- Check if a value is empty or not
- Collect form field values
- Find specific text/element on the page
- Read cookies
- Custom error handling
- Finding user agent information
The collected data could be used to send more info about the events and/or to be used as conditions for the triggers. You see, many possibilities!
Now that we’ve peeked at what can be achieved with the Google Tag Manager Custom JavaScript variable, it’s important to learn about some best practices so we can use it efficiently and not run into errors.
Custom JavaScript Variable Best Practices
The below list is a good starting point to develop habits that can be helpful for yourself and everyone else working with the same GTM container today or in the future – not in any particular order:
- JavaScript is case-sensitive so certain methods have to be used the way they are, e.g., toUpperCase() cannot be ToUppercase().
- If you’re writing a little complex code or want to give some important piece of information to others who will manage the same container, then make use of the commenting feature.
- Use consistent variable names, i.e., if you called a variable myString, then using mystring will not work if you use it anywhere else whether in a function or reference in other areas of GTM.
- Error handling/checks can be quite helpful, especially since certain code can break some functionality on the page. So, use the try-catch logic where necessary.
- Avoid modifying the DOM as it can cause performance issues.
- Return default values in case your expected values are not returned.
- Keep the scope of variables in mind to avoid unintentional global variables.
- It’s better to not rely on external libraries or scripts within your variables unless necessary.
- Keep the logic simple to prevent performance issues. Heavy computation can slow down the page load time. It also makes it easier to manage when the code is concise.
- Avoid pushing values to the dataLayer or redefine values of dataLayer variables.
- Avoid excessive use of synchronous operations that might block the main thread. Use asynchronous operations if necessary.
Synchronous operations block the main thread until they are complete. In JavaScript, functions like alert(), loops, or heavy calculations are synchronous, meaning they stop the execution of other code until they finish. This can lead to performance issues, especially if the operations are time-consuming.
Asynchronous operations are executed in the background, allowing the main thread to continue running. Common asynchronous operations include AJAX calls, setTimeout, setInterval, and Promises. - Test your code properly before publishing the container.
These practices should be good enough to help get the most out of your CJS variables. However, perhaps the most important best practice to keep in mind is that it should always return some value.
If you want to add something to DOM or push something to the dataLayer, you should look at using JavaScript in the Custom HTML Tag.
That’s it for today folks!
Summary
This post might have been overwhelming after all, but don’t be hard on yourself because we did cover quite a lot!
We started by looking at what the Google Tag Manager Custom JavaScript variable is (not to be confused with the JavaScript variable).
We then learned about some use cases for Custom JavaScript variables and that’s where we spent a lot of time and also realized that no amount of examples will be enough because of its versatile nature.
So we moved on to the best practices for using the CJS variable and how it can help us get the most out of it. Remember, it should only be used to return some value. How you use that value in your tags, triggers, and other variables is up to you.
Talking about variables, the dataLayer variable is another super useful variable, albeit not as versatile as CJS.
But with good dataLayer implementation, you probably won’t need to use the CJS variable as much. Check out our post on Data Layer Variable in Google Tag Manager: How to Pull Important Data.
What are some unique ways you have used the Custom JavaScript variable? Let us and our readers know in the comments below!


