Last Modified on January 7, 2025
Google Tag Manager (GTM) makes it easier to track user behavior. Still, it is not without complications whether it’s understanding the difference between tags, triggers, and variables (the core components) or how client vs server-side works.
The three core components allow tags to function properly while providing all the necessary information. It is often said that if you understand how variables work in GTM and when to use which one, you have learned more than 50% of GTM.
Now, for a web container, several types of variables are available under built-in and user-defined variables, each with its unique use (for most cases).
So it can get pretty confusing to understand how all of them work whether it’s the Data Layer variable or Lookup Table.
In this post, we’ll only cover one type of variable, i.e., the Google Tag Manager auto-event variable and you will learn about the following topics:
- What is the Google Tag Manager Auto-Event Variable?
- Auto-Event Variable Use Cases
- Alternatives of Auto-Event Variable
- Limitations of the Google Tag Manager Auto-Event Variable
Let’s get started!
What is the Google Tag Manager Auto-Event Variable?
The auto-event variable stores information about the element that is triggered by auto-event actions like clicks, form submissions, errors, element visibility, etc.
So in essence, it helps to capture and access the information about the events that are triggered under GTM’s hood.
Now, a lot of these events are tracked by other built-in variable types for instance Click Text, Form Classes, Old History Fragment, etc. and all of these are also auto-event variables that are named differently.
What differentiates them is how we set up and use them because built-in ones are available to be used out of the box once enabled.
The Google Tag Manager auto-event variable falls under the user-defined category so it has to be configured depending on the variable type, and we can do some additional customization which is not possible with the built-in ones.
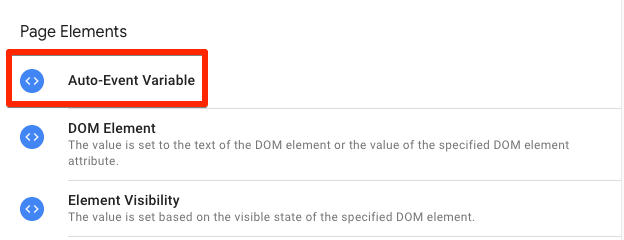
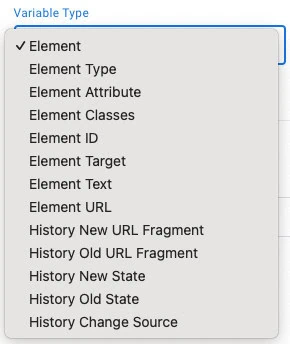
We mentioned above how it can be customized based on our chosen variable type, but the auto-event variable itself is already a variable type, right? True, but it’s an umbrella variable that has 13 different variables from which we can choose.
So, don’t worry you’re not the first one who got confused. You can see below how ‘Variable Type’ is used twice. A more refined name for the second one would remove the confusion but for now, we are working with what’s available.
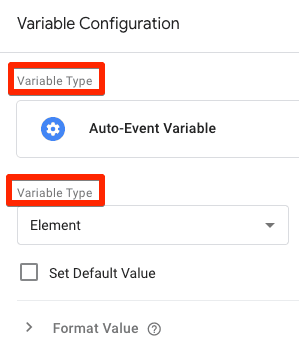
Before we go on and look into these 13 different variables, let’s talk about the two types of customization available for all of them:
- Set Default Value – If you don’t get any value for the variable, you can simply use this setting to have a default value for instance ‘No value’ or ‘None’ to get cleaner data.
- Format Value – It allows you to Change Case to Lowercase or Uppercase and Convert null, undefined, true, and false values to your choice of values, especially if you have some internal language for certain things.
Both of these options are quite useful to get more refined and cleaner data in your endpoint tools like Google Analytics 4.
However, it would have been great if we could change the case to capitalize the first letter of each word as well compared to only changing to lower or uppercase.
Anyways, let’s look at what variable types are available.
- Element – It is stored in the gtm.element key of the dataLayer and accesses the whole DOM aka HTML element that was the target of the auto-event action. For instance, when we clicked on a product in our demo shop, it returned the following element as seen in the preview mode:

- Element Type – It returns the <tag> type of the element that is the result of the auto-event action. E.g., when we clicked on the ‘Add to cart’ button, it returned ‘A’ which means the button is wrapped in an <a> tag.
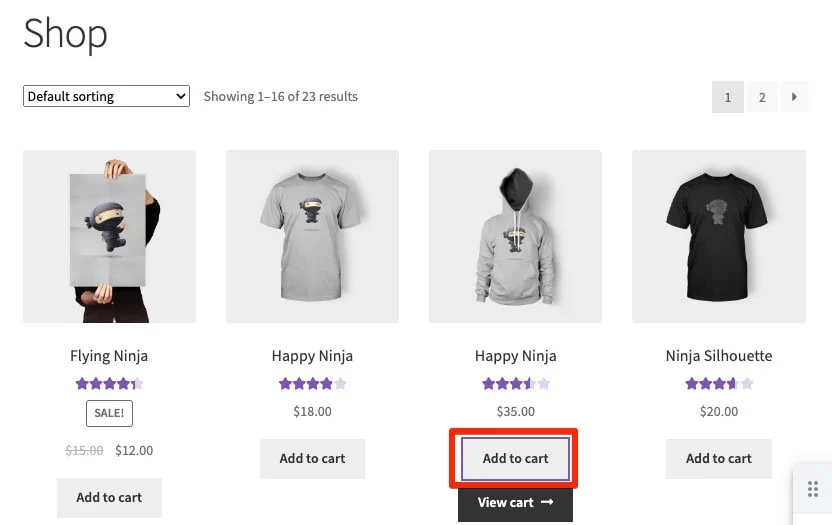
The value is accessed from element.tagName.

This can be verified by inspecting the element, but we’re not going into how to do that here.
- Element Attribute – It returns the value of the attribute that is named when configuring this variable and is one of the most useful auto-event variable types – more on this later. For instance, we want the value of the ‘role’ attribute found on certain elements.
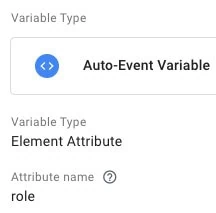
So, whenever an auto-event is triggered the element containing the ‘role’ attribute will return its value.

- Element Classes – This one’s simple in that it accesses the gtm.elementClasses key in the dataLayer to return the class attribute of the element interacted with.
- Element ID – It returns the ID attribute of an element by accessing the gtm.elementId key in the dataLayer.
- Element Target – This auto-event variable type is useful to get the target attribute of an element by accessing the gtm.elementTarget key in the dataLayer.
- Element Text – It returns the text attribute value of the element being interacted with auto-events by accessing the data gtm.elementText key in the dataLayer.
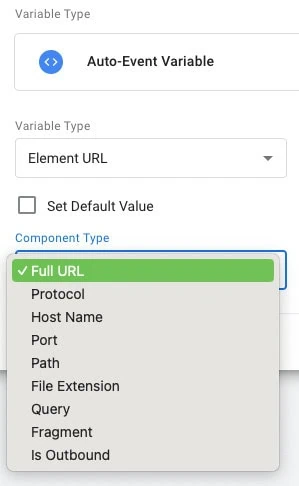
- Element URL – It accesses the gtm.elementUrl key in the dataLayer which returns the value of ‘href’ or ‘action’ attribute of the element. This one’s a bit more dynamic than others because there’s another type of customization available for it, i.e., the part of the URL that you can want to capture which can be: Full URL, Protocol, Hostname, Port, File Extension, Query, Fragment, and Is Outbound.
- History New URL Fragment – Accessed with the gtm.newUrlfragment key in the dataLayer it captures the new URL fragment as set by the browser history event. URL fragment is the part of a web address after the # symbol, e.g., for https://measureschool.com/#footerform URL, #footerform is the fragment. These are common for one-page or single-page application (SPA) sites.
- History Old URL Fragment – Accessed with gtm.oldUrlfragment key in the dataLayer it returns the old URL fragment as set by the browser history event, e.g., #heroform.
- History New State – It returns the new historyState object set by the browser’s history even by accessing the gtm.newHistoryState key in the dataLayer.
- History Old State – It returns the old historyState object set by the browser’s history even by accessing the gtm.oldHistoryState key in the dataLayer.
- History Change Source – This variable returns the browser event that caused the history change, e.g., pushState, replaceState, popstate, etc. by accessing the gtm.historyChangeSource key in the dataLayer.
So, that covers what is the auto-event variable and all its types. In case there are no relevant auto-events triggered, the variables will return ‘undefined’ or any default value you set.
As mentioned above, you can format them to convert undefined into any other value you want to see.
Auto-Event Variable Use Cases
Generally, auto-event variable use cases will depend on any specific scenario and like with most variables, they can be used to collect information or used as a filter in a trigger. Below, we have a few examples to show you in what ways it can be used:
1. No Classes and ID or Same Classes but No ID
It happens more often than you’d think that you want to track a certain element but it doesn’t have a class or ID, or several elements on the page have the same class but no ID, which makes it difficult to track a specific element.
For instance, on our demo shop’s landing page section, there are multiple buttons with the same class “elementor-button-wrapper” and none of them have an ID. We only want to track the “Contact Us” button.
So in any of these scenarios, the first thing you can do is right-click on the element and then click on “Inspect”. This will open the Elements tab in the Developer Tools.

Now we can see the class “elementor-button-wrapper” but there’s also an attribute of href=#contact-us that is unique to this button and can be used in a trigger.
In this case, there are other ways to track it as well because it’s a hyperlink. We can see that when we cannot use a class or ID, we can pick up an attribute to store value and/or use it in the trigger.
So, let’s store it in an auto-event variable where the attribute is ‘href.’
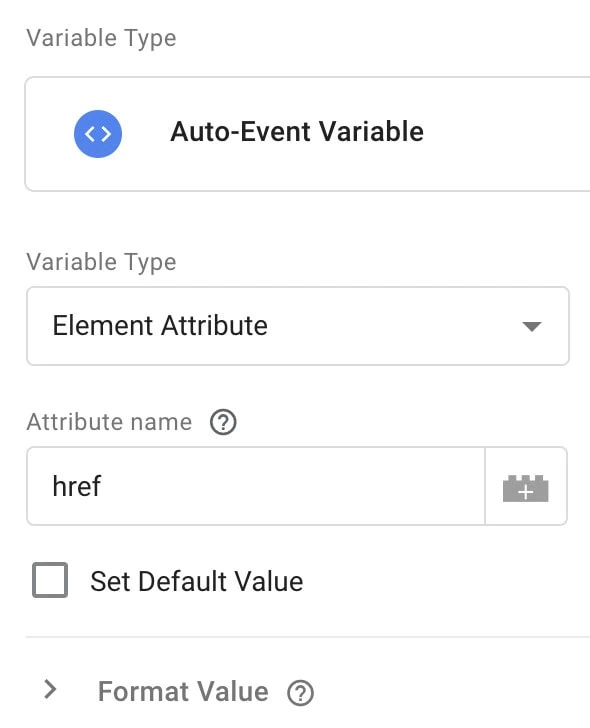
Let’s see if it grabs the values in the preview mode.

So, that works! This means, we can use the variable as a filter for the trigger by creating a Just Links trigger → Some Link Clicks and use the aev – Element Attribute variable contains #contact-us.
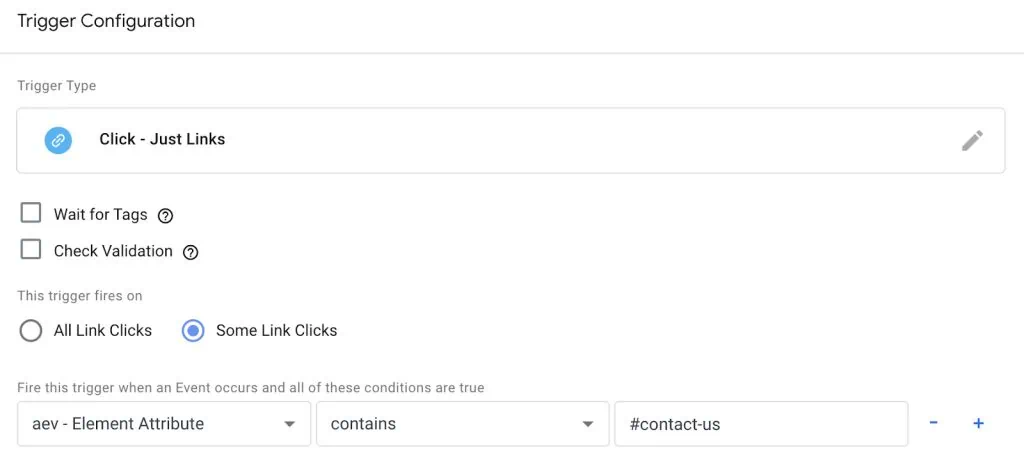
This will only fire the tag when it has that specific attribute, so only track clicks on the Contact Us button.
2. Clean Up Data for Google Analytics 4
It is normal to track the text or URL of the clicked element as parameters to be sent with events. Sometimes, there might be no text/URL and you don’t want to see (not set) in GA4.
So, rather than using the built-in Click Text and Click URL variables, we can use the Element Text and Element URL variables with some customization, where we Set Default Value when no value is found, e.g., ‘Not found’, and also Convert null and undefined to ‘Not found.’
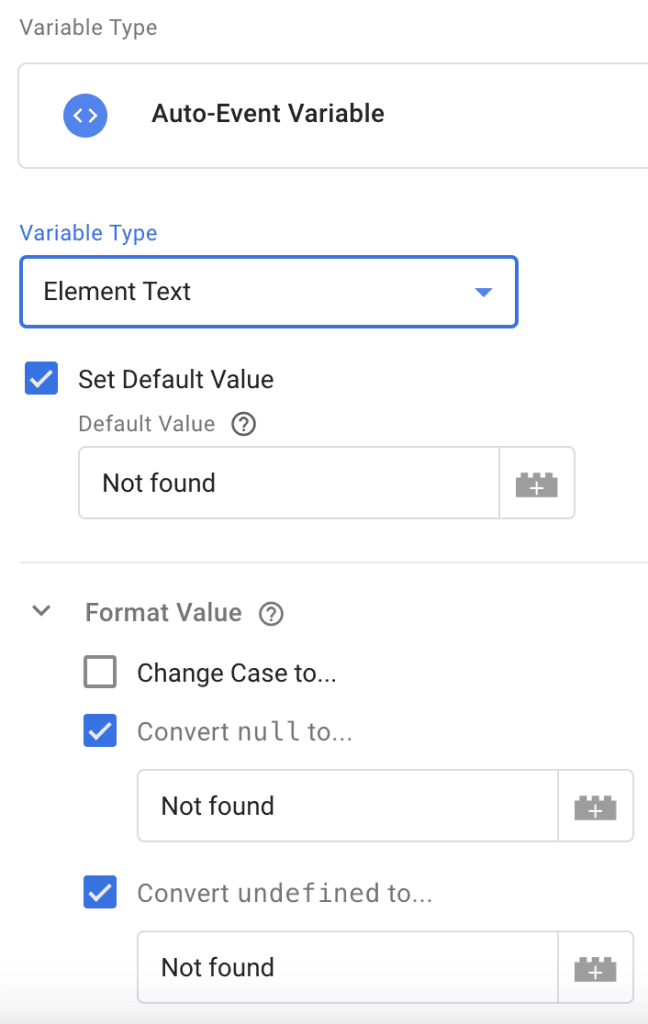
This will keep the values uniform.
3. Collect Additional Values
This method also uses the element attribute variable type to send any additional information that’s available with elements, but not picked up by text, URL, page URL, etc. type of variables.
For instance, let’s say you want to know what section of the content was viewed and the developers have added an attribute that provides info about the location of the content when you Inspect the element. So, we can store this and send it to GA4.
In the example below, we can use the data-title attribute to get that additional piece of information since each section has its title.

We use data-title as the attribute name for the auto-event element attribute variable.
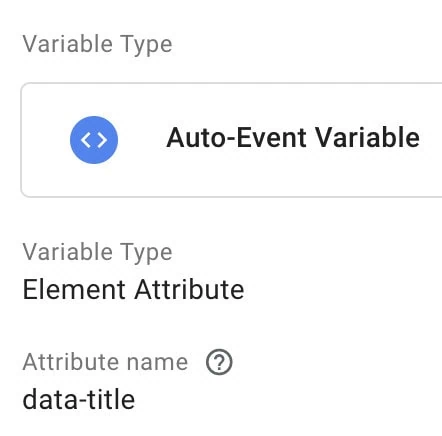
Next, we simply add it to our event that is being used to track when certain content is viewed.
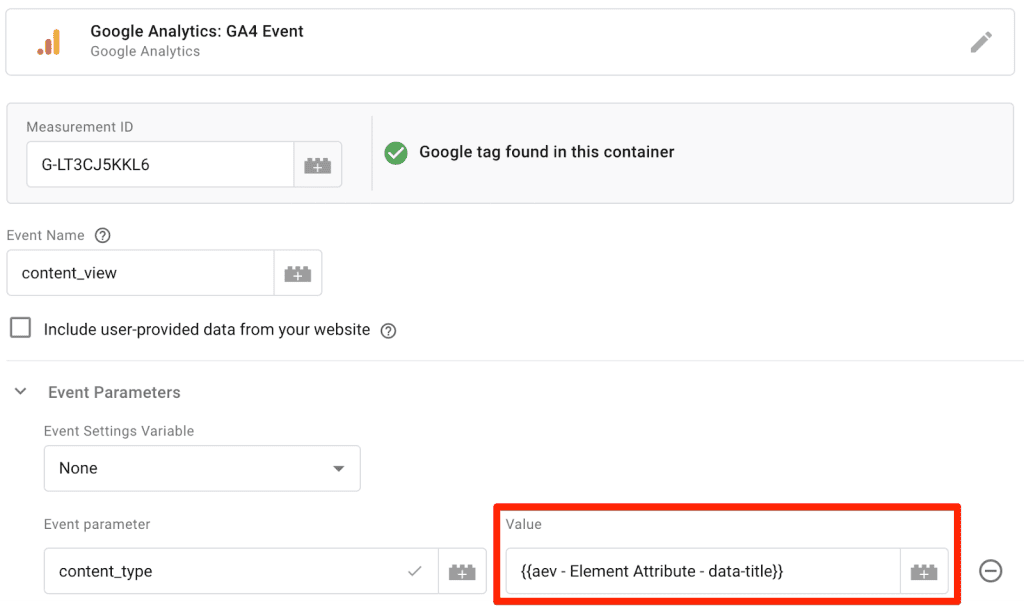
What if there’s no data-title attribute for certain content? You will see (not set) in GA4 and you can tackle that by formatting the variable with a default value and converting null and undefined values to your choice of value.
You might have noticed that we used Element Text, URL, and Attribute auto-event variable types in our examples above as these are commonly used.
However, depending on the situation, other types can be utilized as well, but not as much as these three.
Alternatives of Auto-Event Variable
Almost all these variables have their built-in counterparts available and in most cases, those are good enough. Here is a list of those alternatives:
| Auto-Event Variable | Built-In Alternative |
| Element | Click Element Form Element |
| Element Type | No built-in alternatives |
| Element Attribute | No built-in alternatives There’s a user-defined DOM Element, but it needs to have an ID or a class |
| Element Class | Click Class Form Class |
| Element ID | Click ID Form ID |
| Element Target | Click Target Form Target |
| Element Text | Click Text Form Text |
| Element URL | No built-in alternatives, but there’s a user-defined URL variable |
| History New URL Fragment | New History Fragment |
| History Old URL Fragment | Old History Fragment |
| History New State | New History State |
| History Old State | Old History State |
| History Change Souce | History Source |
You might be thinking if there are built-in alternatives available, then why have them as user-defined?
It’s because the latter provides some customization with the default value and formatting the values to lowercase, uppercase, and converting null, undefined, true/false values to what we’d like to.
Limitations of the Google Tag Manager Auto-Event Variable
Perhaps the most obvious limitation is that if the data for auto-event variable types is not available in the DOM and/or dataLayer keys, then it can’t be used.
Moreover, it’s not recommended to use DOM/HTML elements to set up triggers and/or capture values of elements because if classes, IDs, or attributes (CSS selectors) are changed, then the triggers will not work or you won’t get the values.
Unless specific data attributes are added by devs that won’t be changed as often as other CSS selectors, this might work better! The best way is to go with a dataLayer plan whether it’s for triggers or to capture more values.
However, this mostly applies to all the Element type auto-event variables, history and URL variable types could be used anyway, although you have their dedicated built-in and user-defined alternatives available.
Lastly, in our use-case examples, we used Element Attribute a couple of times. But, if there are no specific attributes available, then we won’t be able to track interactions with specific elements.
Summary
In this post, we covered what is the Google Tag Manager auto-event variable and how it’s not just one type of variable, but covers 13 other types of variables under its umbrella.
We then learned about some use cases for the auto-event variable that were mainly focused on the Element Attribute, Text, and URL types.
However, depending on your specific situation, there could always be a use case for other types and this was not an exhaustive list.
Further into the post, we looked at the alternatives for these auto-event variables where some are available as built-in and others as user-defined.
Perhaps in a future update, built-in variables will have the same customization available and their user-defined counterparts will be removed. Who knows?
Finally, we explored some limitations of the auto-event variable. None of those are deal-breakers, but give us an understanding of the fragility of our implementation if we are solely depending on the CSS selectors.
Variables are no doubt super important components of GTM but what about Tags? Well, you might want to check out our post on Google Tag Manager Tags Explained (With Examples).
So, have you used the auto-event variable in your implementation setup? Let us know how it turned out in the comments below!


