
Last Modified on February 18, 2024
Did you know you can track and send events to your website using Meta Pixel Events?
In short, Meta Pixel Events are actions that Meta Pixel (Facebook Pixel) recognizes as conversions when someone takes a particular action on your website.
In this guide, we’ll learn to set up and send a conversion to Meta Pixel by installing it on a WordPress landing page.
An overview of what we’ll cover:
- Adding an Event from a New Website
- Meta Pixel Helper Extension
- Adding an Event from the Pixel
- Tracking a URL
- Test Events
So let’s dive in!
Adding an Event from a New Website
Let’s open Meta Business Manager. We’ll add an event from the events manager section.
Go to the Menu → Events Manager.

Click on Add Events. You’ll get three different options to add a new event.
Click the option to add an event From a New Website.

After connecting to a new website, we’ll also be sending events.
There are various methods to send events. However, we’ll be using the most beginner-friendly method of sending data. In this method, you are not required to code or use any third-party software like Google Tag Manager.
However, this method is potentially limited to just sending the data. Once you’ve chosen the method to add events, we’ll need to select how we’ll install the pixel code.
Choose the method to Use a partner.

Next, you’ll see a list containing all the various partners for adding events to the new website.
Click on WordPress.

Next, if you don’t already have one, you’ll need to install a plugin called Facebook for WordPress (now called Meta Pixel for WordPress.
Open your WordPress website, and go to the Plugin section. Click on Add New.

In the search bar, type Facebook, and select the plugin Facebook for WordPress. Install it, and click on Activate once done.

After activating it, go to the Settings section of the installed plugin.

Click on Get Started to start the integration process for adding an event to a new website.

You’ll need to enable the integration of WordPress for Meta. Enable all popups and click on Continue.
You must verify your Business Manager, Ad Account, and Meta Pixel account.
🚨 Note: Make sure to verify all your account IDs while choosing to integrate WordPress for Meta.
Usually, we’ll keep the option for Automatic Advanced Matching off.
This option allows us to send additional information to Meta, like their names, email IDs, contact numbers, and other information if the user permits.
It will allow Meta to match the correct user profile with the corresponding information, potentially increasing the accuracy of your data and allowing you to use metric-based filters for sorting and analyzing your data.
However, since this is a demo guide, we won’t be selecting the Automatic Advanced Matching option.
Once done, click on Continue.

Click on Done once the process is complete.

Let’s also verify and see if the integration was successful.
Go to Visit Site from the WordPress portal.
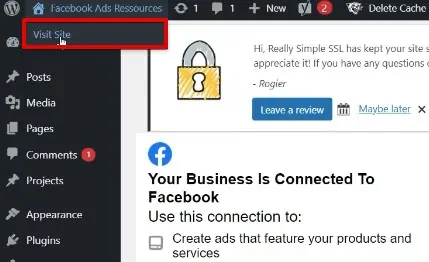
It is an existing landing page that we created for Valentine’s Day.
Meta Pixel Helper Extension
We’ve installed the Chrome extension of Meta Pixel Helper to verify whether the website is firing Tags to the link clicks.
We can see that the website is firing a PageView event.
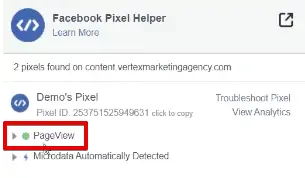
However, this setup will only enable the website to send page view events. We’ll need to modify the process to have any lead events for Meta.
Adding an Event from the Pixel
Let’s open our Meta Business Manager account.
Go to Add Events → From the Pixel.
Click on the option to Open Event Setup Tool.

Add your website URL. Once done, click on Open Website.
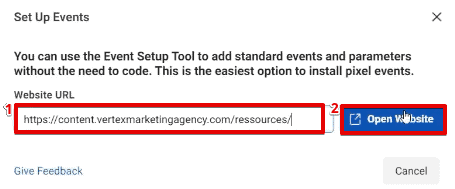
If the installation is correct, you’ll see a Meta Event Tool Setup popup when you open the website.
You’ll see two options to fire events on your website. You can either track a new button to trigger your event or directly add a URL that triggers the event.
We’ll use the option to Track a URL.

It is because we’re using a HubSpot form to collect responses from the audience. Usually, these forms use embedded methods.
So, our Tag Manager tool can’t identify the button unless it is in HTML.
For example, let’s click on the Track New Button option.
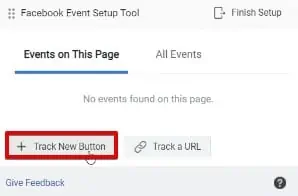
Notice that only a few buttons are HTML-coded and embedded for tracking. These are the ones we manually added to our website, like our homepage logo.
However, the Submit button isn’t available to track.

Therefore, this setup won’t help trigger our lead event. So we’ll go ahead with the option to track a URL.
Track a URL
Fill out the form to generate the URL you’ll need to track.

You’ll land on a thank you page upon completion of the form.

The thank you page acts as an intermediate page before the products and tools page.
It is the page we use to track and trigger our events because this page marks the success of our campaign.
If you mark the final product and tool pages as your launch, you might get multiple events for the same user when they reopen the tools page.
However, this page is only opened once. So, we’ll use it to trigger our events.
Let’s click on Track a URL.

Next, we’ll choose the event type.
In this case, go ahead with the Lead event.
If you have an eCommerce website, you can use the Purchase event. In this case, you can directly track the order confirmation page to verify and trigger the event.
But in this example, we have a Lead event type as our event.
Next, you’ll have two options to track a URL. URL equals, and URL contains. Choose URL contains.
It is because we know that this website contains the terms /happy-valentines/. We don’t have any other pages containing these keywords.
So we can successfully trigger the events based on our keyword /happy-valentines/.
You can also choose to add the value of the lead event or the purchase of the product. You can also add a currency.
Since this is a demo guide, we won’t add those parameters.
Once done, click on Confirm.

Now that our trigger is created, when someone lands on our thank you page that contains the keywords /happy-valentines/, it will send a lead event to our Meta account.
Click on Finish Setup once done.

You may be asked for frequent surveys from the Event Setup Tool if you’re installing it for the first time.
Next, we’ll learn to test the events.
Let’s see how!
Test Events
Let’s open our Meta Business Manager account.
Navigate to the section of Test Events. Here is a tool that helps you to test the browser events.
We’ll paste the page URL in the URL section and click on Open Website.

We’re not sending any events on this page. However, since we have the Meta Pixel installed, we’ll receive a page view event in the tool.
Let’s open our Meta Business Manager again. We can see that a PageView event has been fired.

Let’s also submit the form to verify whether we receive a lead event.
After filling out the form, let’s reopen the Meta Business Manager.
We can see that a Lead event is also triggered.

This is because we successfully installed the Track a URL method to track lead events for pages containing the keywords /happy-valentines/.
Moreover, we’ll be able to see two different page view events because we visited two pages.
🚨 Note: If you’re receiving errors in your Meta Pixel, check out our handy guide on how to fix Meta Pixel errors.
FAQ
How can I set up Meta Pixel Events on my website?
To set up Meta Pixel Events, follow these steps:
1. Open Meta Business Manager and access the Events Manager section.
2. Click on Add Events and choose to add an event from a new website.
3. Select the method to use a partner and choose WordPress as the integration partner.
4. Install the Meta for WordPress plugin on your WordPress website.
5. Configure the plugin settings and integrate your Business Manager, Ad Account, and Meta Pixel account.
6. Verify the integration and ensure the installation is successful.
7. Use the Meta Pixel Helper extension to verify the firing of events on your website.
8. Optionally, you can add events directly from the Pixel using the Event Setup Tool.
How can I test if the Meta Pixel Events are working correctly?
You can use the Test Events section in your Meta Business Manager account to test Meta Pixel Events. Enter the URL of your website or specific pages to simulate events and verify if the events are captured by Meta Pixel.
How do I troubleshoot Meta Pixel errors?
If you encounter errors with Meta Pixel, you can refer to a handy guide provided by the blog post on how to fix Meta Pixel errors. It will provide you with troubleshooting steps and solutions to common issues.
Summary
So, that’s all you need to know about creating and sending conversions to the Meta Pixel by installing it on a WordPress landing page.
This method is helpful when tracking the data from your Meta Ad results.
Additionally, once you collect the data into your account, you can analyze the Meta Ads campaign data to modify your website performance further!
Were you able to create new events for your website? Which method did you use to create the events? Let us know in the comments below!


")
Looking for some help, at a loss since I can’t seem to find any documentation about this online. Currently we are trying to track custom events in Facebook events manager through GTM– we’ve installed the Facebook pixel on our site via GTM, and have also verified our domain with Facebook. We have also created a set of custom events that we want to track in Facebook Events Manager through GTM in the following format (names are trivial here and made up): <script> fbq('trackCustom', 'form_submission'); </script> In this case, we should expect an event to fire when a form is submitted… Read more »