
Last Modified on February 27, 2025
Do you want to set up customized ads for your users based on the products they view in your shop?
With dynamic remarketing, you can show targeted ads to your previous visitors based on the pages they have visited on your website!
In this guide, we’ll learn how to set up dynamic remarketing for your website using Google Ads and Google Tag Manager.
An overview of what we’ll cover:
- Creating a product feed
- Setting up Data Layer Tags
- Testing your Data Layer
- Creating Google Ads remarketing Tag in GTM
- Pulling event data from the Data Layer
- Attaching a trigger
- Debugging dynamic marketing
So let’s dive in!
Creating a Product Feed
The first prerequisite for setting up dynamic marketing with Google Ads is having a product feed. Our product feed will be a spreadsheet that contains data for all of your products.
Product feeds help Google Ads find information (price, image, etc.) about a product that a customer saw. This is important to promote ads for other relevant products.
You can make a product feed with any regular spreadsheet or CSV file. However, I recommend using the Google Merchant Center and directly uploading your feed there. Then, you can simply link your Merchant Center account to your Ads account to maintain an up-to-date product feed.
I won’t go into the details of setting up a Google Merchant Center account in this tutorial, since we could really write a whole separate guide just for that.
But once you’ve got a product feed established here (with either scheduled automatic updates or a plan to manually update the feed), you should be ready to take care of the important part—configuring Tags that use your site’s Data Layer to track specific product views.
💡 Top Tip: Keeping your product feed updated in Google Merchant Center ensures that dynamic ads display accurate pricing and availability.
Setting Up Data Layer Tags
The second step to set up dynamic remarketing is to add Data Layer Tags uto your website.
Data Layer Tags enable us to identify which product a user saw on our website. The Tags then send this data over to Google Ads, which will pull the relevant product information from our product feed. Then, Google Ads can use this product information in dynamic ads and display them on our website.
How does a Data Layer Tag get that information to Google Ads?
When a user interacts with your website, an event will fire. The complete event snippet won’t automatically appear in your tracking tools, but you can install Tags that push relevant data from the snippet to your Data Layer.
In this example where a user viewed two products, the event snippet code will contain the value (price) and the IDs of the products viewed.
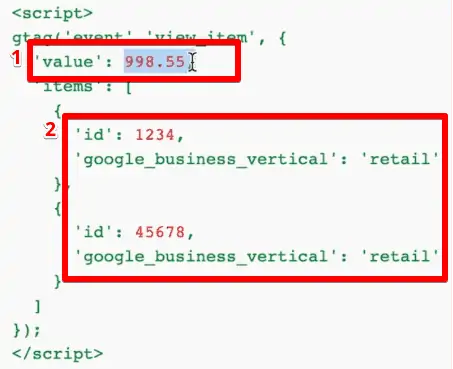
🚨 Note: Depending on how your website is built, you may have variant product IDs for similar items (such as different sizes or color variations of a single product). Make sure that the product ID in your Google Merchant Center product feed should match the ID transferred in the Tag.
A small piece of code called a Tag will grab information like this value and ID, then push it to the Data Layer. Once there, you can track the information as variables using tools like Google Tag Manager.
So now the important part: how do we install these Tags so that they push the correct information to the Data Layer?
The simplest method is to use a plugin. If you’re using popular eCommerce stores like Shopify, Magneto, or WooCommerce, you can just install a plugin that will implement the code for you.
However, if there aren’t any plugins available for your store, you may have to manually install codes on your website with the help of Google documentation. This is more likely for smaller eCommerce stores or for custom stores.
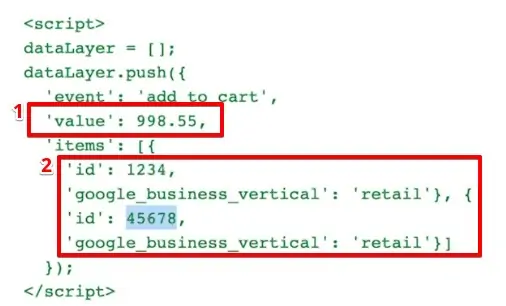
With a manual installation via Google Tag Manager, you’ll need to push the product’s value and ID to the Data Layer using a custom script.
This method can be complicated for marketers who are not well-versed with coding. But if you don’t have a developer and are determined to go this route, our MeasureMasters program includes Data Layer specifications and template codes.
Once we have the codes installed, we need to check whether or not they were implemented correctly.
Testing Your Data Layer
If you’ve correctly installed the Data Layer Tags, then an event should fire every time a user visits a search results page, a category page, or a product page. There should also be an event each time a user adds an item to their shopping cart or completes a purchase.
The Data Layer for each of these events will include the product information that we need for our Google Ads dynamic remarketing campaign, including value and ID.

Let’s see how this looks in practice. With the help of Google Tag Manager, we can check out the Data Layer for any event that fires on our website.
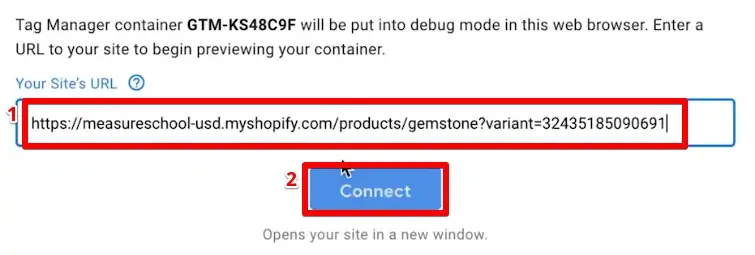
First, we’ll go to GTM Preview mode, using the URL of the product page that we want to test.
Once connected, we should be able to see a Data Layer push on the left called view_item. This tells us that our Tag installation is correct.
The Data Layer for this view_item event will give us information about the value of the product and its ID.
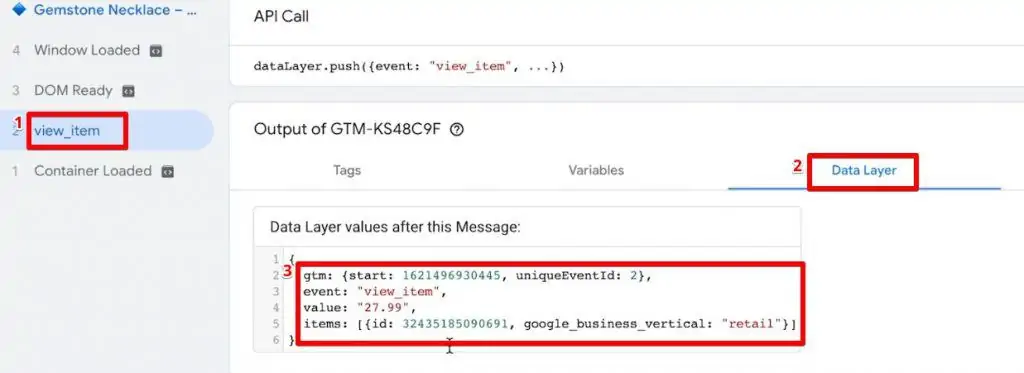
You may notice the google_business_vertical is listed as retail. This is a classification or characteristic of our website that describes the shop system. Google also has different verticals such as education, flights, jobs, and more. You can choose your vertical depending on the type of business you own.
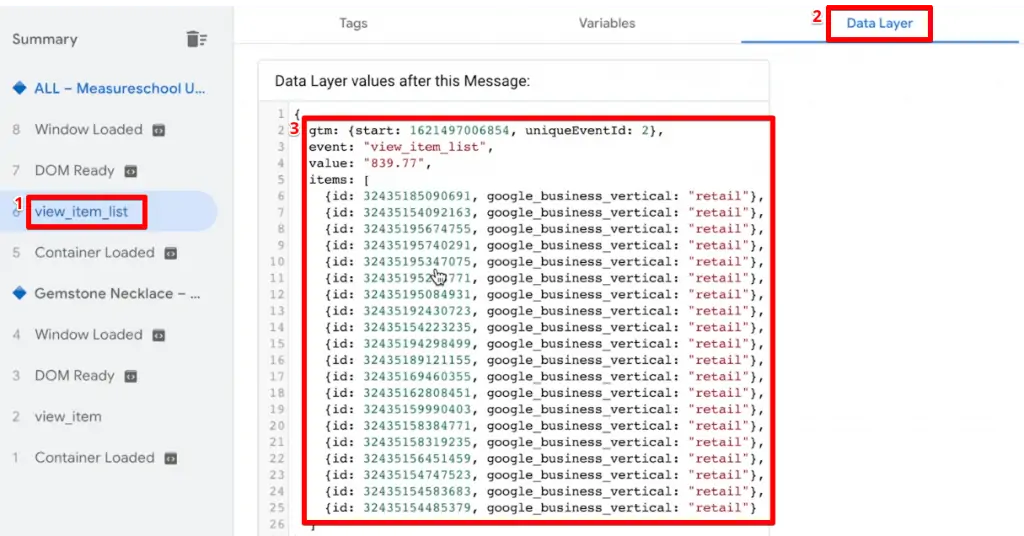
Now that we know the Data Layer is working properly for this product, we should also check the implementation on a category list of products.
If you click on a product category on your website, you should see a Data Layer push called view_item_list. The Data Layer for this event will list the individual IDs for all the products shown on that page, and the value will be the sum of all those products.
The testing process is similar for the view_search_results, add_to_cart, and purchase events. In any case, you should see a full list of ID numbers for each product shown on the page, and the value will be an aggregate of all those products’ prices.
When we see that all the information is displayed correctly, we can say that our codes for the Data Layer specification have been implemented successfully.
This information should be pushed dynamically into the Data Layer for our next steps to work correctly.
Let’s see how we can transfer this information from the Data Layer into Google Ads.
Creating Google Ads Remarketing Tag in Google Tag Manager
First, you’ll need to go to your Google Tag Manager account. Then create a new Google Ads Remarketing Tag.

Give the Tag a name.
🚨 Note: In the Tag configuration, you may get a warning that the Conversion linker tag is missing. If you don’t already have one, go ahead and Create it.

If you need to build a new Conversion Linker Tag, the process is easy. You don’t need any special configurations for this Tag unless you want to install something specific like cross-domain tracking.
Give the Tag a name and click on Save. This will create a Conversion Linker Tag.

Next, we’ll need our Conversion ID and Conversion Label for Tag configuration.
You can find these in your Google Ads account. Go to Tools & Settings → Shared Library and click on Audience manager.

Under the Audience manager, go to Audience sources on the left and click on Google Ads Tag. (In the case that you don’t have one, you’ll be prompted to create one.)
At the bottom of your Google Ads Tag page, click on Tag setup and choose the option to Use Google Tag Manager.
This is where we’ll find our Conversion ID.

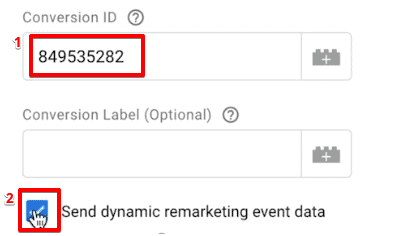
Copy the Conversion ID and paste it into the Tag configuration in our Google Tag Manager account. We don’t need to add a Conversion Label for this example.
Here’s where things get exciting. Let’s go ahead and check the Send dynamic remarketing event data option.
To use dynamic remarketing event data for our Google Ads Tag, we’ll need to take an additional step: pulling the event data from the Data Layer.
Pulling Event Data From the Data Layer
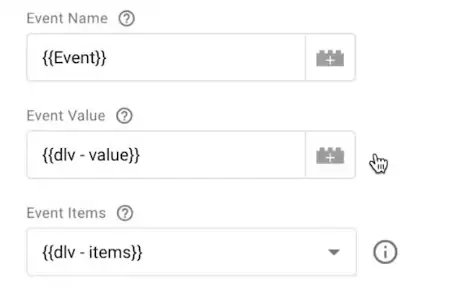
To set up our Tag we’ll need information like Event Name, Event Value, and Event Items.
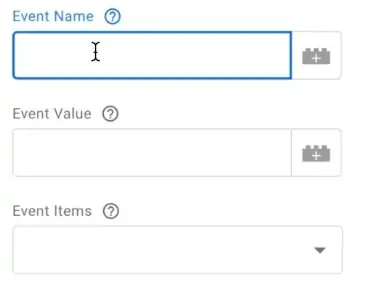
Let’s start with the Event Name. We already have predefined event names given in the Google documentation that we need to match in order to pull the correct information.

All of these are defined in our Data Layer, so we won’t need to add these events individually. Instead, we can take a shortcut by using variables.
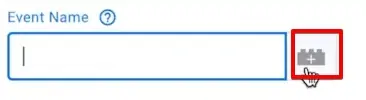
Click on the “+” icon to add a new Event Name.
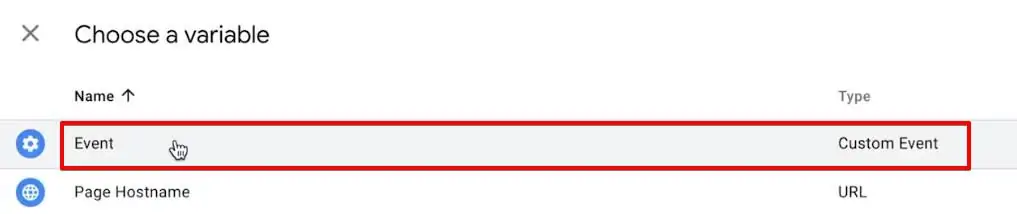
Choose the predefined variable Event, which appears with a gear icon.
Next, we’ll be adding the Event Value. Again, click on the “+” icon next to the text box.
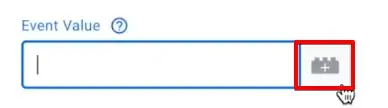
We can find this value from the key-value pairs in the data layer. To fetch this value, we’ll create a new Data Layer Variable. Click on the “+” icon in the top right corner to choose a variable.

We want the pair for the key called value, so that will be our Data Layer Variable Name.

Add a name for the variable and Save it.
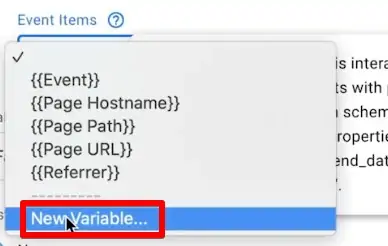
Lastly, we’ll fill up Event Items. We can find our items array in the data layer, which we’ll again fetch using a Data Layer Variable.
So let’s select New Variable…
The Data Layer Variable Name will be called items this time. Give your new custom variable a name and Save it.

We have now correctly configured our Google Ads dynamic remarketing Tag!
We’re almost done. Our next step will be to attach a trigger to the Tag.
Attaching a Trigger
We want to fire our remarketing Tag when someone views a product, searches a product, views a category list, adds a product to their cart, or makes a purchase.
This means that we need to trigger our Tag only when these predefined events occur.
So let’s create a new Custom Event trigger such that it fires on multiple events.
Check the Use regex matching option. This is a very powerful tool that will help us to use an “or” function with a pipe symbol.
We’ll copy all our predefined event names from the Google documentation and separate them with “|”.
Thus, our final Event name will be view_search_results|view_item_list|view_item|add_to_cart|purchase.
Give the trigger a name, and Save it.

Finally, we can save our Tag as well—we’ve finished building a fully functional dynamic remarketing Tag for Google Ads!
To make sure your Tag is working correctly, click on the Preview mode.

If you navigate to a product page, you should see your remarketing Tag fire for any view_item event.
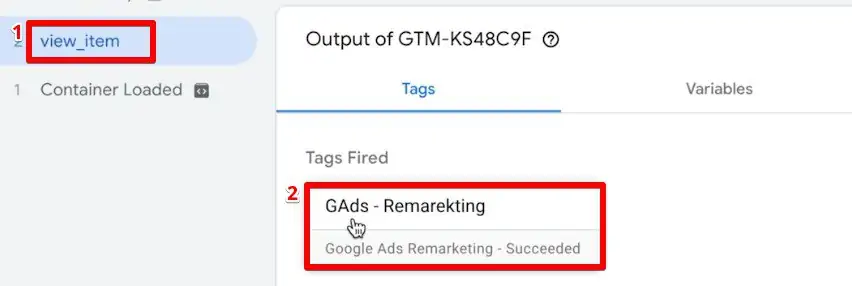
And when we open the fired Tag, we should see the Event Items, Event Value, and Event Name.
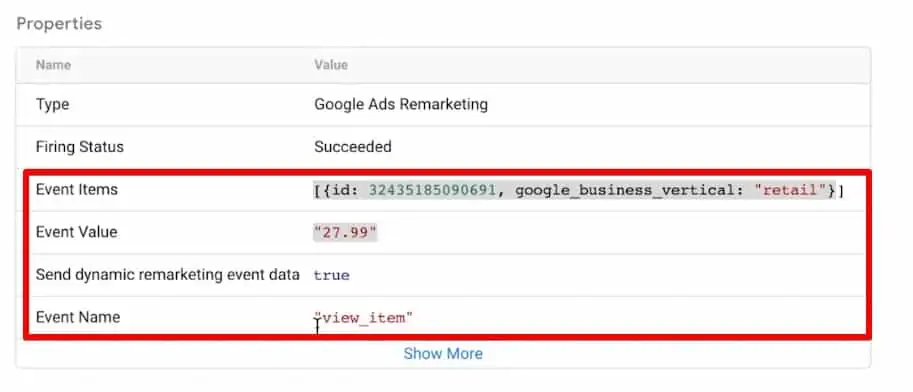
Thus, our Tag is working correctly!
Debugging
Let’s also see how data gets pulled for different events on our website.
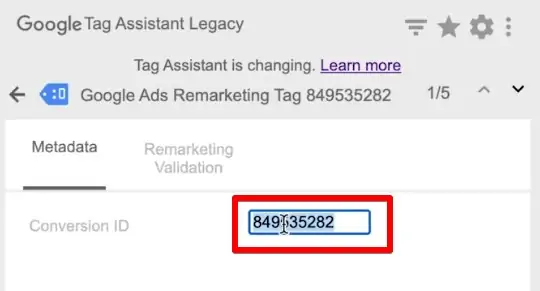
First, go to a product page on your website and Enable the browser extension Tag Assistant Legacy to start tracking data.
You’ll see a Google Ads Remarketing Tag under your extension’s Tag Analysis.

If we open the Tag, we’ll see our Conversion ID under the Metadata tab.
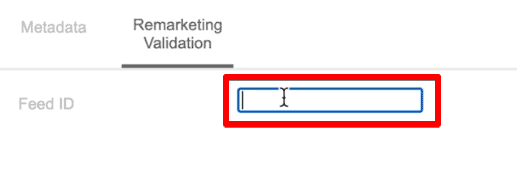
To confirm that your product ID in your Tag matches the one in your product feed, you can click on Remarketing Validation and enter your product Feed ID.
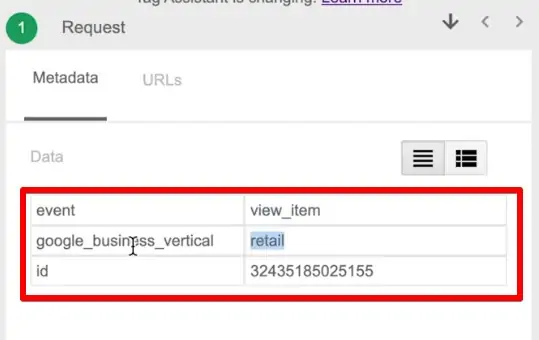
Finally, if we click on Requests at the bottom of the Tag Assistant, we can see our view_item event, google_business_vertical, and id of the product—in short, everything that was sent to Google Ads.
Similarly, we can also check for a website page with multiple products, such as a catalog or category page.
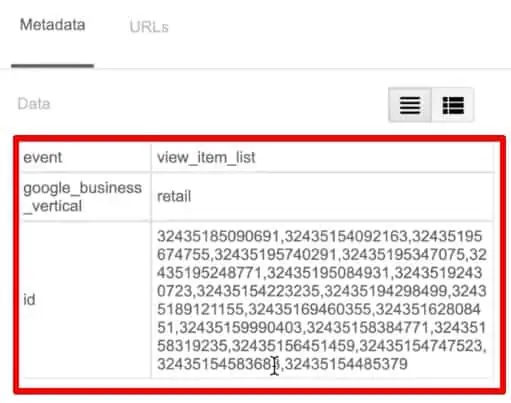
For this Tag, there should be a view_item_list event. It shows us the event, google_business_vertical, and list of id of all the products that appear on the page.
We can check the same way for all the other predefined events, like view_search_results, add_to_cart, and purchase.
This event data will also be available in your Google Ads account.
Under the Google Ads Tag, you’ll see parameters like currency, event, google_business_vertical, id, and value.

Lastly, Submit the Google Tag Manager version so that all these changes are live on your website and your dynamic remarketing campaign begins!
FAQ
How do I create a product feed for dynamic remarketing?
You can create a product feed using a regular spreadsheet or CSV file. However, it is recommended to use the Google Merchant Center to create and manage your product feed. By uploading your feed to the Merchant Center, you can ensure that it stays up-to-date and easily link it to your Google Ads account.
How can I install Data Layer Tags on my website?
There are two methods to install Data Layer Tags:
1. Using a plugin: If you are using popular eCommerce platforms like Shopify, Magento, or WooCommerce, you can install a plugin that automatically implements the necessary code for Data Layer Tags.
2. Manual installation: If there are no available plugins for your platform, you can manually install the code on your website using Google Tag Manager. This method requires adding custom scripts to push product information to the Data Layer.
What are Data Layer Tags and why are they important for dynamic remarketing?
Data Layer Tags allow you to capture information about the products viewed by users on your website. This information is then sent to Google Ads, which retrieves the relevant product details from your product feed. Data Layer Tags play a crucial role in enabling dynamic remarketing by facilitating the transfer of product information to Google Ads.
Summary
To summarize, here’s how to set up dynamic remarketing for Google Ads (with GTM)
- Create a Product Feed:
- Use Google Merchant Center to upload and manage your product feed.
- Set Up Data Layer Tags:
- Implement Data Layer Tags to capture product information (ID, price) and push it to the Data Layer.
- Test Data Layer:
- Use GTM Preview mode to ensure the Data Layer captures the correct data on various events (e.g., view item, add to cart).
- Create Google Ads Remarketing Tag in GTM:
- Configure a new Remarketing Tag in GTM with your Conversion ID.
- Pull Event Data from Data Layer:
- Use Data Layer Variables to pull event-specific data (event name, value, items).
- Attach Trigger:
- Set a Custom Event trigger to fire the tag on relevant events (view item, add to cart, etc.).
So that’s how we set up dynamic remarketing ads on any website using Google Ads and Google Tag Manager.
This is one of the most effective methods to bring customers back to your website because it shows them personalized ads about products and services they want. The best marketing leads are the ones who already know you and your products!
Also, once you get the audience hooked on your website, it will be beneficial to track the conversion of customers who actually purchased your product.
Were you able to install dynamic remarketing correctly on your website? How do you use the data tracked with this? Let us know in the comments below!


")
Hello,