Last Modified on January 7, 2025
Did you know that setting up outbound links in GA4 is unnecessary?
Why? Because GA4 will do it for you.
In this post, we will show you how to find the outbound link click data in Google Analytics 4 and discuss the advantages of tracking it.
Here is an overview of what we’ll cover:
- Checking Default Settings or Turning on Enhanced Statistics
- Where Can I Find Outbound Links in GA4
- Outbound Traffic Report in Explorations
- Building Your Custom Report
- Configuring Outbound Traffic for Standard Reports within GA4 Interface
- Where Can You Find Link Domain and Link URL Parameters in Standard Reports
Let’s dive in!
Checking Default Settings or Turning on Enhanced Statistics
Enhanced statistics is one of the best features that can track outbound traffic by default. It can track not only page views but also outbound link clicks.
Enhanced Stats are events that Google collects automatically, provided you have enabled the Enhanced Stats feature. Note that this type of event is only tracked on sites. If you see that it is turned off, this is an easy fix.
However, finding that data and reports might take a lot of work for beginners. So, let’s look at how you can do that in Google Analytics 4.
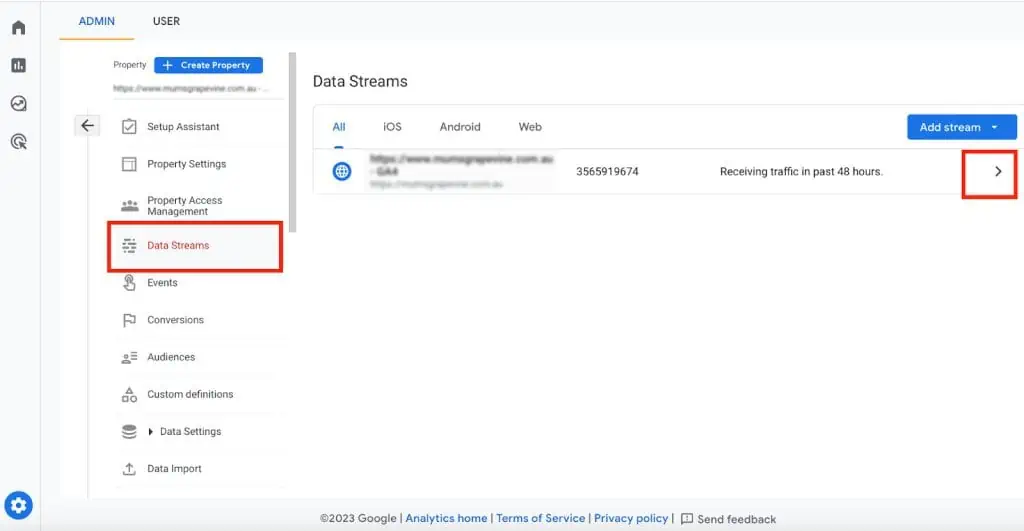
First, let’s make sure this feature is turned on in your GA4 property. Go to the Admin section, then head to Data Streams within the property column, and select your website data stream.
Here, you will find the enhanced measurements section.
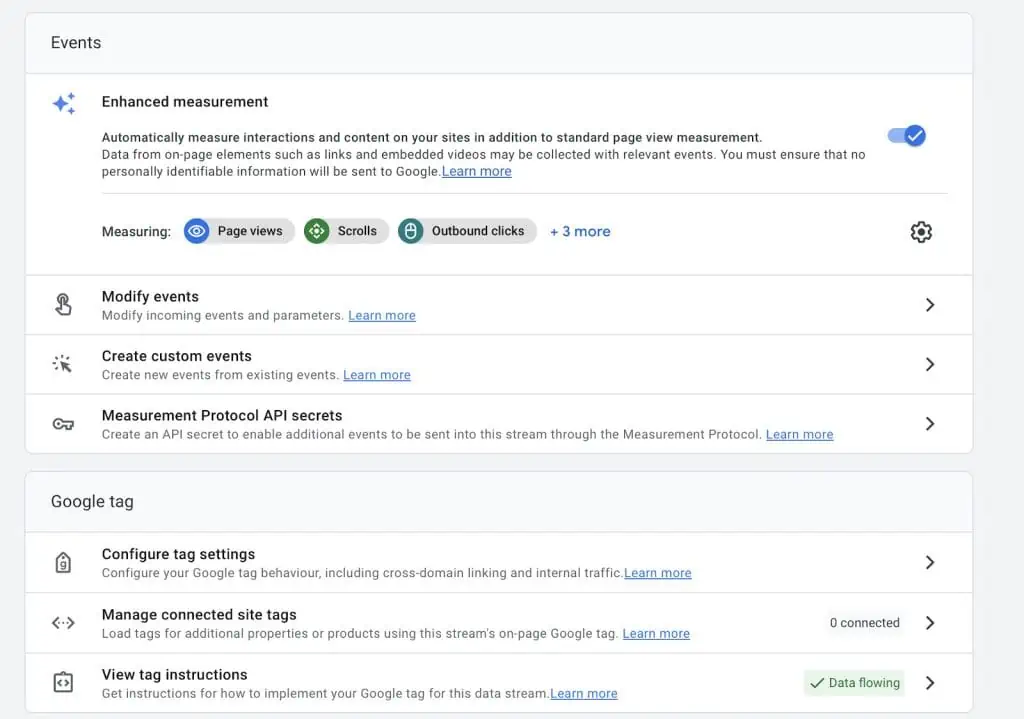
If enabled, you can check what kinds of events are tracked automatically.
Today, we’re shining the spotlight on outbound links in GA4. If you can’t find it right away, no worries! Just click on the gear icon and enable this feature.
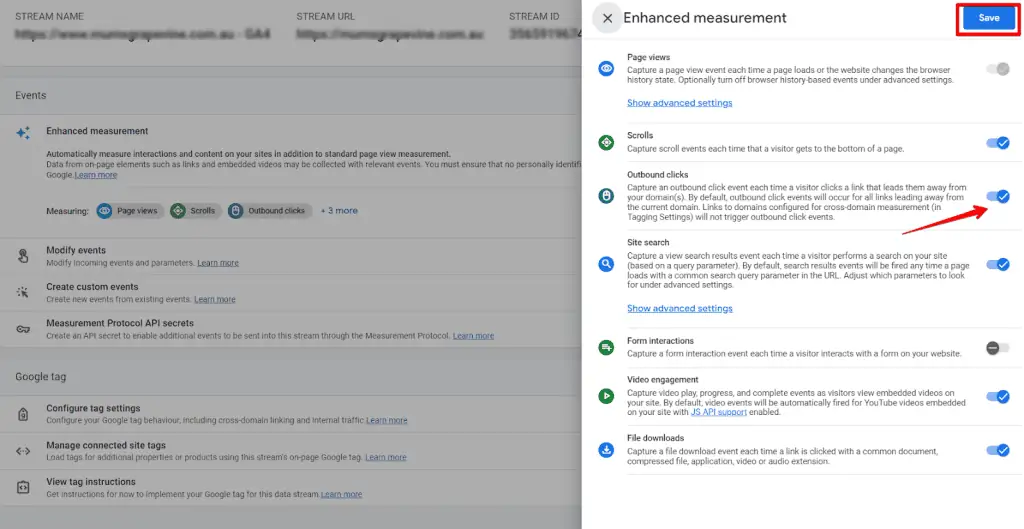
Once activated, GA4 will keep tabs on every time a visitor clicks a link that takes them to another website, which we call outbound links.
Where Can I Find Outbound Links in GA4?
After you’ve collected the outbound link click data for at least 24 hours, then stroll over to the Reports section under Engagement. You’ll find a list of events there, including the one we care about, the outbound link event named “click.” This is where the magic happens.
However, at this stage, you’ll only see the basics – how many times the event happened and the total number of users who engaged with your outbound links in GA4. But for the juicy details about which specific links were clicked, it’s time to roll out the explorations.
Outbound Traffic Report in Explorations
Head over to the sidebar in GA4 and find Explore. Choose Free Form or Blank to create your exploration adventure.
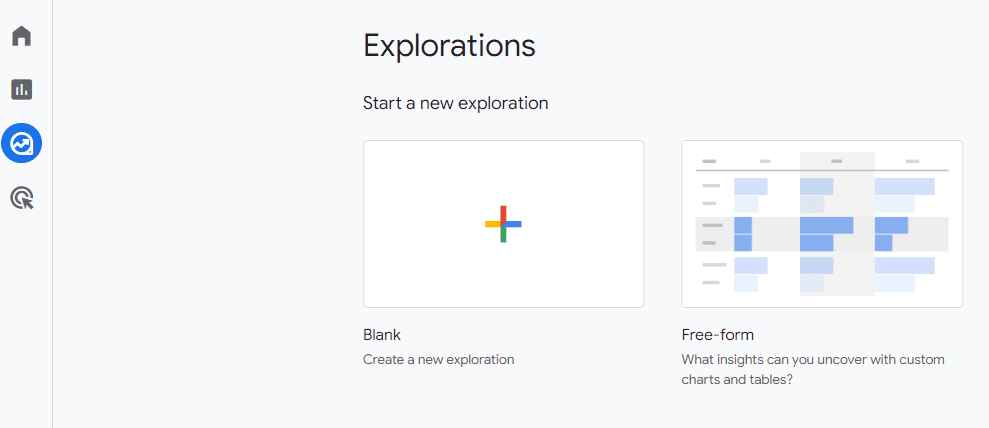
Now, add dimensions by clicking the plus sign. Start with the event name and the all-important Link URL.
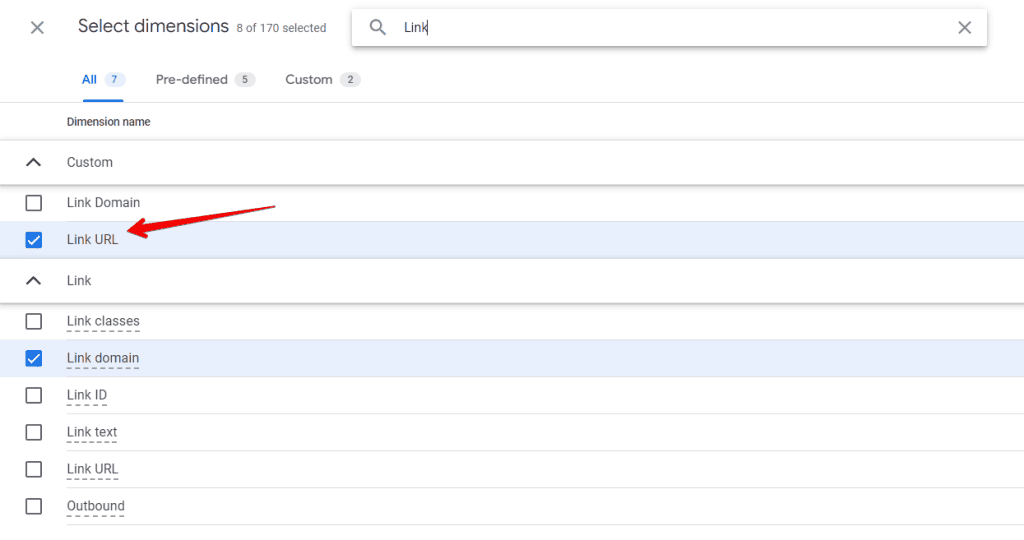
These dimensions are your treasure map to the clicked links. Import them into your exploration.
To get the complete picture, let’s add some metrics. Event count helps you see how often each link was clicked, and total users give you the big picture of user engagement.
Add these metrics to your exploration to supercharge your analysis.
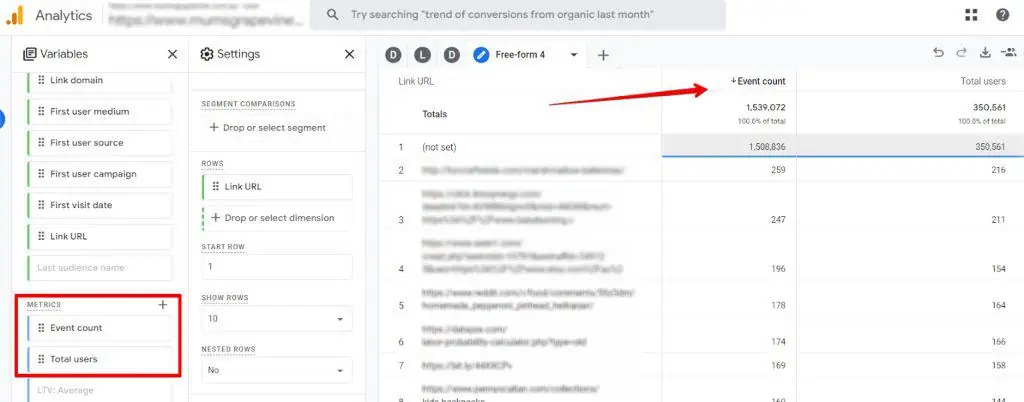
Building Your Custom Report
It’s time to craft a report that spotlights the MVPs – the most clicked outbound links. Start by double-clicking the link URL and the two metrics you added. By default, you might see all the events on your website, not just clicks.
To zoom in on our click event, scroll down to Filters. Pick the event name and ensure it matches with the click. Apply the filter, and voila – your report is tailored to perfection.
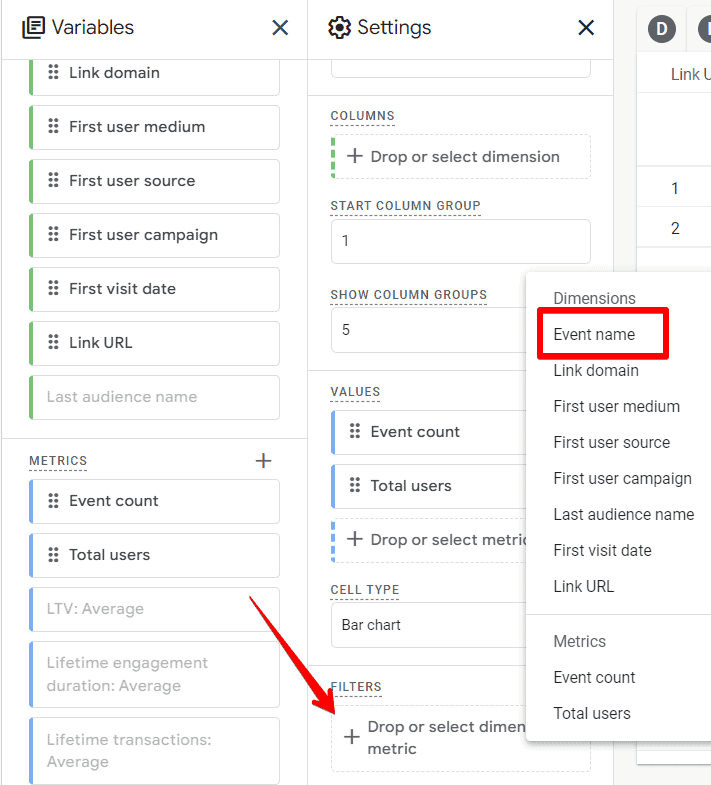
Patience is a virtue, so if you’re starting with GA4 or recently enabled outbound click tracking, don’t fret.
Standard reports can take up to 24 hours to fill with data, and exploration reports might need up to 48 hours. If you don’t see your data after a day, give it another 24 hours.
Configuring Outbound Traffic for Standard Reports within GA4 Interface
In addition to the custom report in Explorations, you can add more information about your outbound traffic to standard reports. And this can be done without involving developers and even without using GTM.
Bring Back Universal Reports!
What if you or your client want to see the outbound link clicks as separate events alongside other events, as it was possible to configure within previous Universal Analytics?
No problem. We can modify and configure click events within GA4 to extract only outbound clicks. In general, the click event lets you know which links are most frequently clicked by users on your site before they leave it.
Outbound clicks are used to track the transition on an outgoing link to another domain. Along with it, an additional outbound parameter is sent (with the value true), and such parameters are link_classes, link_domain, link_id, and link_url.
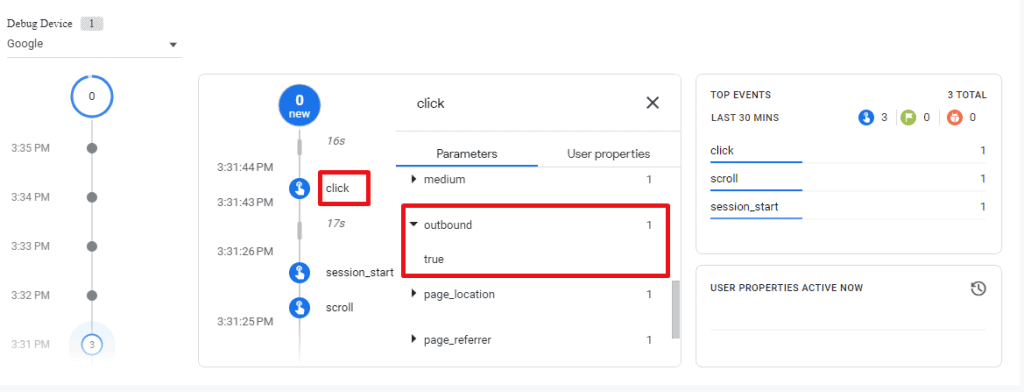
To extract only clicks with these parameters, we need to take the following steps:
Modify GA4 Events: Tweaking Settings
Navigate to Admin, then Events. Click Modify Event and assign a new name to your adjustments.
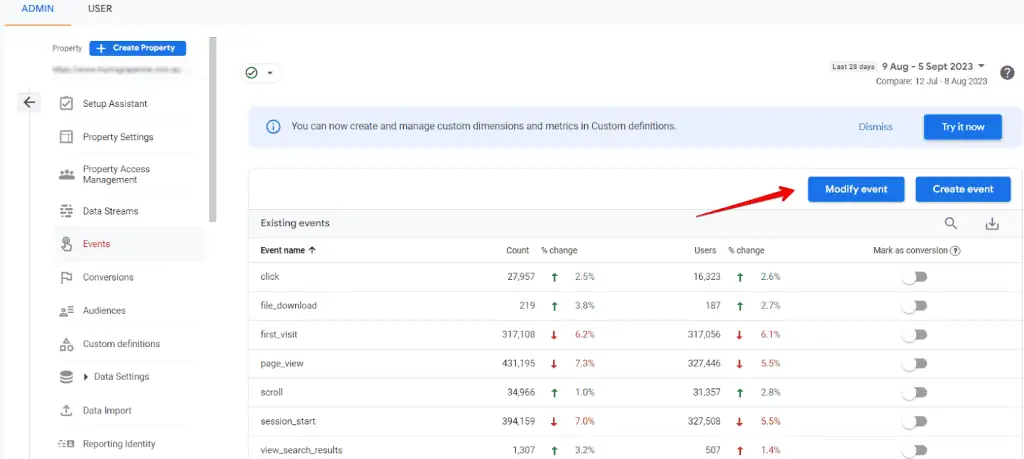
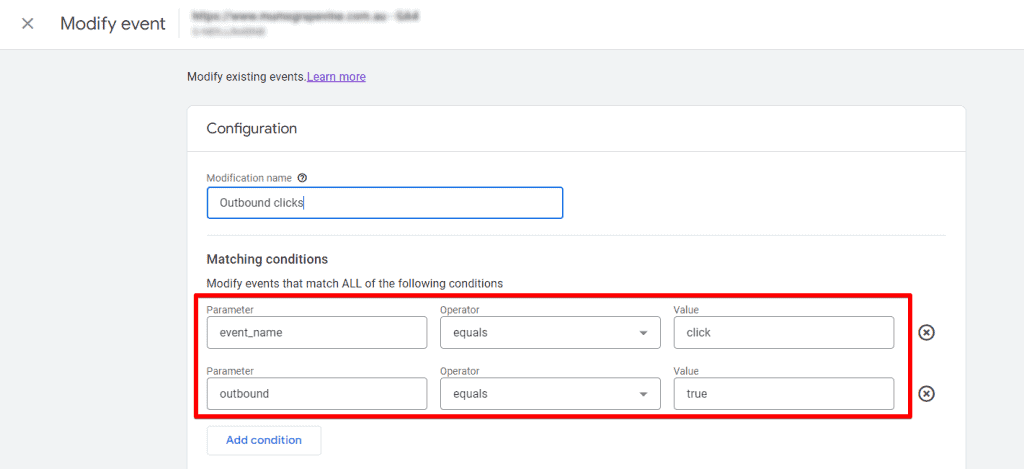
Customizing GA4 Events: Defining Initial Match Criteria
In this step, elucidate which events or parameters require modification. In our instance, we’ve opted for event_name equals click, and we’ve introduced a secondary condition, outbound click equals true.
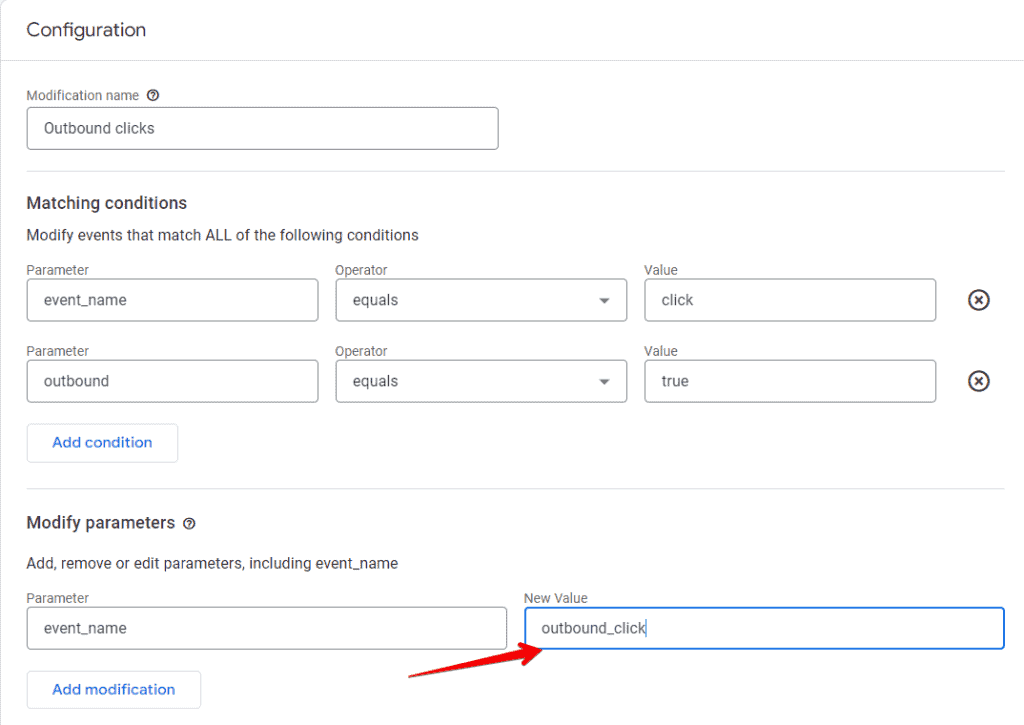
Adapting GA4 Click Events
We’ve introduced a fresh event_name parameter to the conditions outlined earlier and renamed it outbound_click.
Eliminating the Outbound Parameter from the Click Event
To exclude this parameter from click tracking, insert an additional row featuring the outbound parameter, leaving the value field empty.
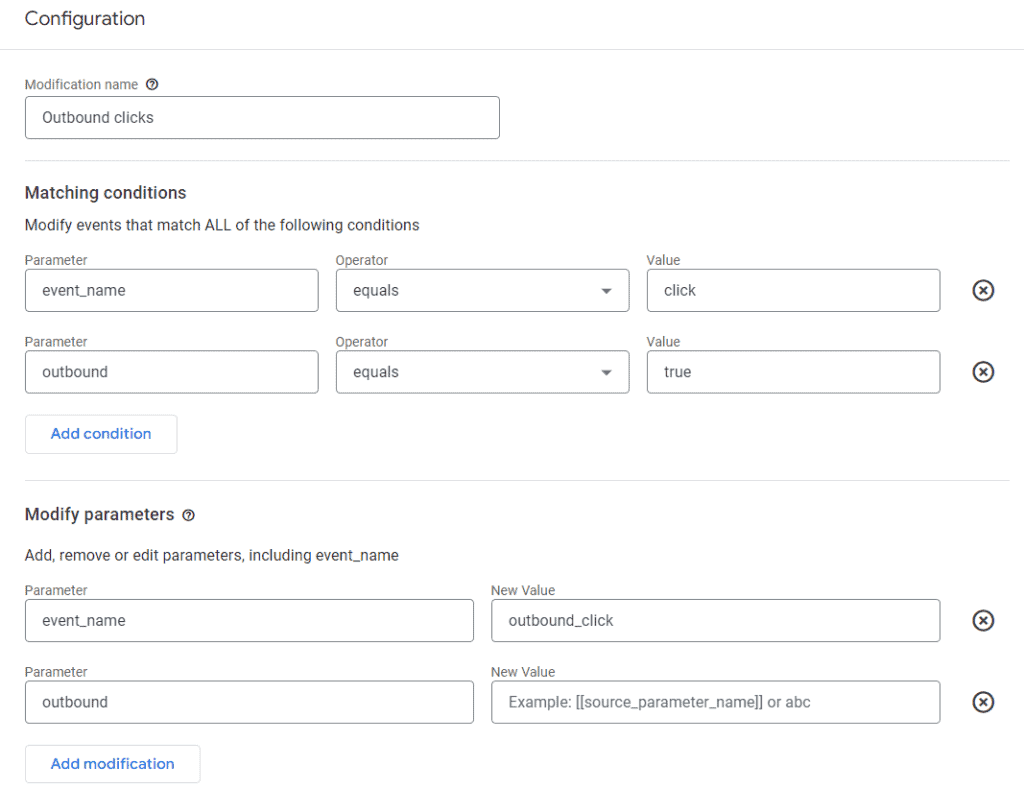
Now, you will see outbound clicks separately from other clicks, as a custom event along with other events.

Tips: Displaying Outbound Link Domains within Standard Reports
Here are a few tips to make standard reports more comfortable to do. Add parameters like link_domain within standard reports if you want to see them as custom definitions.
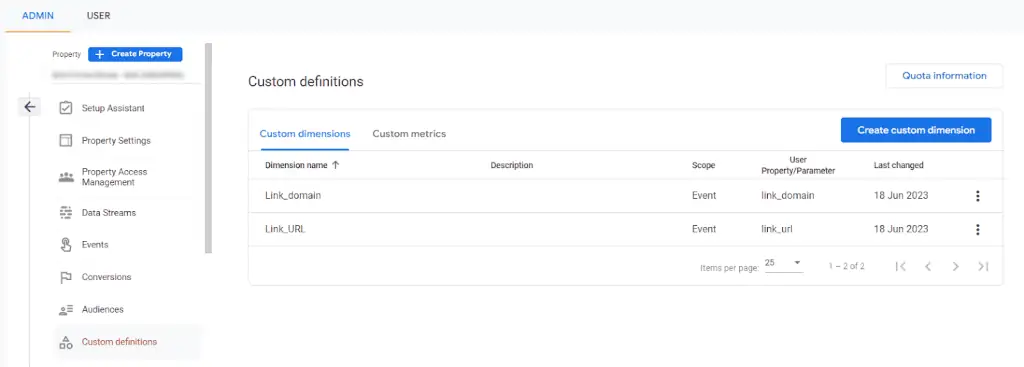
Step 1:
- Navigate to your GA4 Admin interface.
- Locate the section for Custom Definitions.
- Opt to create custom dimensions.
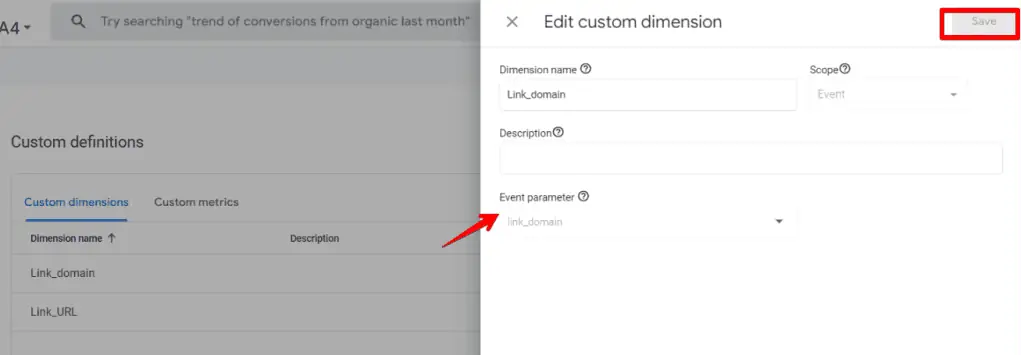
Step 2: Add your parameter name. Choose the link_url or link_domain event parameter in the dropdown and click Save.
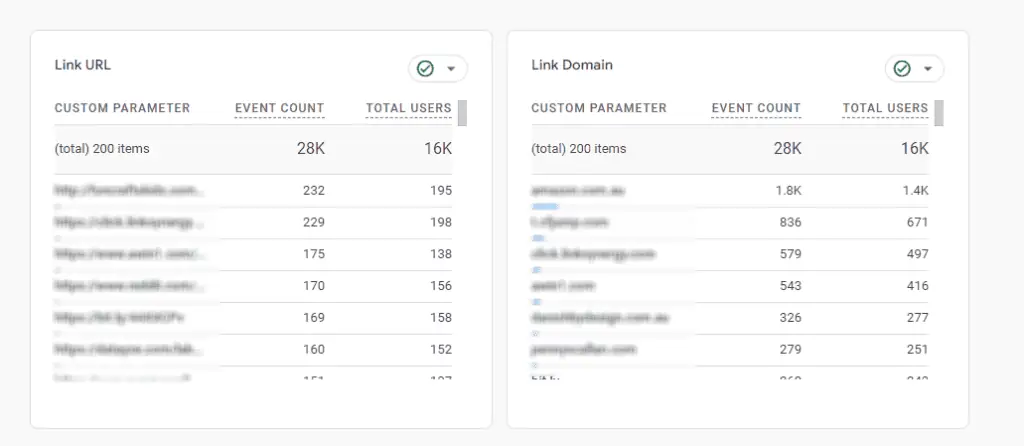
Now, you can find Link Domains and Link URLs within standard reports.
💡 Top Tip: If you need to learn more about custom definitions, read our setup guide.
Where Can You Find Link Domain and Link URL Parameters in Standard Reports?
1. Navigate to all events and click on our custom Events – outbound_click event. You’ll see the cards with these parameters
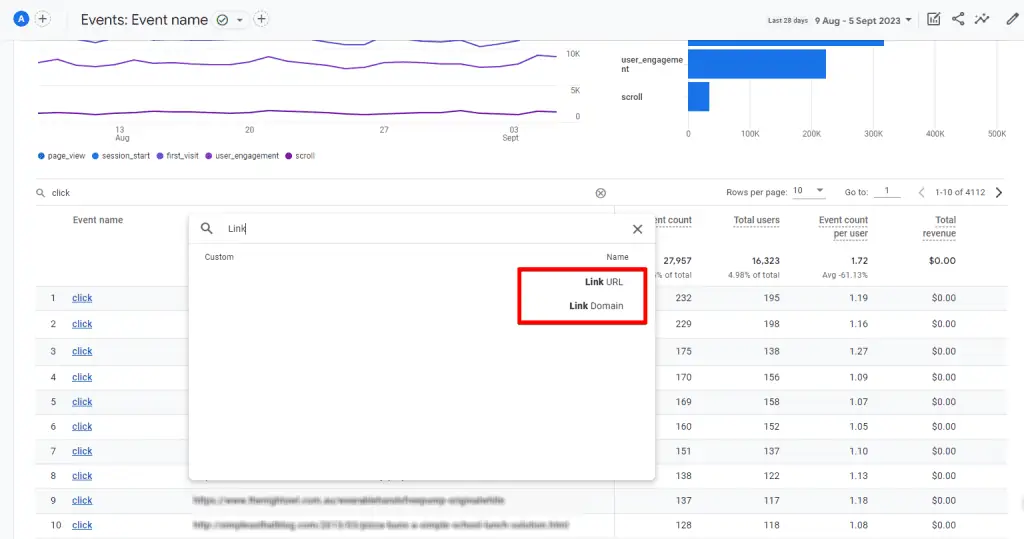
2. After adding parameters to custom definitions, you can also add parameters as a secondary dimension to the standard Events reports.
Summary
To summarize, here’s how to track outbound links in Google Analytics 4:
- Enable Enhanced Measurement
- Go to Admin > Data Streams > [Your Data Stream] > Enhanced measurement settings.
- Ensure outbound link tracking is enabled.
- View Reports
- Check the Reports section for outbound link data.
- Build Custom Reports
- Use the Explorations section for detailed analysis.
Tracking outbound links in GA4 is like finding buried treasure for your website strategy. It offers valuable insights into how users interact with your outbound links, helping you make informed decisions.
By following the simple recommendations from this post, you’ll harness the full potential of GA4 and take your website’s performance to new heights.
Continue reading about customization affiliate links and setting up them as conversions.
Share in the comments if this was a useful article or your experience in installing an outbound tracking through GTM.


Thanks, Inna!
You may want to check on this. I believe G4 just started not supporting outbound click tracking by default. Not sure if its a bug or what, but it quit natively working