
Last Modified on March 25, 2024
With browser-side tools like the Meta Pixel falling out of fashion, you need to know how to send Pixel events via the Meta Conversions API — and we’ll show you how to do this easily using Zapier.
To follow this tutorial, ensure you have a Zapier account with integrations for the tools you’ll be tracking conversions. (In this guide, we’ll use Google Forms as an example.)
An overview of what we’ll cover:
- Creating a Zap and Adding a Trigger
- Sending Data to the Meta Conversions API
- Assign Form Fields to the Event
- Connect Meta Events Manager to Zapier
- Test Your Zap and Activate it!
So let’s dive in!
Creating a Zap and Adding a Trigger
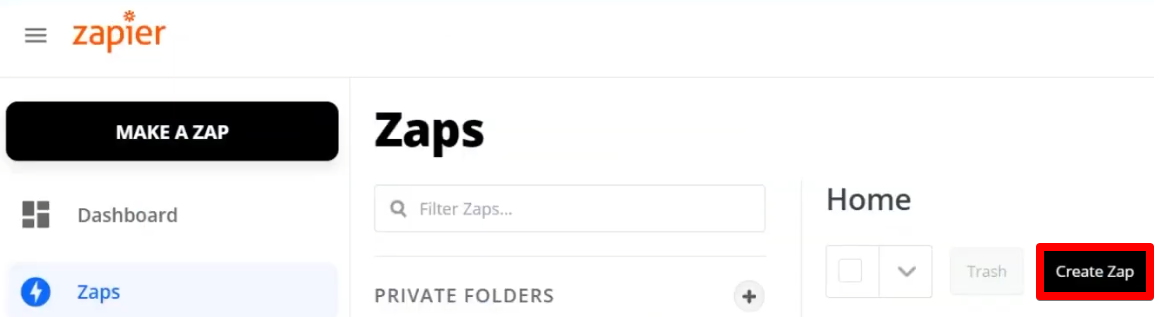
In your Zapier account, start by clicking the Create Zap button.
Next, we’ll need to add a trigger. The trigger is where you’ll pull data and send it to the Meta Conversions API.
In this example, I’ll be using a Google Form. I have configured this Google Form to add response data to a Google Sheet.
💡 Top Tip: You could also use something like ActiveCampaign or Hubspot as your trigger. It doesn’t matter which, as long as you pull the correct information to send to the Conversions API. (Want to learn more about tracking ActiveCampaign events? Check out our handy guide on ActiveCampaign Event Tracking with GTM.)
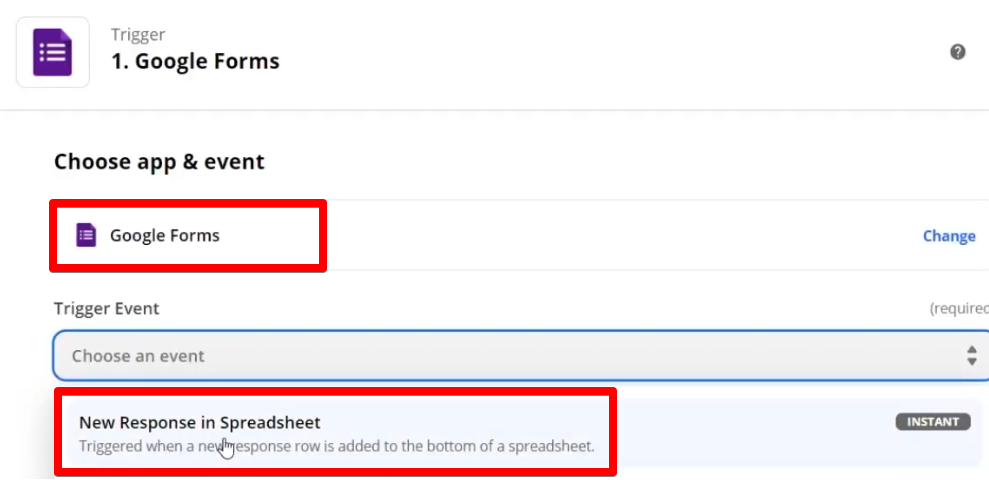
In the Choose App & Event section, select Google Forms (or your integrated trigger of choice) and set it to trigger a New Response in Spreadsheet.
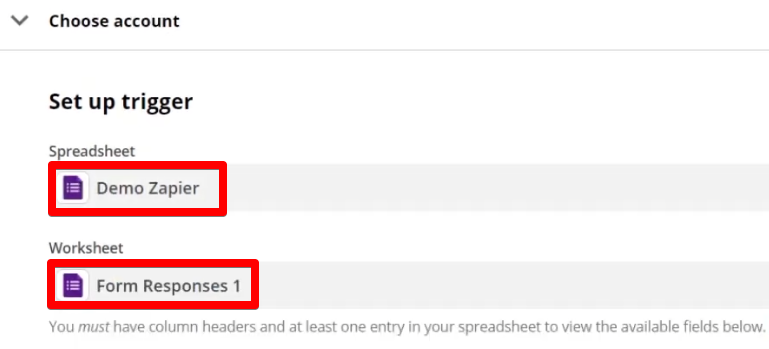
Under Choose Account, select the correct account for the app you’d like to use. Then, under Set up trigger, select the Spreadsheet (where data should go) and Worksheet (event trigger) you want to use for this event.
In this case, that means the Demo Zapier spreadsheet we’ve created to record form submission data and the Form Responses 1 Google Form that will collect user responses.
Before you go any further, I recommend testing this out so that you know everything’s connected properly.
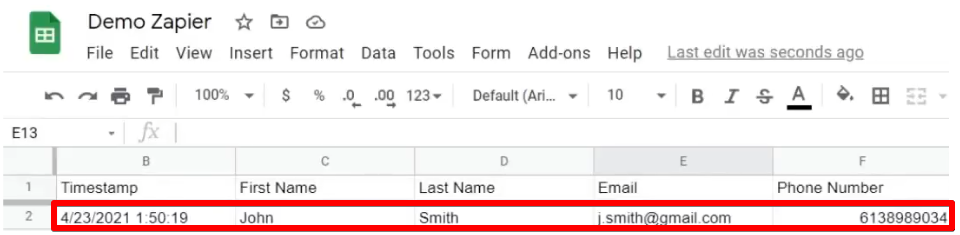
In another tab, trigger your event to see data populate your spreadsheet (in this case, I just submitted my Google Form with some sample data).
… And you should see the values from your event added to your spreadsheet.
Click the Test trigger button on your Zapier tab to ensure this information is gathered correctly.
If everything is working, we should see the event information appear here.

Sending Data to the Meta Conversions API
Next, we must instruct Zapier to send this information to the Meta Conversions API.
You have to choose Facebook Conversions for the app event that Zap performs after it starts — make sure you DON’T choose Facebook Offline Conversions since that’s something entirely different.
In this example, I’ll send an event when a user purchases something. So, for the Action Event, I’ll select Send Purchase Event.

Sign in to your Facebook Conversions, then click Continue to set up the action.
For this demo, we’ll work with a scenario where a user purchases an item on our website; therefore, we’ll choose the Website option for the Action Source.
Then, choose the Business Account that’s associated with the Meta Pixel you want to send the information to and select that Pixel.

Now we need to add the event information, which will come from our spreadsheet. First, we need the event time, which must be in Unix timestamp in seconds format.
🚨 Note: If the timestamp in your spreadsheet is not in this format, automate a conversion in another column that you can pull from.
Under Event Time, select the spreadsheet column that collects your events’ timestamps. It will add the timestamp to the event info of your zap.

🚨 Note: It’s true that if the Event Time is left empty when your zap fires, a timestamp will be automatically added to this box. Don’t do this. Meta is clear in their documentation that the event time needs to be exactly the same time (down to the second) as when the event occurred on your website or in your app. And especially if you’re using a lower-tier Zapier plan, your timestamp may be delayed by up to fifty minutes, which is not a good idea.
When sending the same event from multiple sources (such as the Meta Pixel and Conversions API), you will use the Event ID to help remove duplicates.
In this guide, I won’t be adding an Event ID. However, add it if you’re sending an event through both the Conversions API and the client’s browser (a Pixel). Otherwise, you’ll end up with duplicate event data.
The Event Source URL is the URL where the web event occurred. It is where you put the webpage URL where the user converted.
The Test Event Code is how you ensure your Zap is working correctly. It is crucial, but we’ll come back to this later.
You should only select True for Opt-out Of Ads Delivery Optimization if the event should be used for attribution.
In this example, I don’t want that. I also won’t add any of the Data Processing Options because this is a demo but feel free to add any that are useful to your situation.
Assign Form Fields to Your Event
Next is the Customer Information section. Here, you’ll add values from your Google Sheet that describe your event. Go through the fields and select the corresponding data.
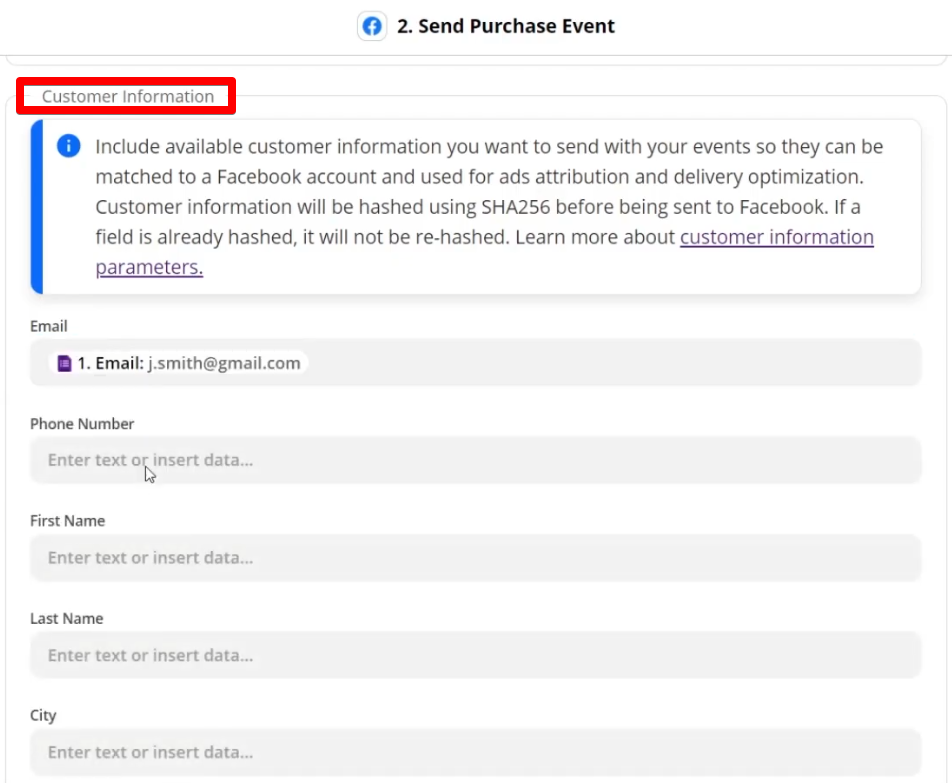
Once you’ve entered all of these, there are also some optional fields that you can use to pass additional information to Meta.
If any of these information fields are available to you, I recommend using as many as possible to help with the quality match rate (Meta’s ability to match the information that you are sending).
You can even unlock additional fields by setting Show All Fields to True. For any data that you have, this will help flesh out your marketing data even more.
Continue this process with the Custom Parameters section. There’s a pretty long list of custom data parameters that you can send to the Meta Pixel, so take advantage of these if you have them.
Connect Meta Events Manager to Zapier
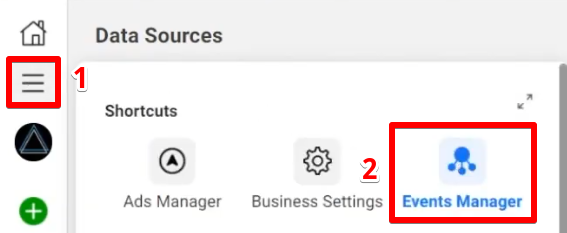
If you haven’t done this already, you must connect your Meta Events Manager to Zapier. To do this, go into Business Tools → Events Manager. (Make sure that you have the right Pixel selected!)
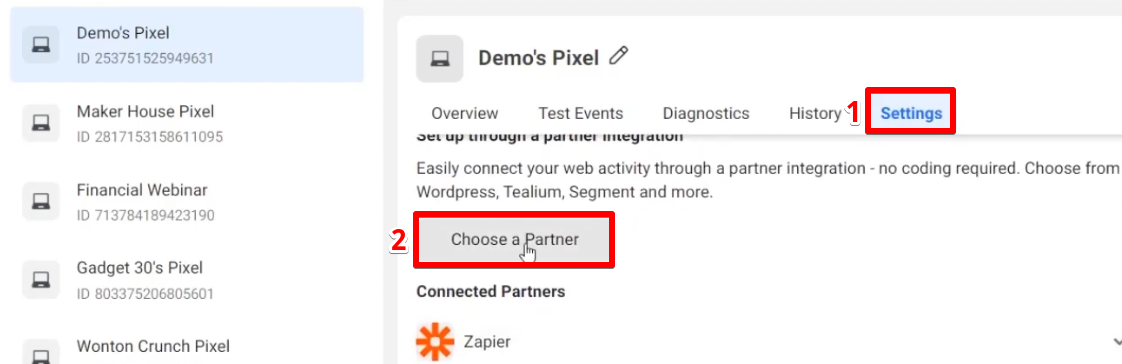
Click on Settings. Under the Conversions API, you’ll have the option to Choose a Partner. We’ll select Zapier.
Test Your Zap & Activate
Once Zapier is connected, the final step is to test and activate your Zap.
To do this, you’ll need to get a Test Event Code from the Events Manager. Go to the Test Events tab, and under the Test Server Events heading, you’ll see a code that we will copy.

We’ll use this code in Zapier to test our Zap — remember that Test Event Code field under the Set up action section? Go there and paste the code.

Why didn’t we add the Test Event Code earlier? Because you should only populate the Test Event Code field while you’re actively testing your Zap.
If you leave the Test Event Code on an activated Zap, it’ll interfere with your event data. So, the best practice is to only add it while you’re in testing mode, then remove it right away before activating.
So let’s test. Scroll down (click Continue through the other sections) and click Test & Review.

If everything is set up correctly, you should see a purchase event from the server using the Conversions API. You’ll also get a little success message but double-check that all the data is correct, too, just in case.

To make sure the correct data was sent and recorded, go to your Events Manager and find your new purchase event, which will appear under Events Received in the Test Events tab.
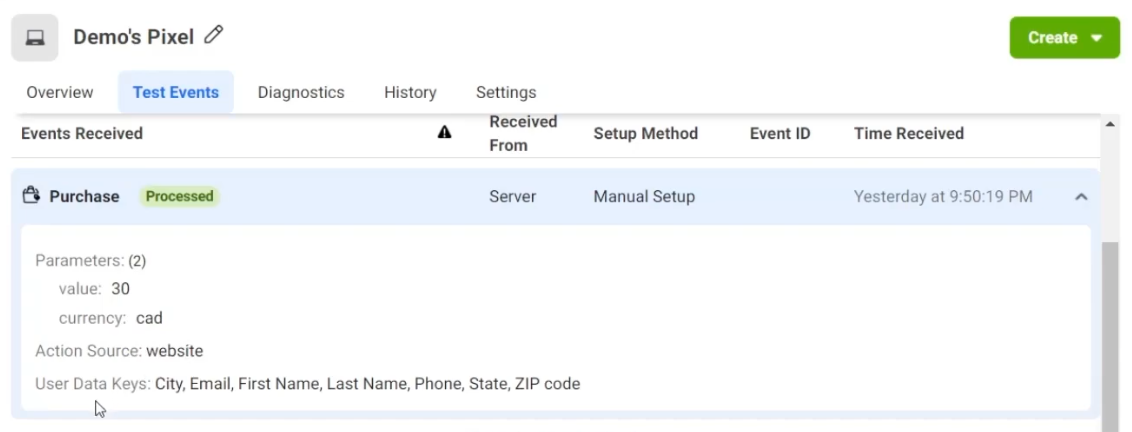
By clicking on the purchase event, we can see its information. You’ll see that it was received from a server, which confirms that it’s a Conversions API event instead of a Pixel event.
So everything looks good! It’s time to remove the test code and launch your functional Zap.
Go to the Set up action section and remove the Test Event Code. Just leave this field empty.
Then, switch the little toggle on the right side of your top bar to On. Scroll down and hit Continue, then click Turn on Zap.
Now, we have a Zap that gets triggered every time someone submits a form I’ve created, and it sends all that information to the Meta server using the Conversions API. Neat!
FAQ
Why should I use the Meta Conversions API instead of Meta Pixel?
The Meta Conversions API offers server-side event tracking, which has several advantages over browser-side tracking. Server-side tracking is more reliable and accurate, as it directly sends event data to Meta’s servers without relying on browser interactions. It also helps with privacy compliance, as it doesn’t require cookies or tracking pixels on the user’s device.
How can I test my Zap before activating it?
Zapier provides a testing feature where you can simulate the event and review the data sent to the Conversions API. You’ll need to obtain a Test Event Code from the Meta Events Manager and paste it into the corresponding field in Zapier. It’s crucial to test your Zap thoroughly to ensure the data is correctly formatted and being sent as expected.
What is Zapier, and why do I need it for sending Pixel events via the Conversions API?
Zapier is an automation tool that allows you to connect different apps and automate workflows between them. In this case, Zapier helps you integrate your form submission data (or any other trigger) with the Meta Conversions API. It acts as a bridge between your trigger app (e.g., Google Forms) and Meta, enabling you to send event data seamlessly.
Can I use any trigger app with Zapier for sending events to the Conversions API?
Yes, you can use various trigger apps supported by Zapier, depending on where you want to track conversions. In the tutorial, Google Forms was used as an example, but you can use other apps like ActiveCampaign or HubSpot as long as you can pull the necessary information to send to the Conversions API.
How do I set up the trigger in Zapier to pull data for the Conversions API?
After creating a Zap in Zapier, you can choose your trigger app (e.g., Google Forms) and specify the trigger event (e.g., New Response in Spreadsheet). You’ll need to select the correct account for the app, set up the trigger by choosing the appropriate spreadsheet and worksheet, and test it to ensure the data is being pulled correctly.
How do I send data to the Meta Conversions API using Zapier?
After setting up the trigger, you must add the action step in Zapier to send data to the Conversions API. Select the Facebook Conversions app (not Facebook Offline Conversions), and choose the specific action event (e.g., Send Purchase Event). Connect your Meta account and select the Business Account and Pixel where you want to send the event data.
How do I configure the event information to be sent to the Conversions API?
In Zapier, you’ll need to provide event details such as Event Time, Event ID (optional), Event Source URL, Test Event Code, and other relevant information based on your event. You can map the values from your trigger app (e.g., Google Sheets) to these fields to ensure the correct data is sent to Meta.
What should I do after testing my Zap and confirming it’s working correctly?
Once you’ve verified that your Zap is set up correctly and the test event is being received by the Conversions API, you should remove the Test Event Code from the Zap. Leaving the Test Event Code active on an activated Zap can interfere with your actual event data. After removing the code, activate your Zap by turning on the toggle switch, and your functional Zap will start triggering for real events.
Summary
That’s it! This is how you can send Pixel events to Meta using the Conversions API and Zapier. As mentioned, this was more for demo purposes on how you’d be able to send data into the Conversions API via Zapier.
Ensure you configure your spreadsheet correctly and double-check all your data while testing to get the most use out of this technique!
Besides Zapier, you could also track Meta pixel purchases and conversions with Google Tag Manager if you don’t need server-side event tracking.
Have you used the Meta Conversions API to successfully track events? What’s your preference between server and browser event tracking? Let us know in the comments down below!


")
hi @Julian,
Thanks for sharing, this was super helpful.
Can we send FB app events to conversion API as well?