
Last Modified on March 17, 2024
Do you want to test your eCommerce tracking, but you’re worried about installing a work-in-progress on your live website?
On a demo website, you can test-drive your website’s functionalities—including its tracking—without jeopardizing meaningful data.
In this guide, we’ll learn how to set up an eCommerce demo website and install Google Tag Manager to practice tracking implementations.
Here’s an overview of the steps of creating a demo website for practicing GTM:
- Set Up an eCommerce Demo Website Using Sandbox CMS
- Install & Configure the WooCommerce Plugin
- Install Google Tag Manager on the Demo Website
So let’s dive in!
Setting Up an eCommerce Demo Website Using Sandbox CMS
One way to set up a demo site is to pay for a hosting service, install WordPress, and set up a whole website to mimic your real eCommerce site. But this is costly, time-consuming, and frankly overkill for what you need.
A cheaper, quicker alternative is to set up a demo website using Sandbox CMS.
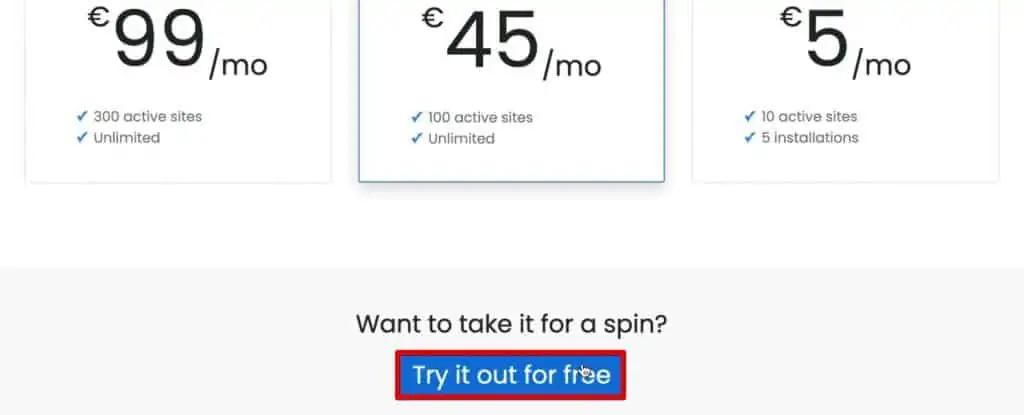
To do that, you’ll first need to register for a Sandbox account. You can choose either a free account or a premium, paid version if your goal is to create multiple testing sites.
If you just need one demo site (or if you want to try out Sandbox and see if the premium is worth paying for), you’ll just need a free account.
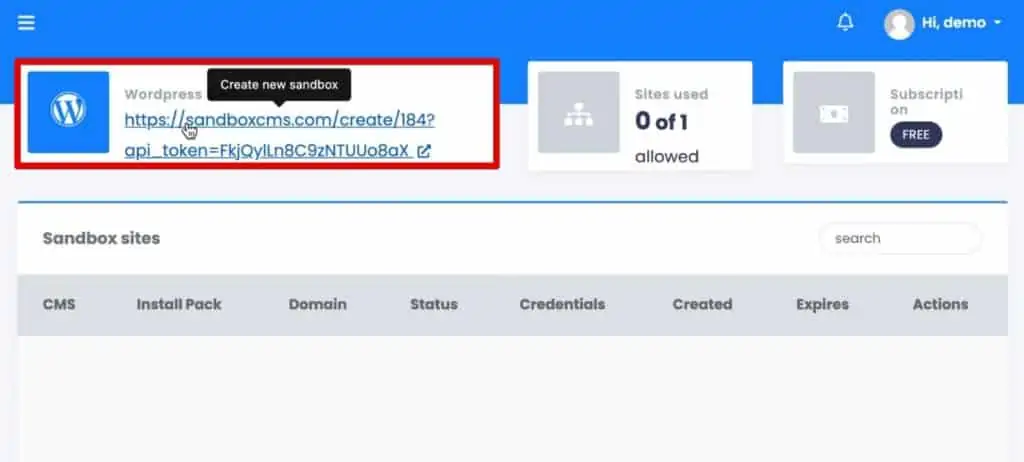
Once you have a Sandbox CMS account, you can create a new WordPress instance.
Just click on the sandboxcms.com link at the top of your account homepage. This will initiate your sandbox and take you to your WordPress installation.
Installing & Configuring the WooCommerce Plugin
To implement eCommerce on this WordPress instance, we’ll use the WooCommerce plugin.
🚨 Note: If you have another eCommerce plugin that you’re using on your main site, then you should use that on your sandbox site, too. I’m demonstrating with WooCommerce here because it’s free, so it doesn’t cost anything to implement on a sandbox site!
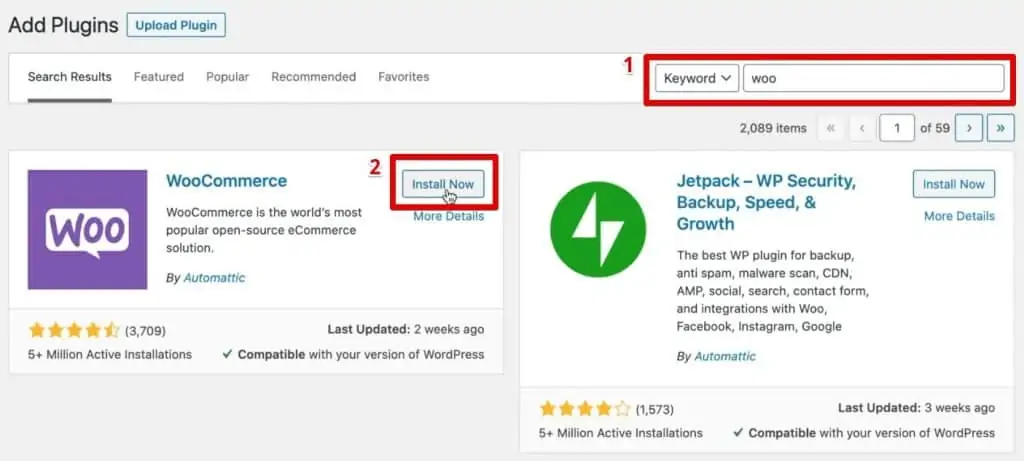
In your WordPress dashboard, go to Plugins → Add New and search for the WooCommerce plugin.
Click on Install Now to install the plugin, then Activate it. This will change our basic WordPress site into an eCommerce store.
Next, we’ll configure our WooCommerce store.
For a demo store, we don’t need to set up everything if certain aspects don’t help you test your tracking implementation. For example, we’ll skip setting up the store details.

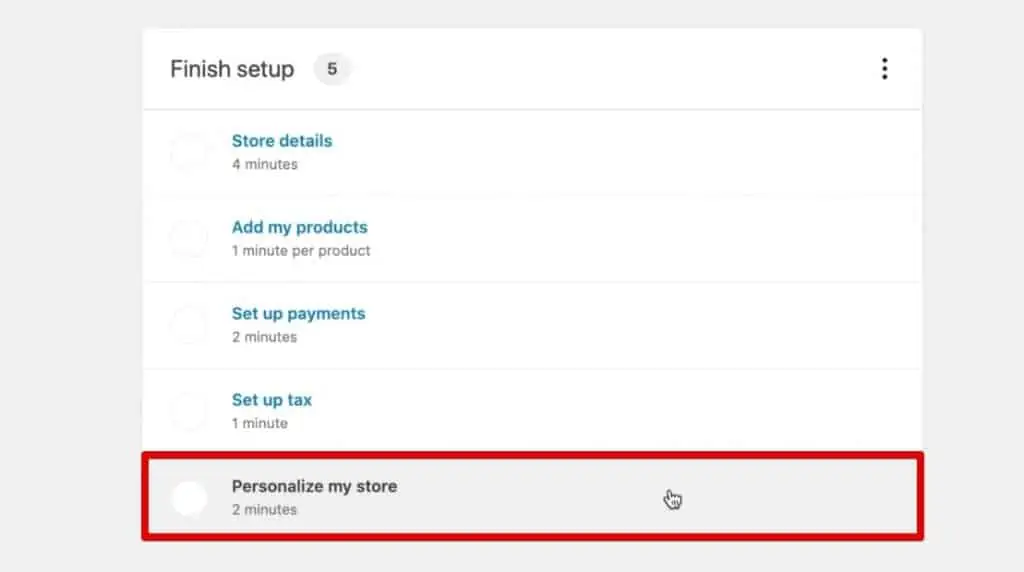
This will take us to our WooCommerce store. Here, we’ll see some more setup options that will help us test the store’s function and tracking implementation.
Let’s start with the Personalize My Store option to set up the basic site layout.
Since this store doesn’t need to feature real products, we’ll populate it with sample items by clicking Import products.

You can test any page view, add-to-cart, or purchase functions with these just like real products on your main site.
The second step is to Create a custom homepage.

For now, we can skip the logo and store notice configurations since they’re less important for testing the website and tracking functions. Click Complete task.
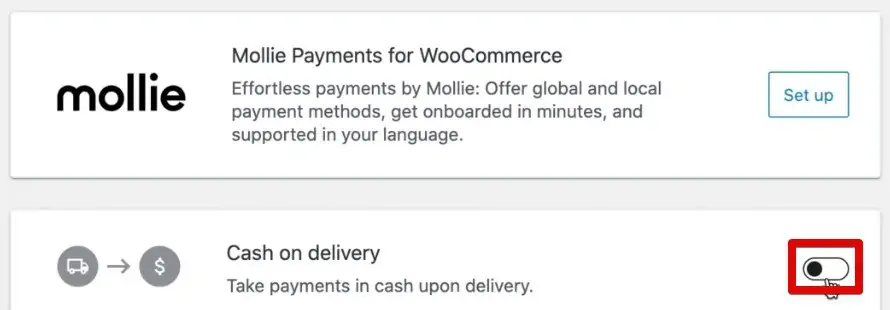
Next, click on Set up Payments.

This is essential to testing whether the “commerce” part of your eCommerce site is working correctly. Adding a payment option allows us to follow the user experience from the ordering process to the checkout page.
There are multiple options available to collect payments online with Stripe, Paypal, Klarna, and Mollie. If your main site uses any of these, you probably want to set them up here.
You can also choose to have “customers” pay on delivery or via bank transfer.
For simplicity’s sake, we’ll just use the Cash on Delivery option on this demo site (since no extra configurations are necessary for this option).
You can also add tax rates to purchases if you plan on tracking customer cost and your actual revenue separately (which is a good idea, business-wise).
Click Set up tax and simply add your store location and country.
The WooCommerce plugin gives us the option to Install Jetpack and WooCommerce Tax if we want to automate our sales tax calculations.
However, the existing configurations are enough for us to start testing our tracking. So if you don’t want to set this up, you can select the I don’t charge sales tax option and move to the next step.

Lastly, click Set up shipping to make sure that you can track shipping costs separately from your product revenue.
Under this menu, you can set shipping costs separately for your country and the rest of the world.

You can skip all the other payment and shipping configurations for your sandbox eCommerce site.
Next, we’ll select the default currency for this site. In your dashboard, go to WooCommerce → Settings → General → Currency options and select your Currency.

Now that our WooCommerce store is configured, the last step is to select a theme for the site.
Go to Appearance → Themes on your WordPress dashboard. This will bring you to the theme store.
Browse and select any pre-built theme from the options available. If there’s one that matches your main site, you might want to pick that one. Then, Install and Activate the theme.

At this point, we’ll have a demo eCommerce website set up, including a theme and some sample products.
We can quickly test our store functionality by adding products to the cart and checking out. If everything is working correctly, the store will place our order successfully.
This brings us to the last and most important step of this guide—installing Google Tag Manager so that we can track these orders.
Installing Google Tag Manager On Our Demo Website
There are several ways to install Google Tag Manager and access the Data Layer. However, in this example, we’ll install it using a WordPress plugin.
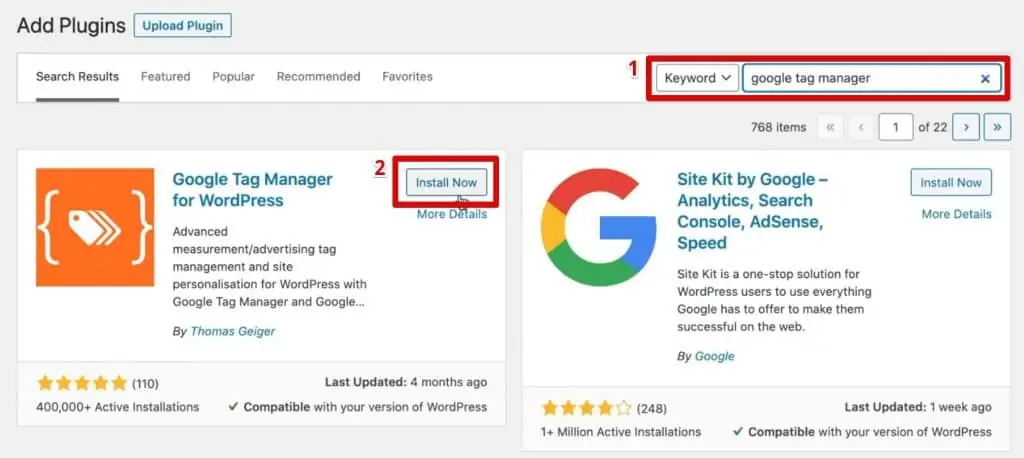
So let’s go to Plugins → Add New and search for Google Tag Manager for WordPress. Install and Activate it just like you did with the WooCommerce plugin.
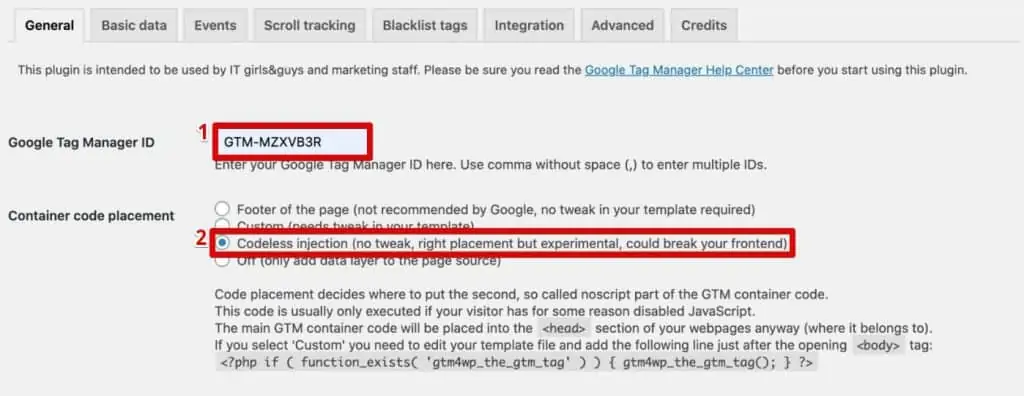
To start tracking data, you’ll need to connect your sandbox site to your Google Tag Manager account.
So go to Settings → Google Tag Manager in the WordPress dashboard, and add your Google Tag Manager ID from your account.
For your Container code placement, select the experiment-friendly option Codeless injection and click Save Changes.
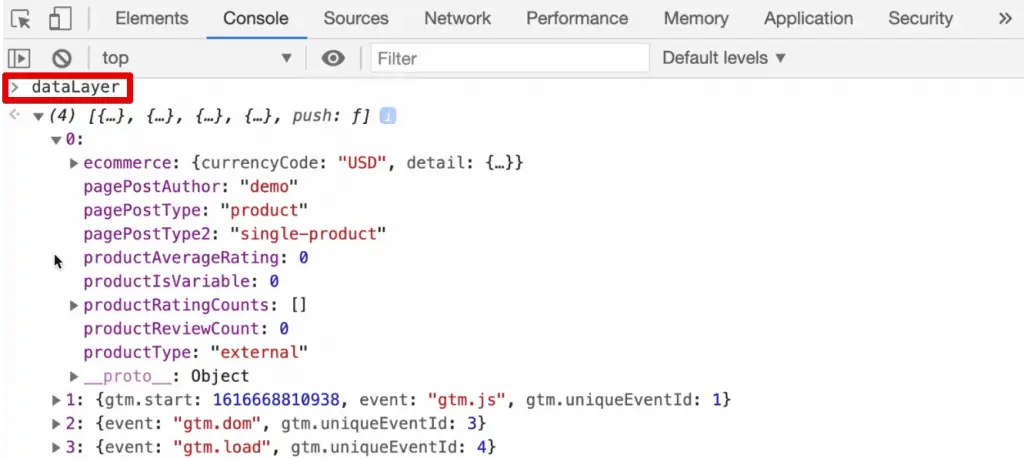
Finally, to access the Data Layer, go to Settings → Google Tag Manager.
Then, click on the Integration tab and select WooCommerce. Here, check the box for the Track enhanced e-commerce option.

You can now access the Data Layer from your browser’s Console using the dataLayer command.
I’ve created a deployable link to help you with a faster installation of this demo eCommerce website using Sandbox. All you’ll need to do is click on the Build option after signing into your Sandbox CMS account.
FAQ
How can I set up a demo eCommerce website using Sandbox CMS?
To set up a demo eCommerce website, you can use Sandbox CMS, which provides a cost-effective and quick solution. Follow these steps:
1. Register for a Sandbox CMS account (free or premium).
2. Once you have an account, create a new WordPress instance through Sandbox CMS.
3. This will take you to your WordPress installation, where you can proceed with the setup.
How do I install and configure the WooCommerce plugin on my demo WordPress site?
To install the WooCommerce plugin:
1. Go to your WordPress dashboard and navigate to Plugins → Add New.
2. Search for the WooCommerce plugin, click on “Install Now,” and then activate it.
3. Once activated, your basic WordPress site will be transformed into an eCommerce store. To configure the WooCommerce plugin, you can personalize your store layout, import sample products, and set up payments, taxes, and shipping costs.
However, for testing tracking implementations, you can skip certain configurations that are not relevant to your needs.
Is there a faster way to set up this demo eCommerce website using Sandbox CMS?
Yes, a deployable link is provided to assist you with a faster installation of the demo eCommerce website using Sandbox CMS. Simply sign into your Sandbox CMS account and click on the “Build” option after accessing the link.
Summary
And that’s it! This is how you can set up a demo eCommerce website using Sandbox CMS.
Using this demo store, you can test your website functionalities and install tracking using Google Tag Manager. It is a great way to enhance the shopping experience for your target audience and increase website conversions.
Want to put your sandbox website to use? Give setting up a relative click variable in GTM a try and pull more contextual data from every user action that you track.
Do you test your websites before going live? How do you create testing environments for eCommerce websites? Let us know in the comments below!


")
Hi julian thank you for the article and the video. Could you please explain why when you installed gtm you chose the codless injection option?
sure. This option places the codes in the right place if the hook exists in your theme without having to tweak your theme. It should work in most of the cases, but if not, you will need to use the Custom option to place your codes
I understand, however this is relevant only for the noscript part (right?) which will fire only in cases where the browser does not support javascript (that’s like less then 2% of the users?)
That was very useful. Thank you so much! I think adding the Google Analytics tag in GTM would be a valuable addition to the article.
Thank you Julian for this very useful article. I just wanted to mention one observation. After installing the GTM plug-in and using the “codeless injection” for the GTM <noscript>, it seems that Tag Assistant shows a non-standard implementation (blue gtm tag). As per GTM installation guide, <noscript> part should be inserted immediately after the opening of <body>, in this instance the <noscript> is not the first script after the opening <body> tag, so maybe this is what causes Tag assistant to show the blue non-standard implementation tag. I’ve tried to check in the wordpress settings If I could manually insert… Read more »